
I have always been a hybrid photographer, which means I enjoy mixing landscape and wildlife photography. One of the animals that has always had a special place in my photography is the Atlantic Puffin. These quirky birds are a joy to photograph. They don’t only look gorgeous, with their colourful bills and black & white bodies, but they also show interesting behaviours which allow you to shoot a large variety of images. In this article, I want to share 6 tips which can help you improve your puffin (and bird) photography. These tips will help you evolve from snapshots to more artistic and intentional photographs.
While this article is mainly focusing on the Atlantic Puffin, these tips can be applied to bird photography in general. I hope you find the tips useful and, as always, I invite you to the comment section if you want to share your tips or disagree.
Interested in joining the 2027 edition of Puffins in the Midnight Sun photo workshop? Check out this dedicated page for all the information. You can also read how this year’s photo workshop went and which images I returned home with.
Photographing the Atlantic Puffin isn’t only very fulfilling and rewarding, it’s also very therapeutic. There’s something truly special about spending time at the bird cliffs with only the birds and the ocean around.
Tip 1 – Get Low & Isolate The Puffin
The first tip is probably one of the most valuable ones: getting low to the ground. It’s almost natural that we want to shoot from our own eye-level. However, getting down to the bird’s eye level creates much more compelling puffin photographs. This is in part due to the fact that it’s much easier to isolate your puffin subject.
By getting a low vantage point you enhance the depth of field because the distance between the subject and the background becomes much larger. Additionally, you get the chance to include a blurred foreground, which you can’t do when standing upright. Because puffins usually nest on cliffs you can isolate subjects quite easily by using blurred grass as a foreground and the ocean as a blurred background. You even take it up a notch and put some grass really close to your lens to create some more artistic images with striped grass bokeh.
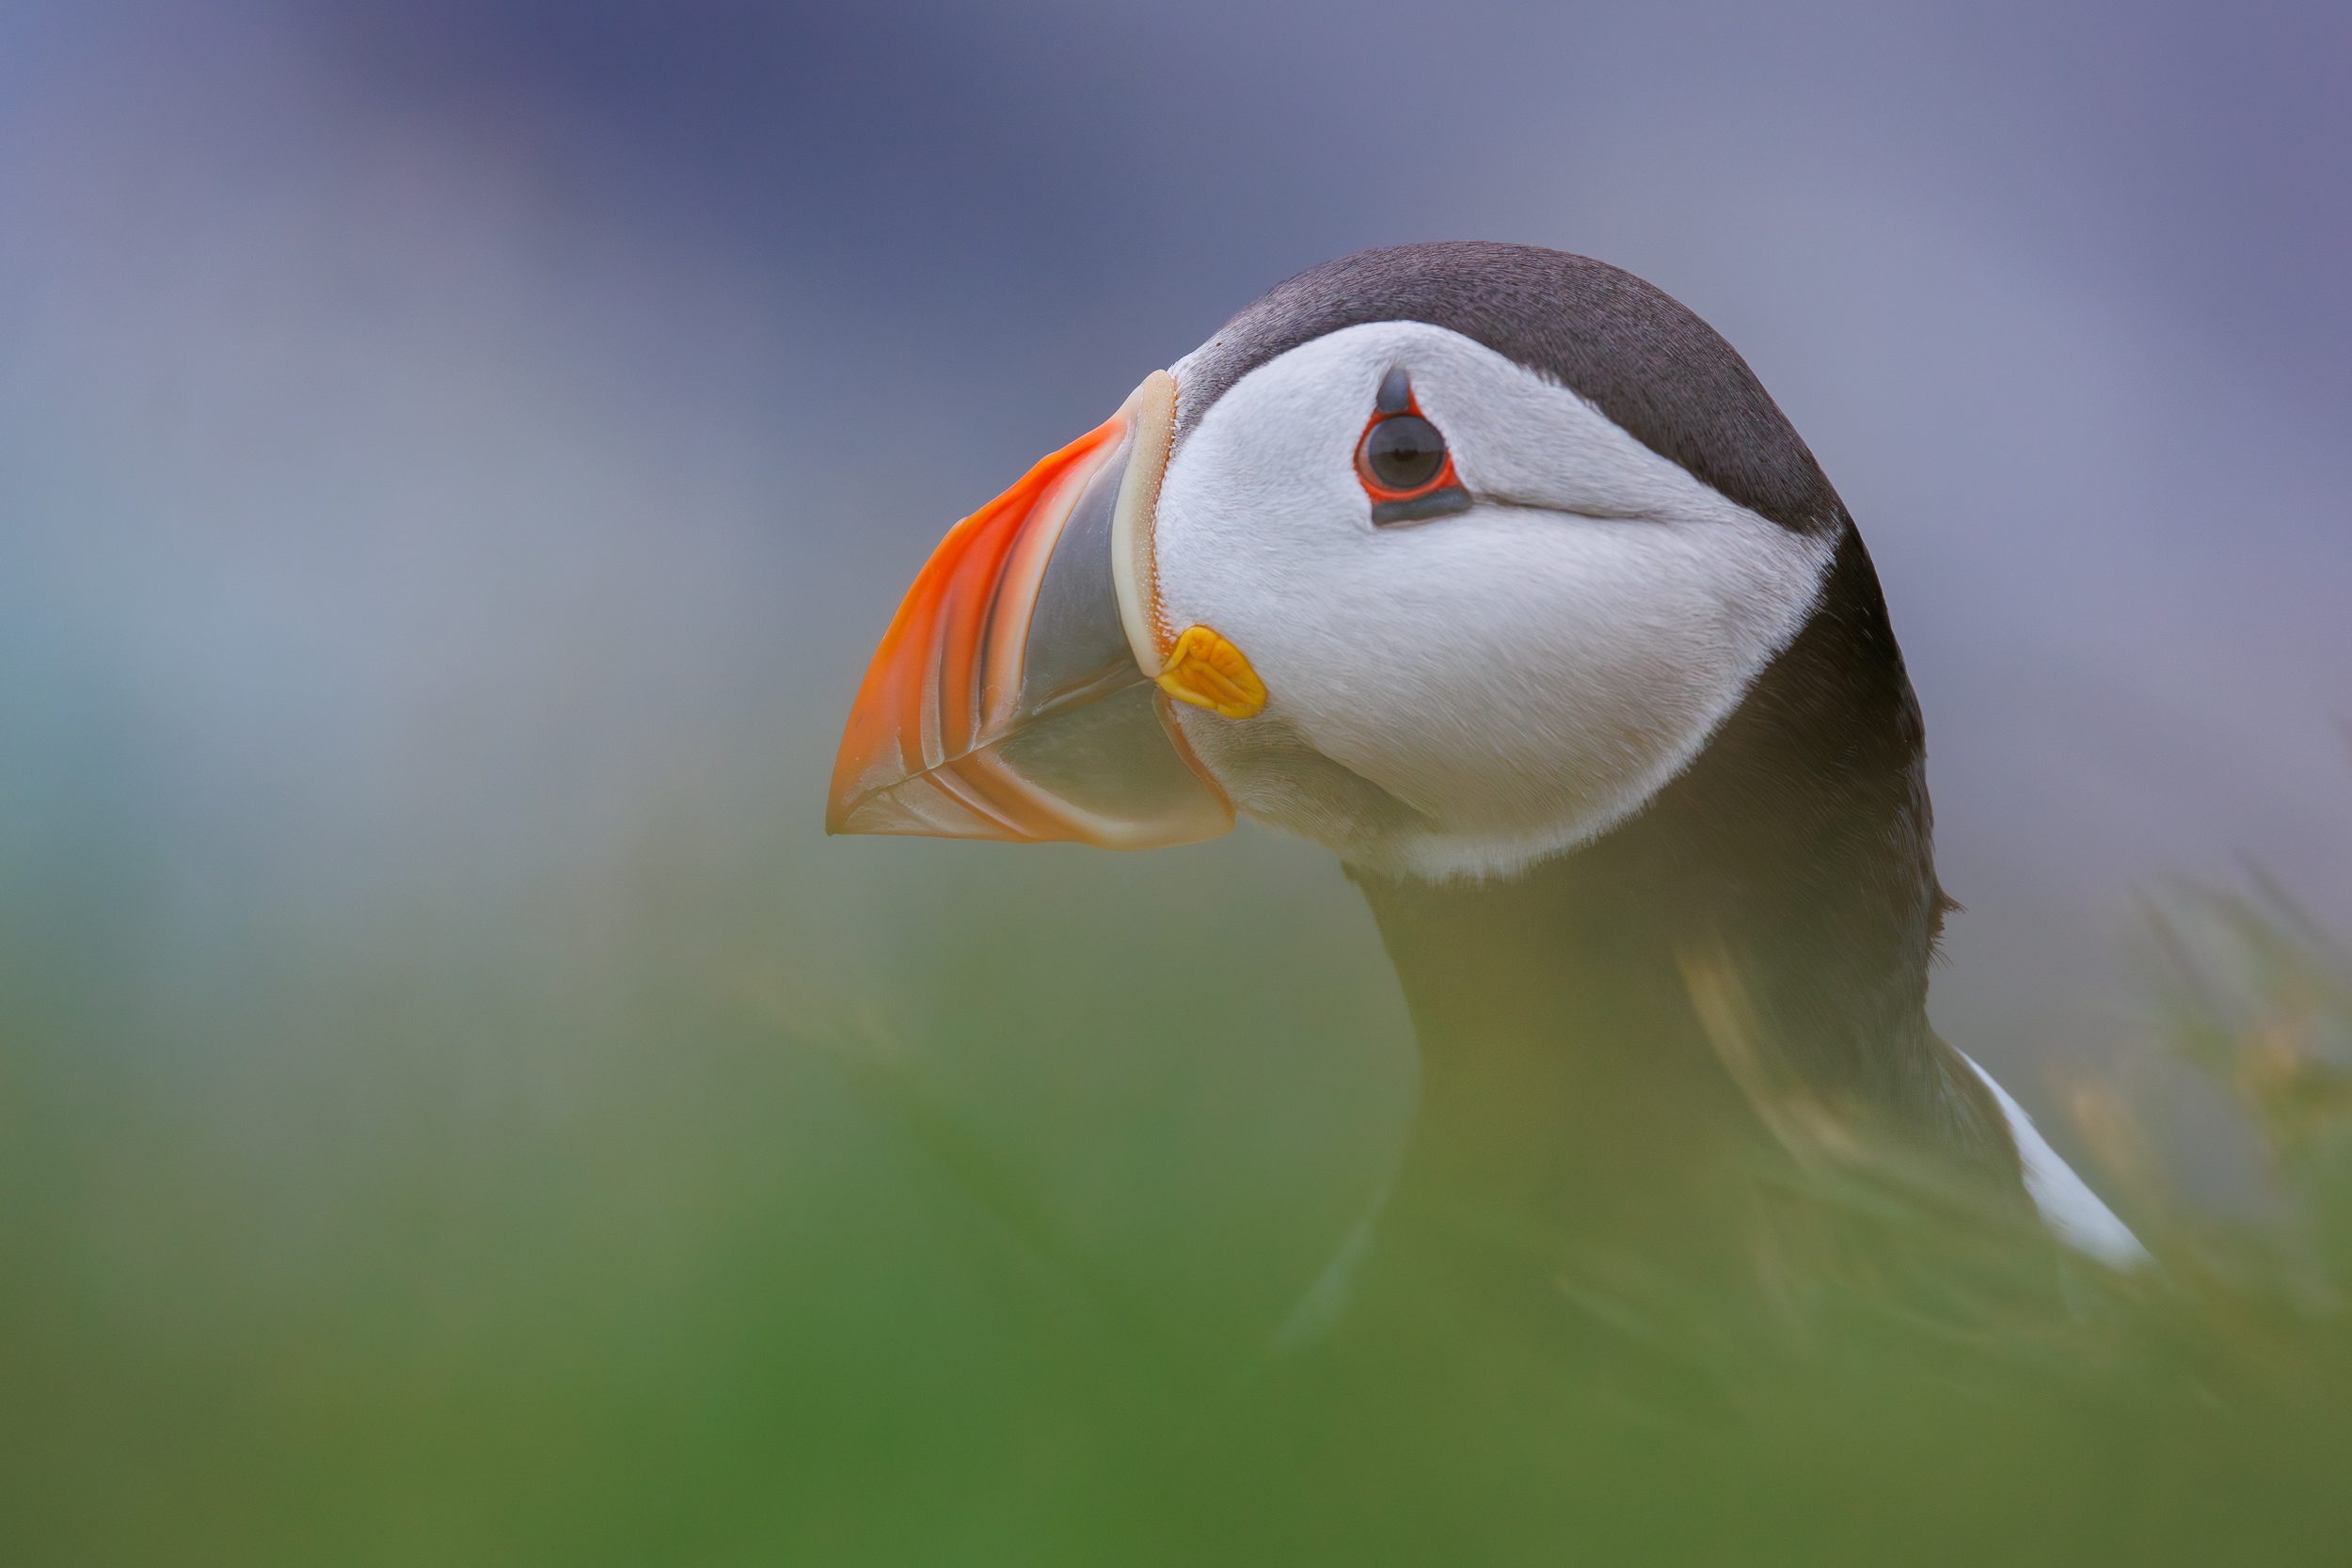
By getting really low to the ground, you can get full separation of the subject between foreground and background.
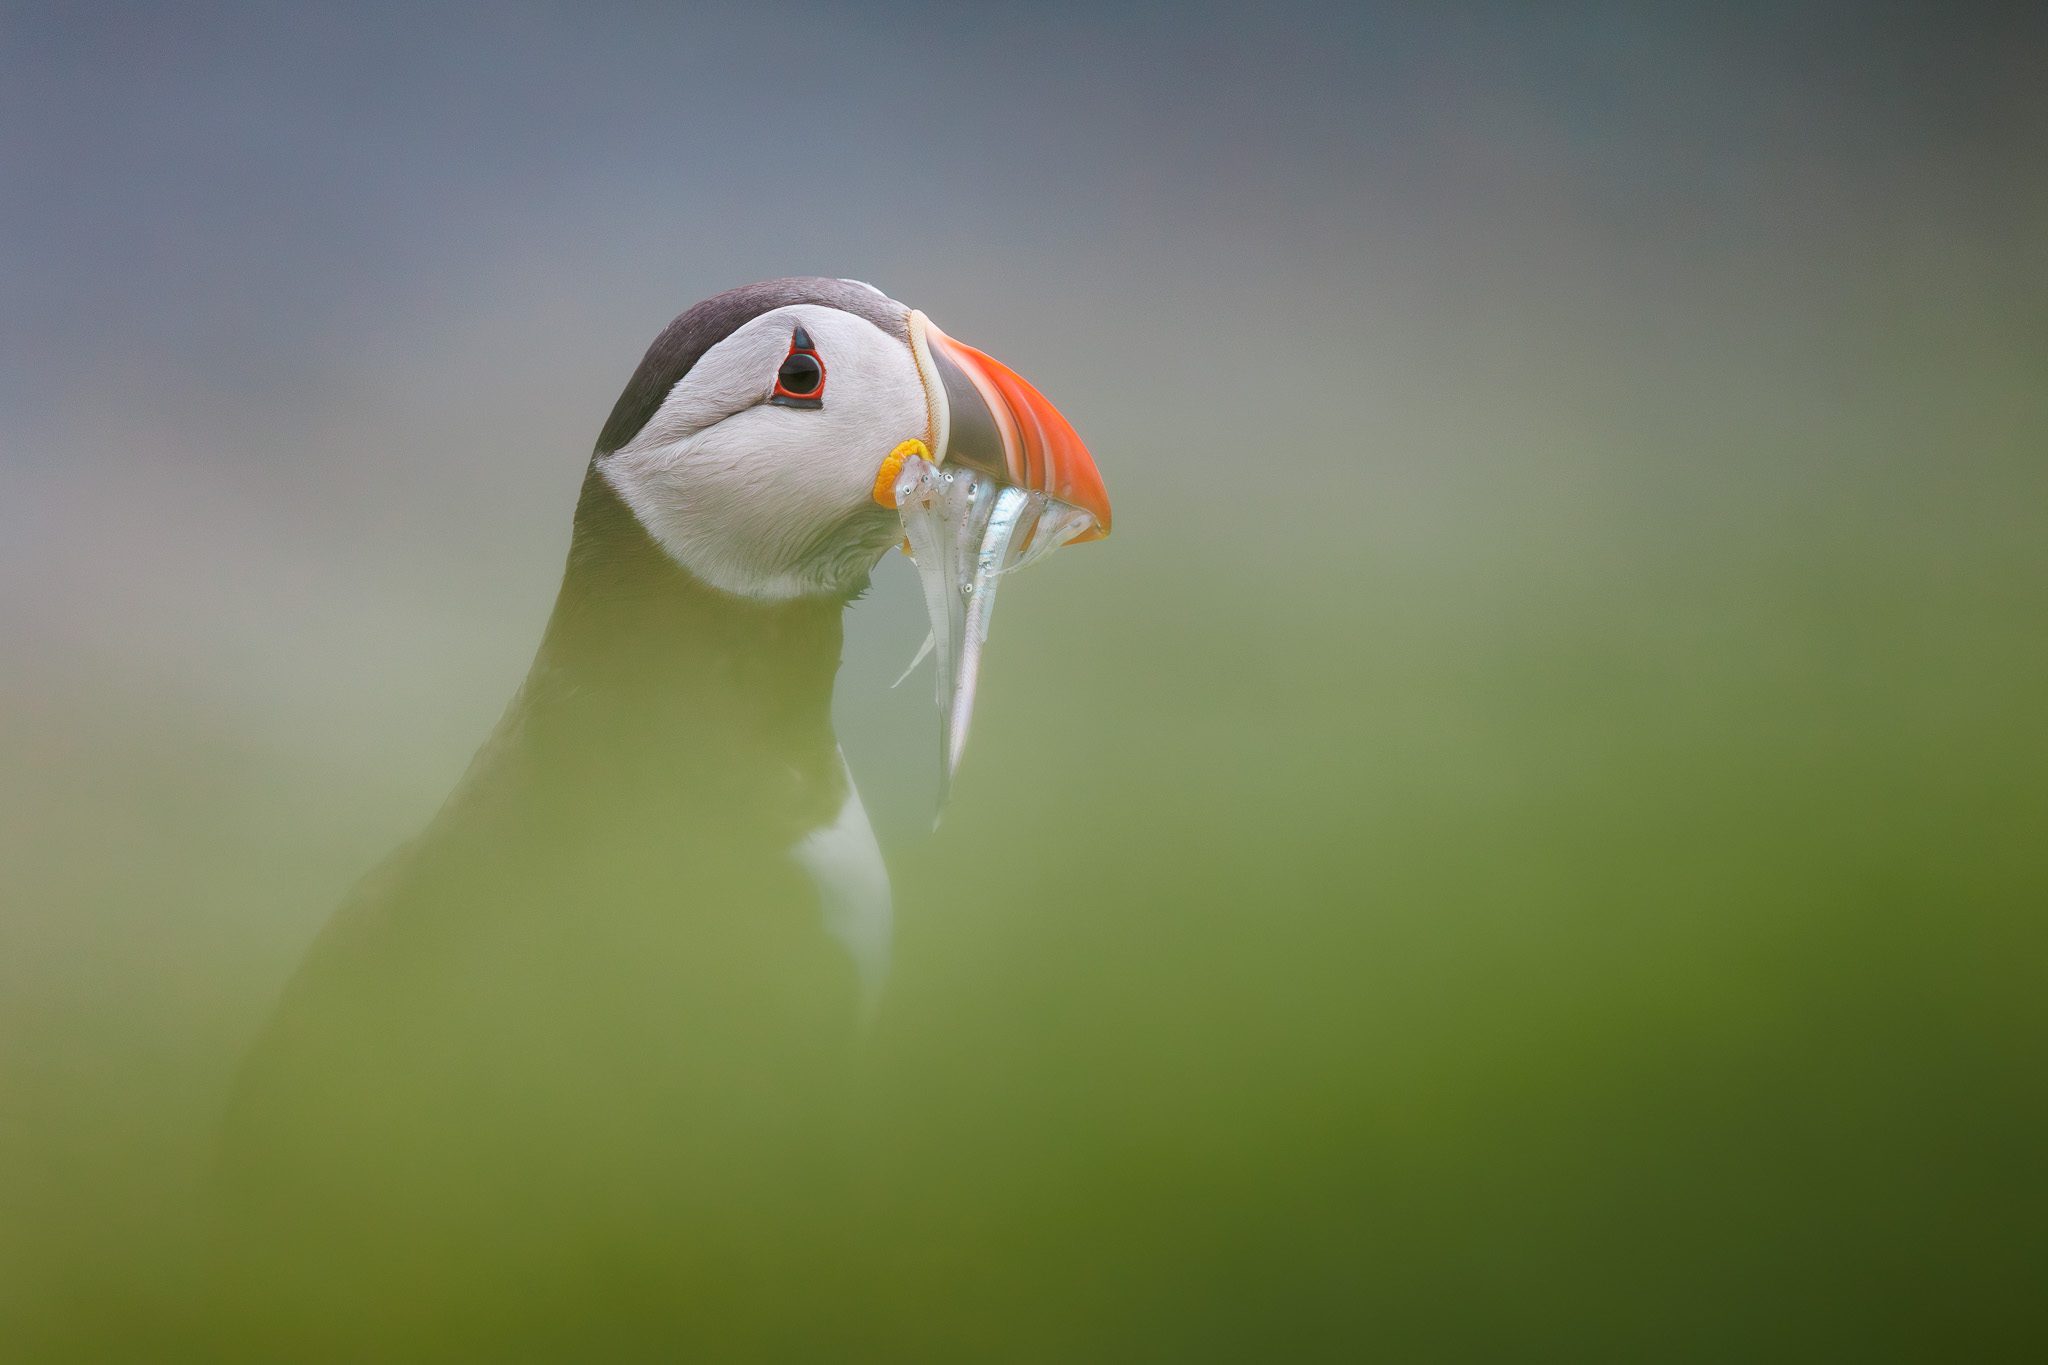
By sticking your lens really close to grass, you can create artistic photos where the grass turns into stripes on the image. All of what you see was done in camera.
Tip 2 – Think About Composition
It’s absolutely vital to think about how you will compose your subject when you photograph puffins, and birds in general. While there are many ways to compose bird photographs (and taste varies between people), there are a few composition tricks and ideas you can easily try out with a solid outcome:
- It’s important to consider how the puffin is positioned in relation to how you are looking at it. Think about which way it is pointing its bill or which way it is flying. Almost every bird photograph will have empty space in it. When framing, the more aesthetically pleasing way is to make the bill or the flying puffin point towards the empty space. This way you convey this idea of where it is flying to or what it is looking at. Personally, because I read left to right, I also find it more pleasing when a puffin is pointing from the left to the right.
- Complementing the previous compositional trick, is the rule of thirds. When framing a puffin when it is pointing or flying in a certain direction, the rule of thirds is an easy way to create a composition. What is important though, is to understand what part of your subject to frame on a third. For me, I find that when you can see part of the body, the body should be positioned on one third from the left or right. If you can only see the head, positioning the eye on one third works best.
- If a puffin is looking straight at you, it could be interesting to frame the puffin dead centre as that will convey the idea that it is looking at you, or the person looking at the photograph.
This photograph doesn’t work for me because the puffin’s bill is pointing away from the empty space.
This photograph works well because the puffin is positioning its bill into the frame, looking at the empty space.
- When photographing puffins, keeping your composition simple is vital in order to create a compelling photograph. Try to think what can be removed from the frame, rather than included. Do you have enough separation between the subject and the surroundings? Making sure the photograph is all about the puffin(s) will help you get the best possible outcome.
- While puffin portrait photographs are classic shots for a reason, I find it’s important to show the behaviour of the puffin in the photograph. Being patient so you can get a shot where it’s flapping its wings, showing its tongue, carrying fish or even interacting with other puffins feels very rewarding and helps you tell more of a story with your photographs.
Mind you, while these tricks are meant to help you find good compositions, they are also personal. What works well for me might not work well for you. Experimenting is always a good idea.
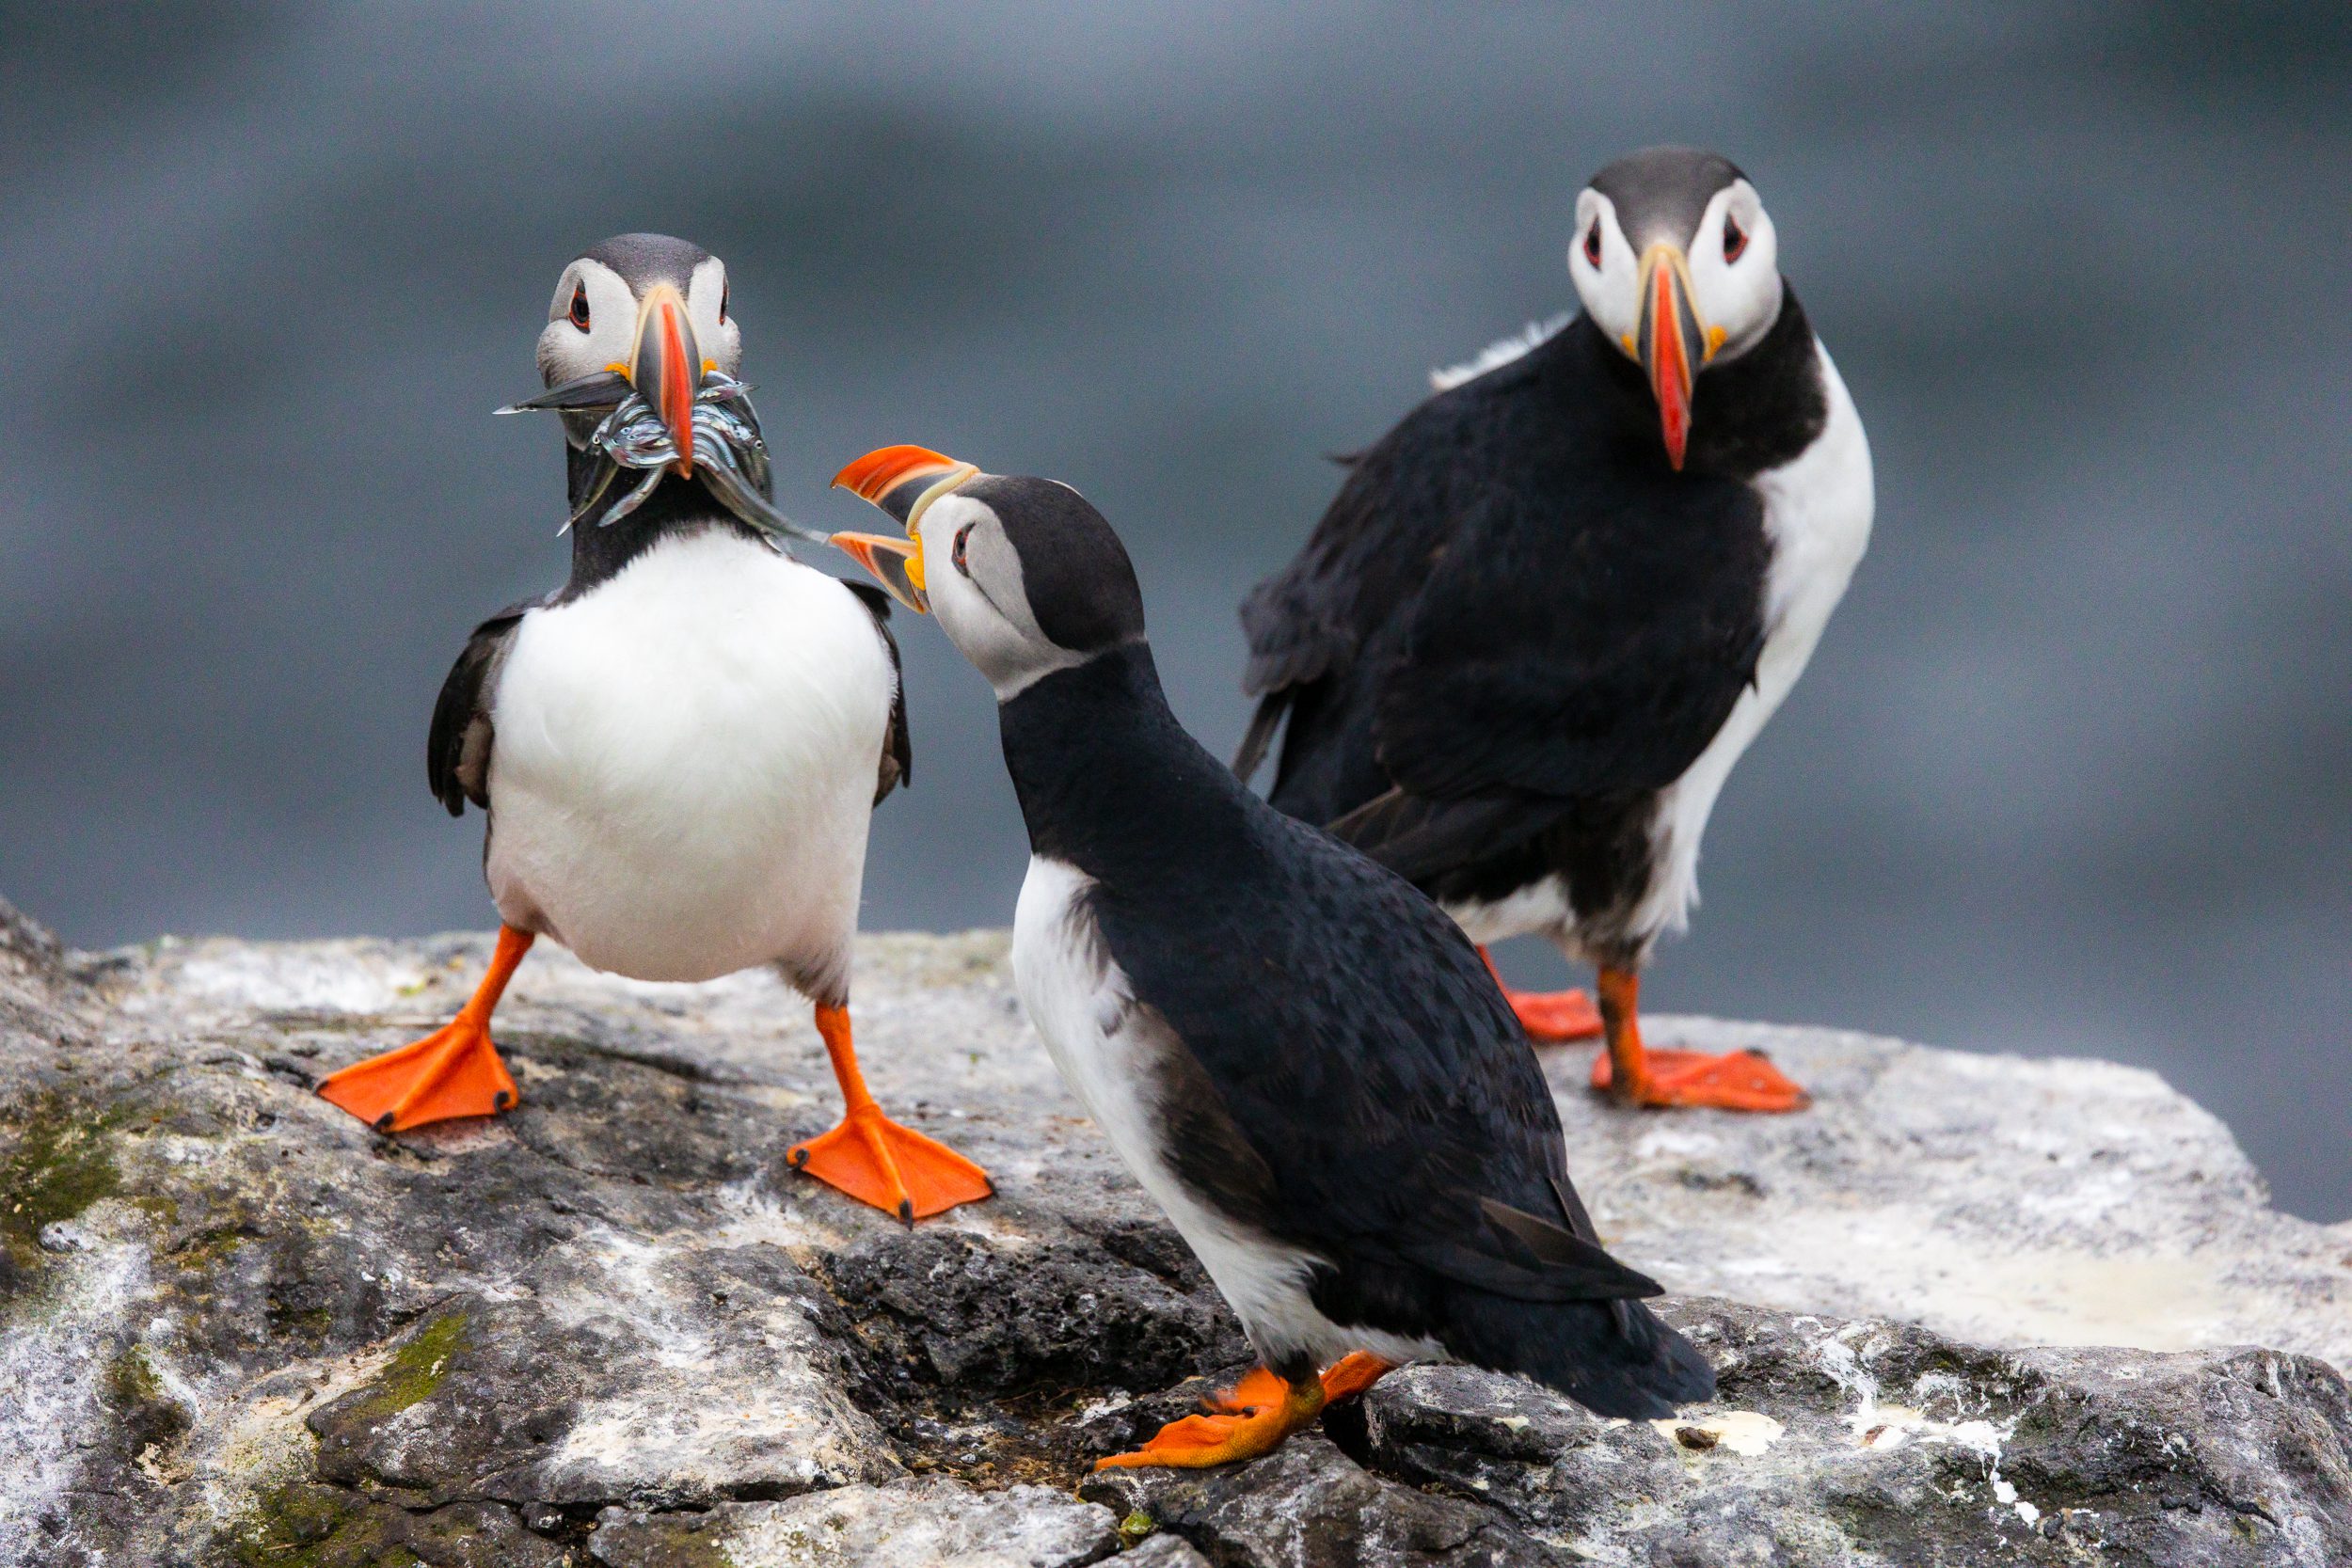
Showing how puffins interact with each other can make a photograph much more interesting. I managed to capture this fleeting moment where one bird is trying to steal the catch of another in 2021. I haven’t witnessed this behaviour since.
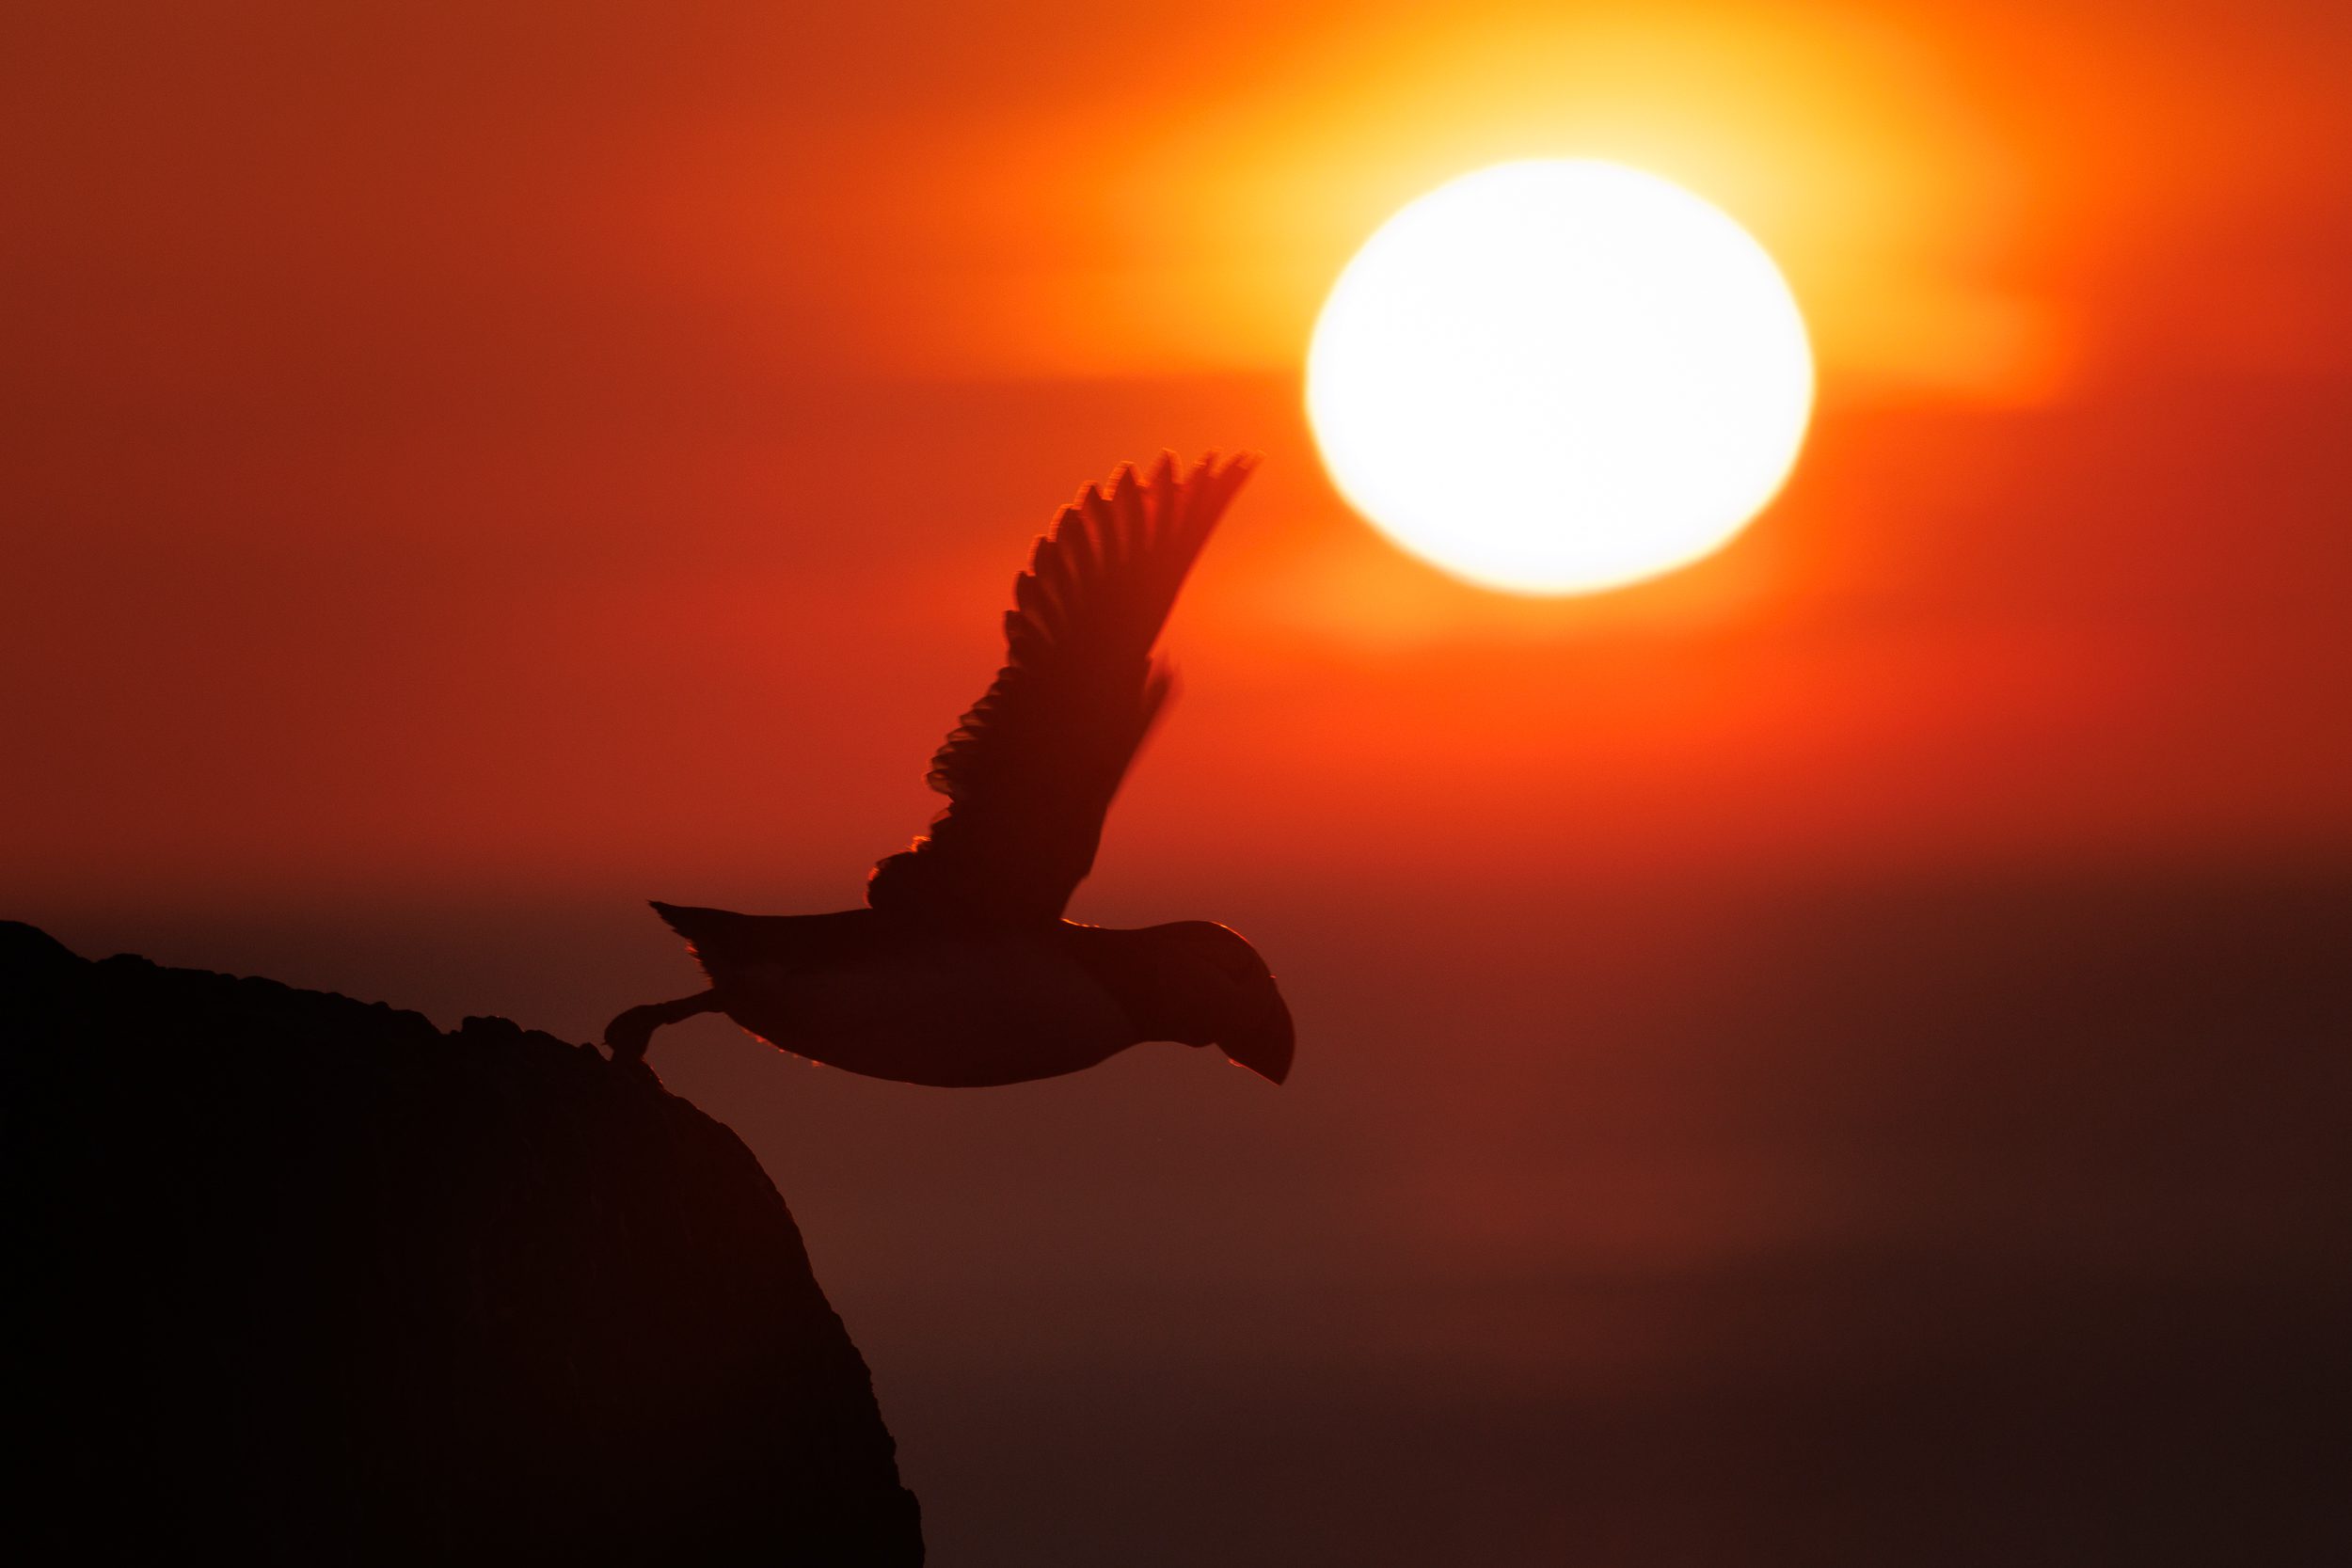
A photograph such as this one, doesn’t show the puffin in action, but it also conveys a feeling. It creates a special atmosphere due to the midnight sun being there.
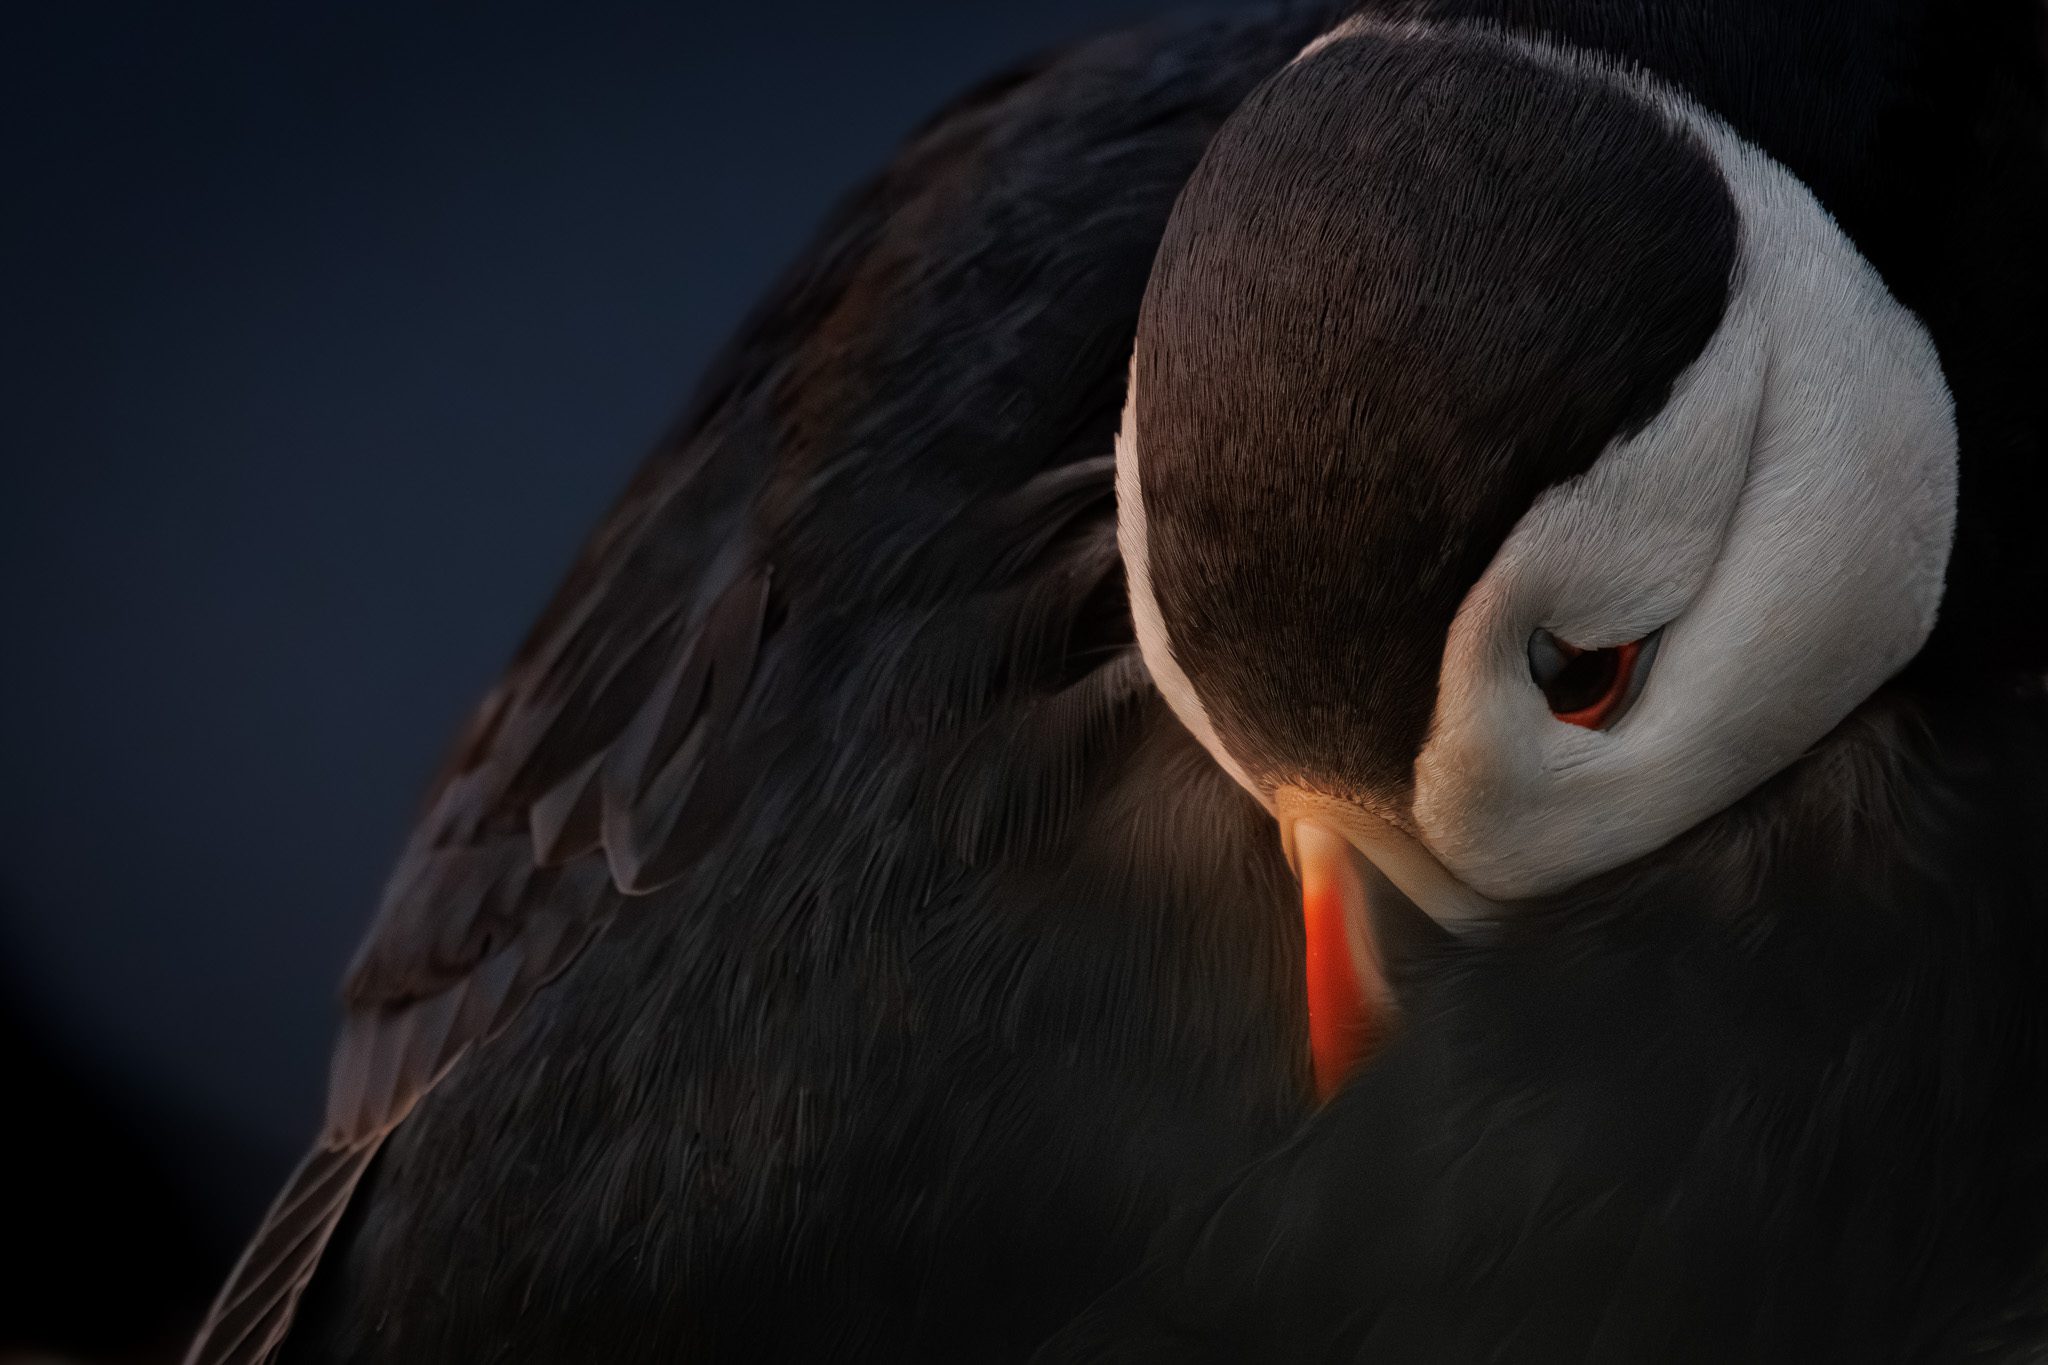
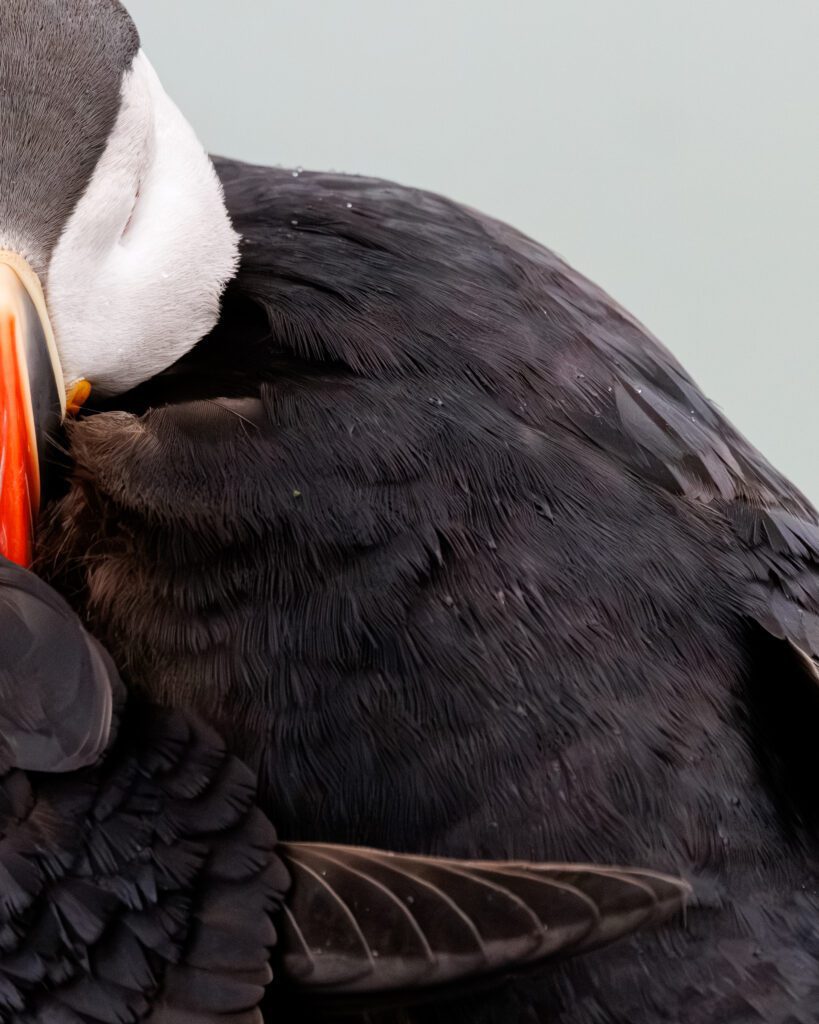
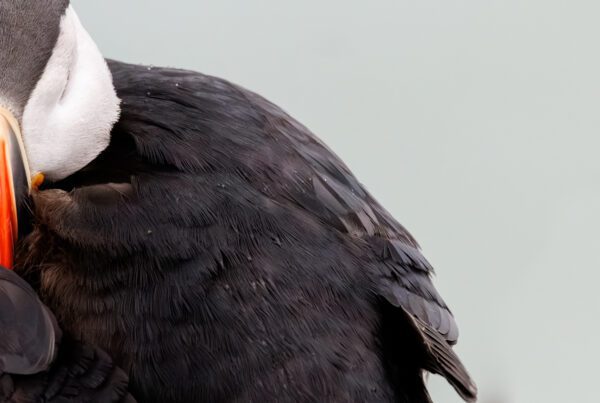
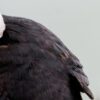
For the longest time I wanted a photograph such as this one, where a puffin is resting its head in his feathers. On this year’s photo workshop, I finally managed to capture it.
Tip 3 – Photographing Puffins in High Speed Burst Mode (With Eye Autofocus)
When photographing puffins, & birds in general, you should always shoot in burst mode, using a high frame rate. Having a high frame rate, means you will also have more photographs to choose from afterwards – a higher keeper rate. Additionally, if something unexpected happens such as a behavioural change (having their unique tongue out or the membrane moving in front of the eyes), you want to have a variety of shots. It happens so often I take a great puffin shot but I won’t use it due to the membrane moving in front of its eyes.
Example: Puffins can generally be photographed really close, which means that the area that’s in focus will be quite small. If the puffin suddenly moves his head, your camera will need to adjust the focus almost continuously. If you don’t shoot in burst, and just take single shots, you won’t have many photographs to pick from. On top of that, your camera might not have grabbed the focus correctly each time. If your camera shoots at 8 frames per second, you will not only have more shots to pick from but the amount of shots in focus will also be higher.
One tool which helps you nail the focus in such cases too is the eye autofocus tracking in more modern mirrorless cameras. This feature has also evolved a lot in recent years with firmware updates and newer models. I have found that it has become essential in my style of bird photography.
Shooting with a high fps means you are unlikely to miss the shot when the puffin has its nictitating membrane covering its eye.
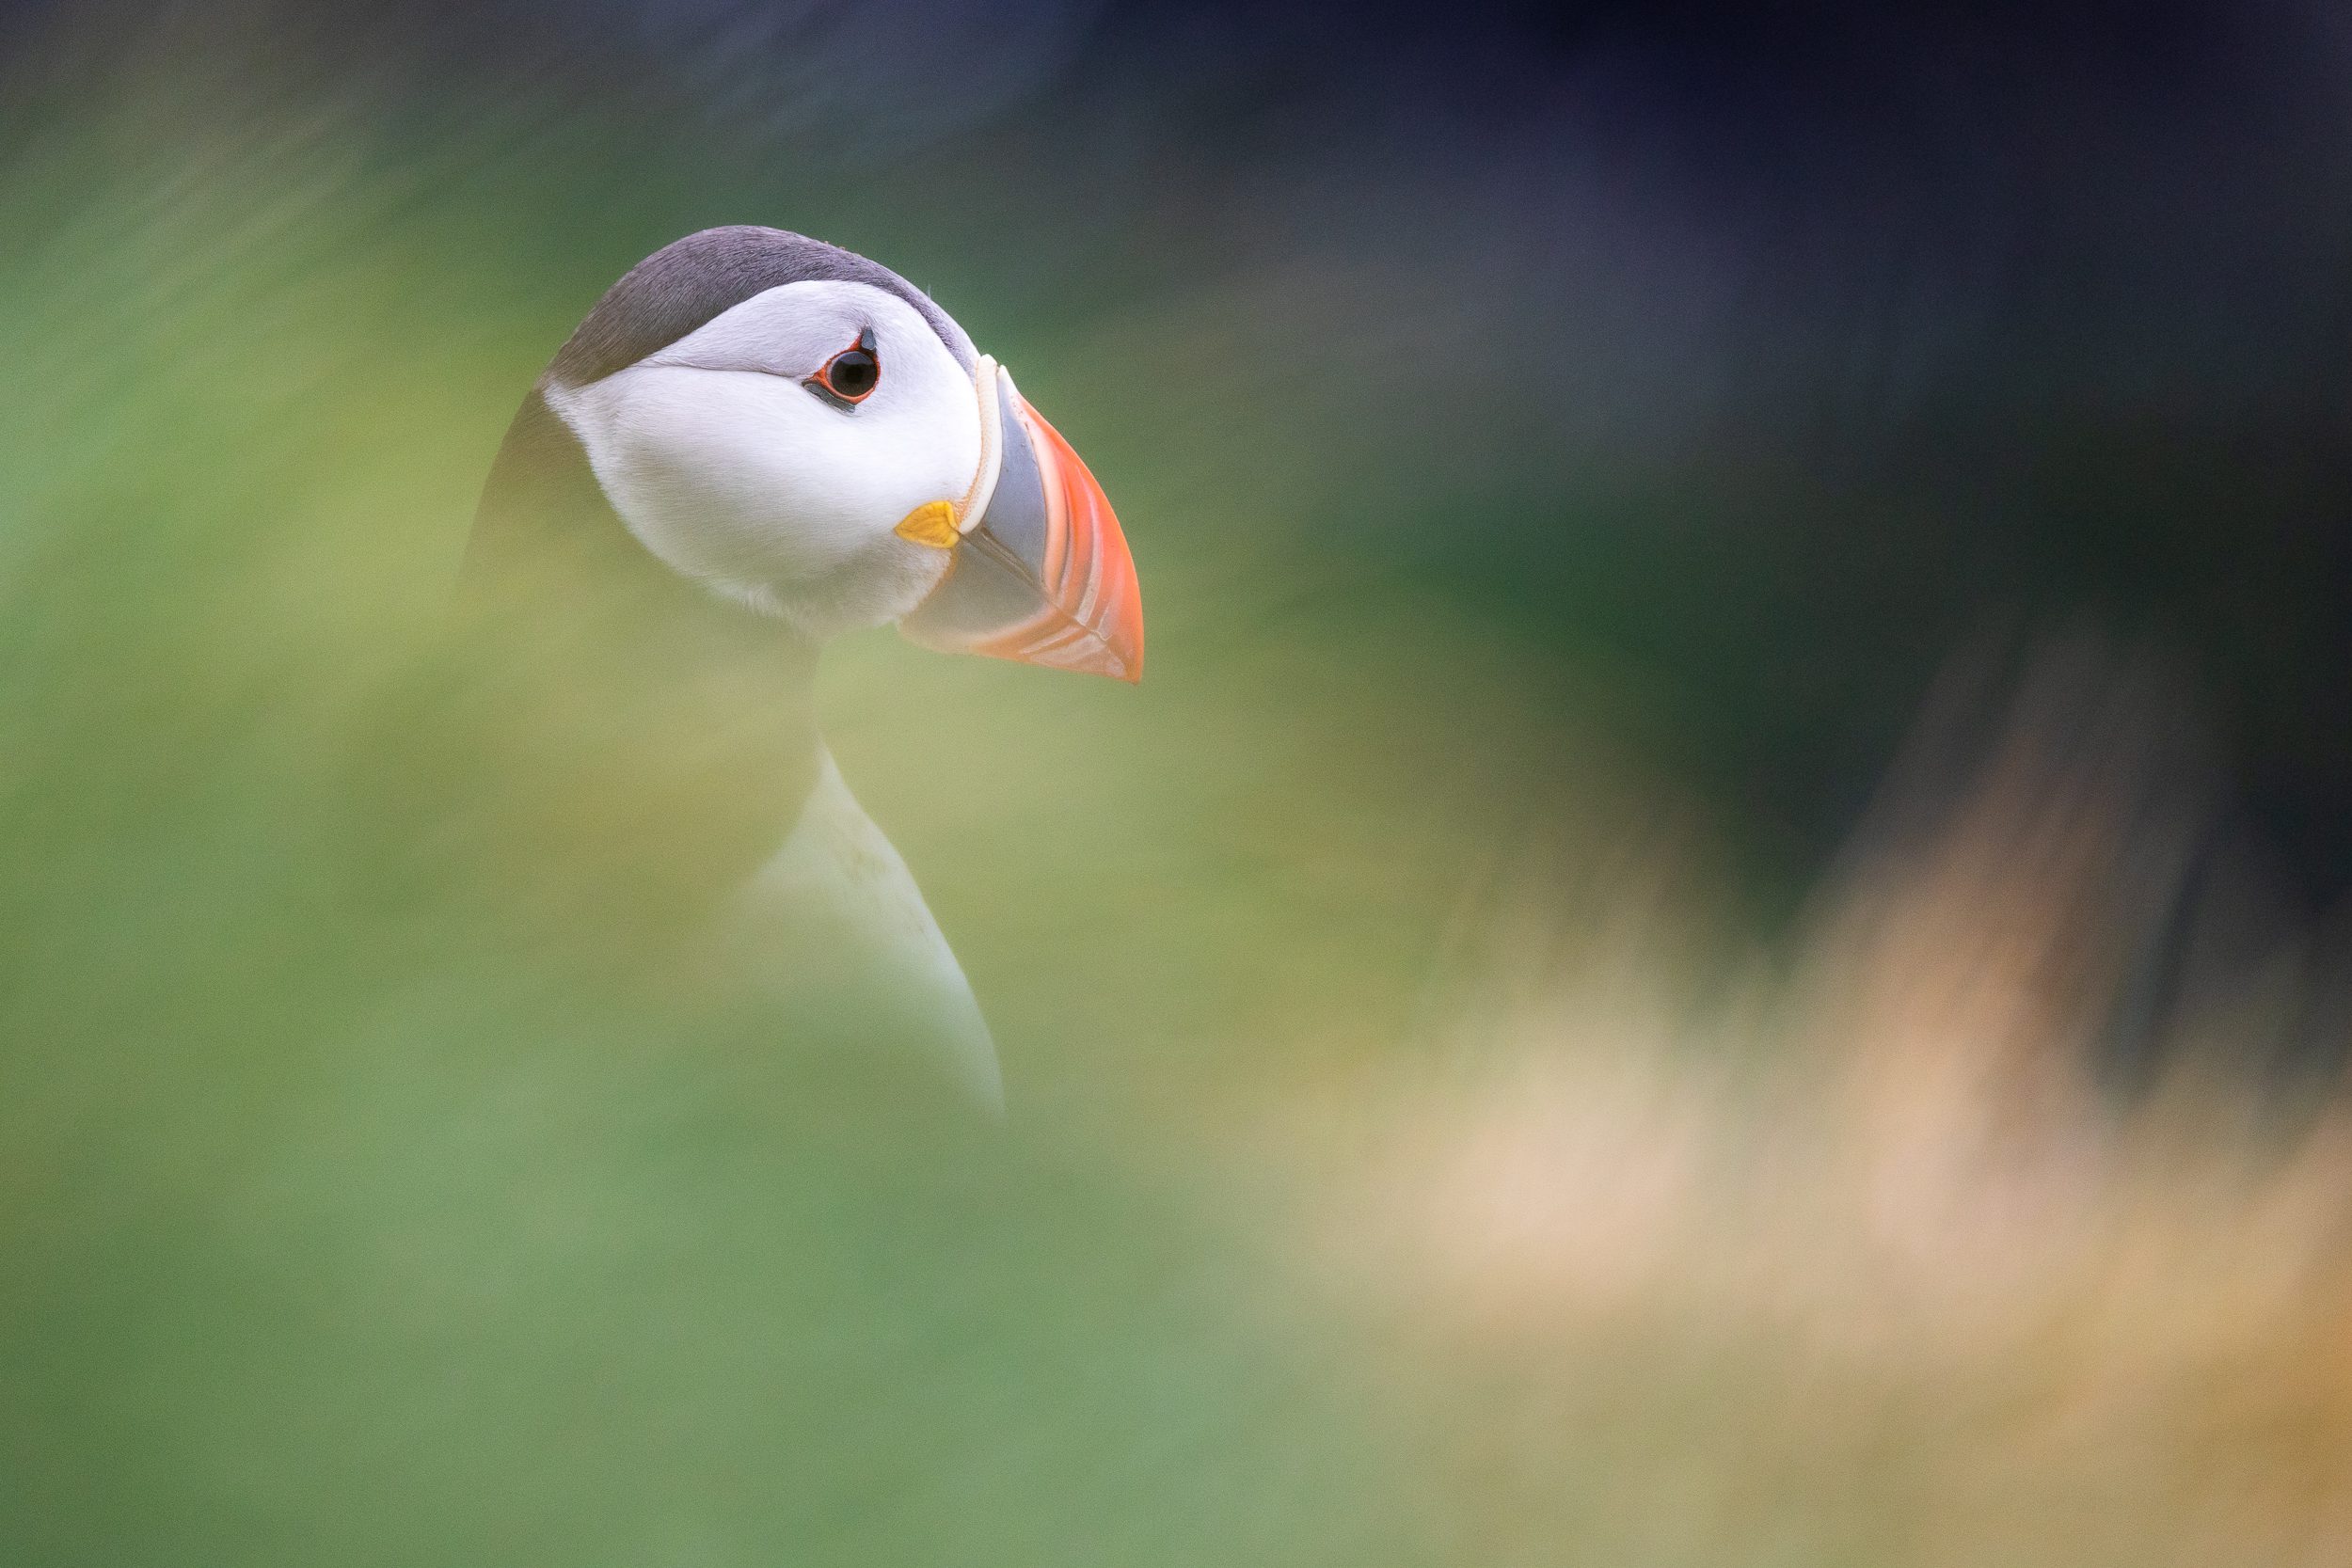
A photograph such as this one, where you have grass in front of the puffin, is very difficult to achieve without eye tracking autofocus functionality as the focus would likely be jumping between the grass and the bird.
Tip 4 – Use a Telephoto Lens With a Short Focusing Distance
Many people automatically assume that a lens with a big range, such as a 200-600mm, is vital. While having a good telephoto with a decent range is certainly important I would argue that the more important feature to look out for is the minimum focusing distance of the lens. In some cases, the focus distance can be above two or even three metres which means you need to be a lot further away. Certainly for photographing puffins, this can cause issues as in many places the birds are hiding behind high grass which prevents you from being at those distances.
This is one of my personal favourites and was captured with a Canon 100-500mm RF lens at 500mm. This image is uncropped. I added this here to show you that massive focal ranges are not really necessary when photographing puffins.
Tip 5 – Understand Your Subject’s (or the Puffin’s) Behaviour
Probably the most important tip is understanding the puffin’s behaviour. Understanding the Atlantic Puffin, and knowing how it behaves, helps you anticipate what shots you could take. A few examples:
- Knowing when a puffin is nesting, and when their chicks begin hatching, is really important! Outside of the nesting period, puffins spend their time on the water, which means you won’t see them at all. Additionally, when their chicks haven’t hatched yet, most puffins will be inside the burrows. Although it varies slightly every year, puffins usually come to land in the middle of April. Most of them will be in their burrows until the middle of June. They leave land again before the middle of August.
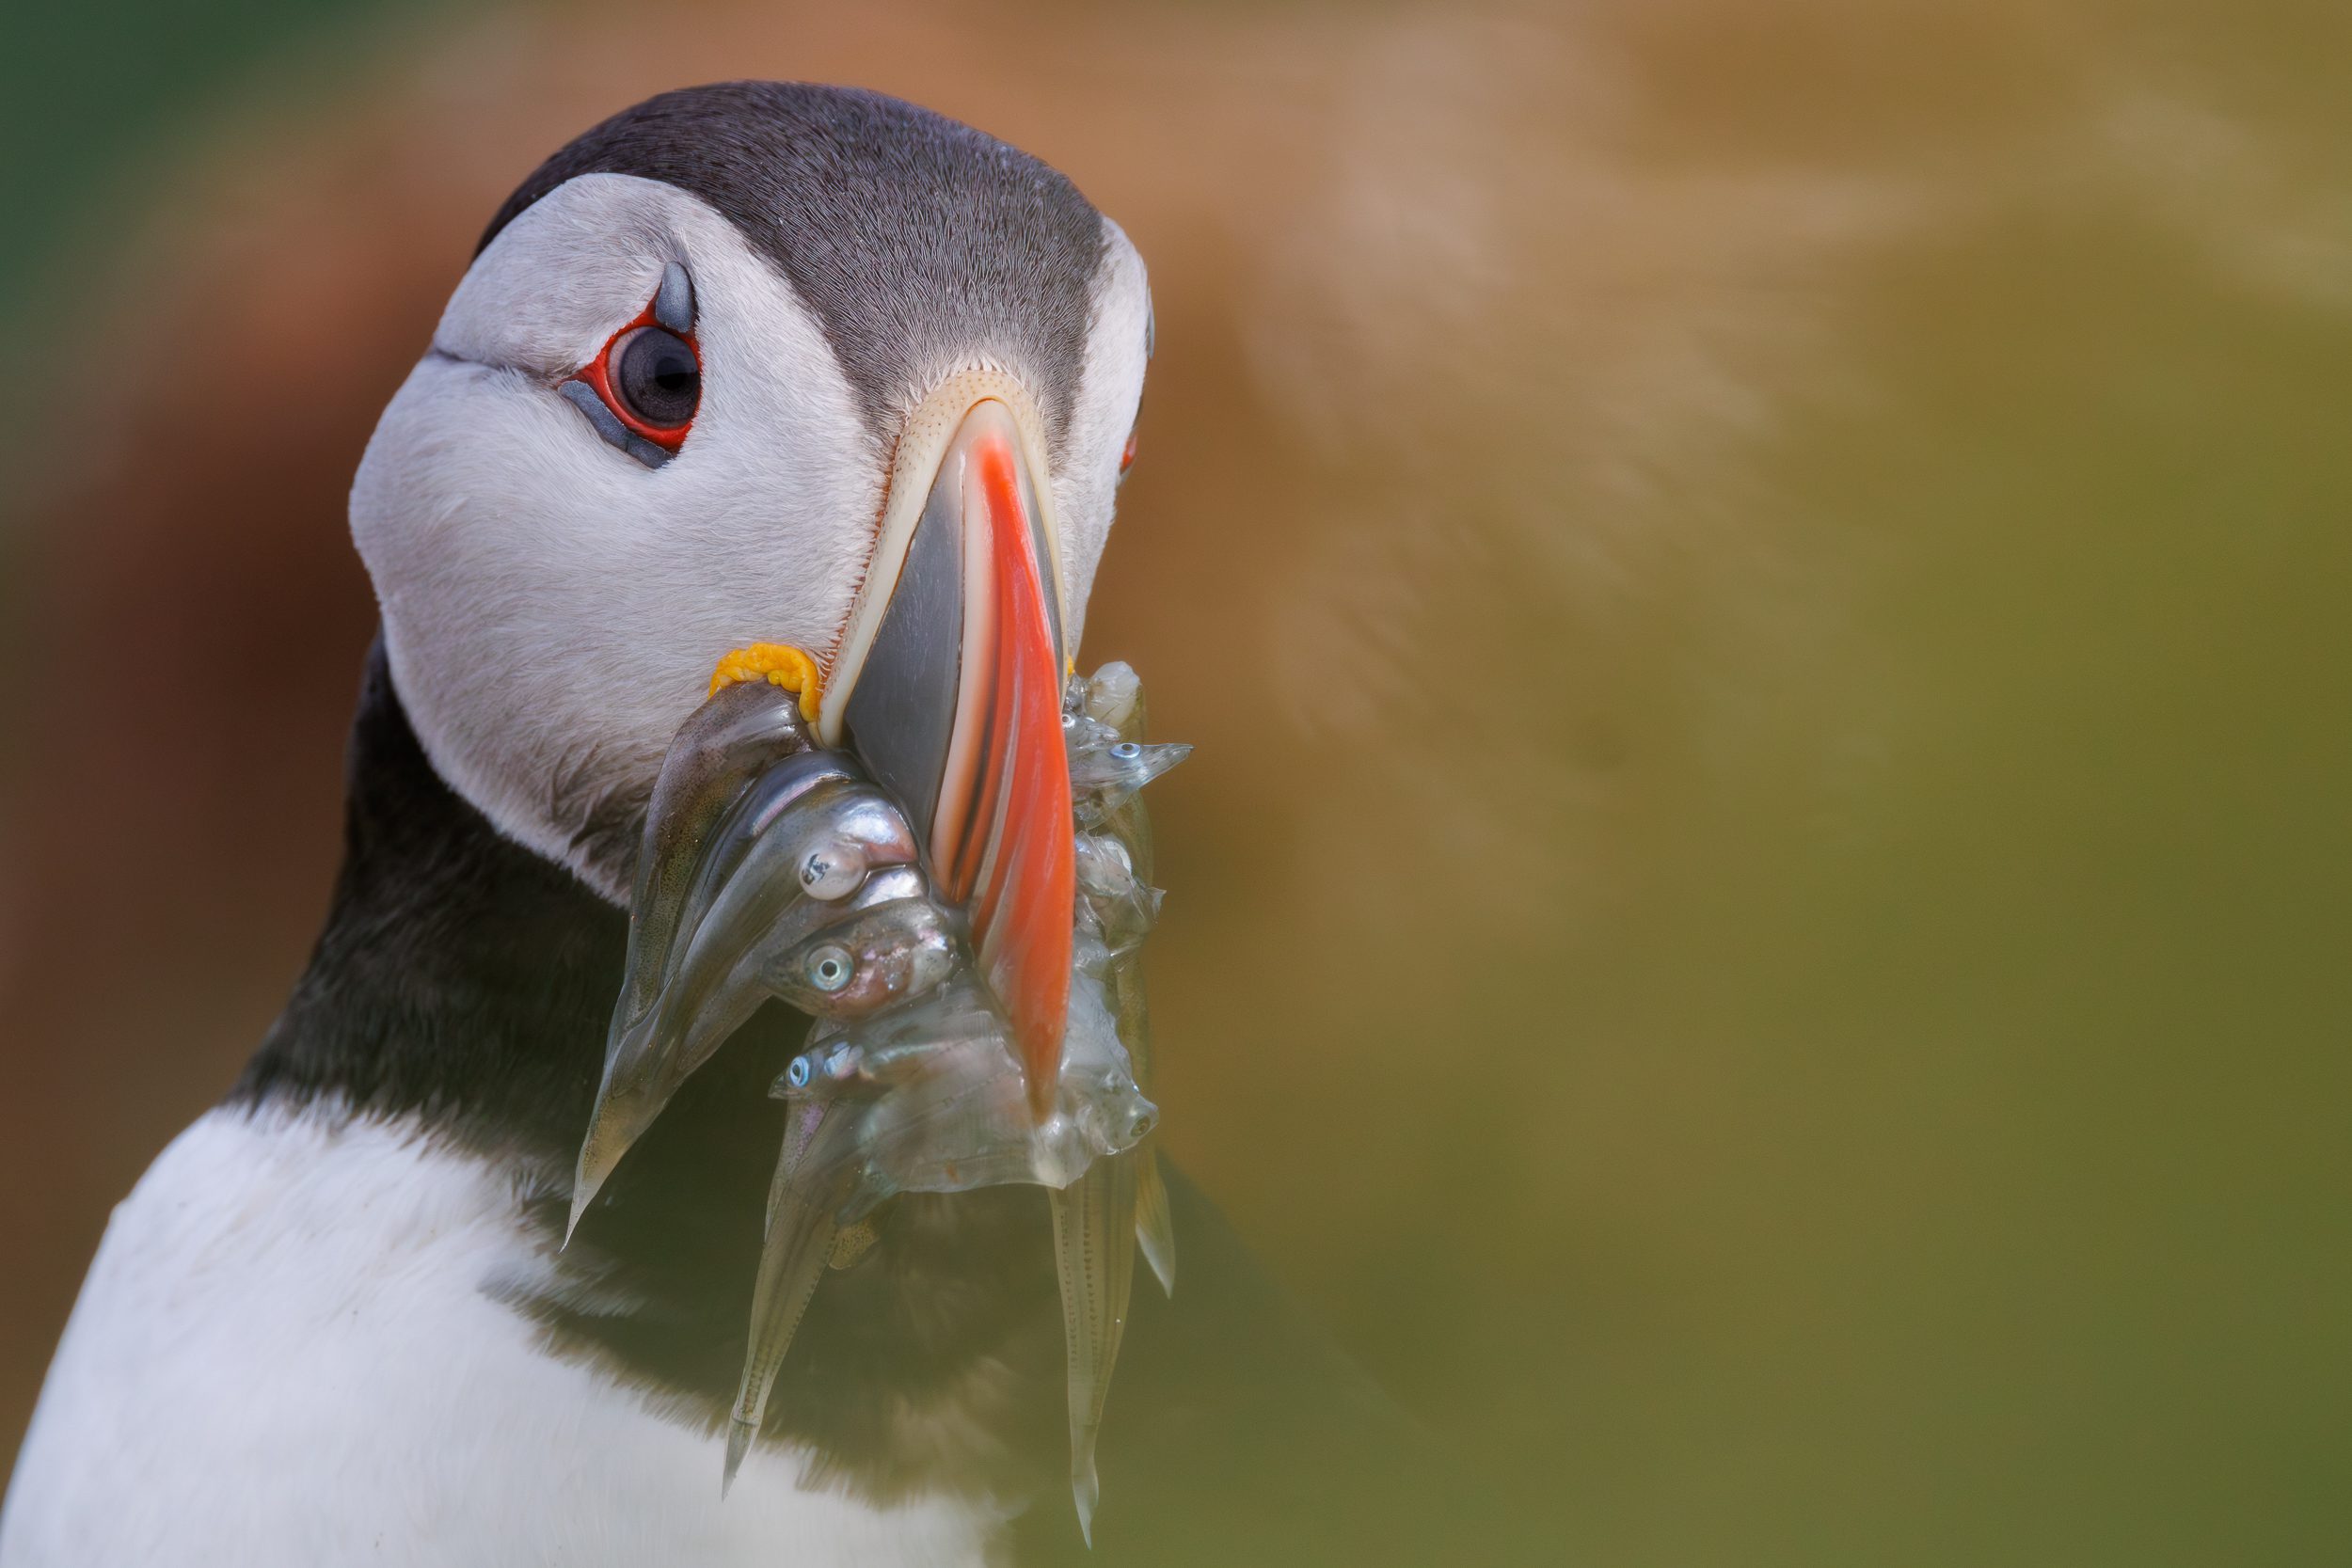
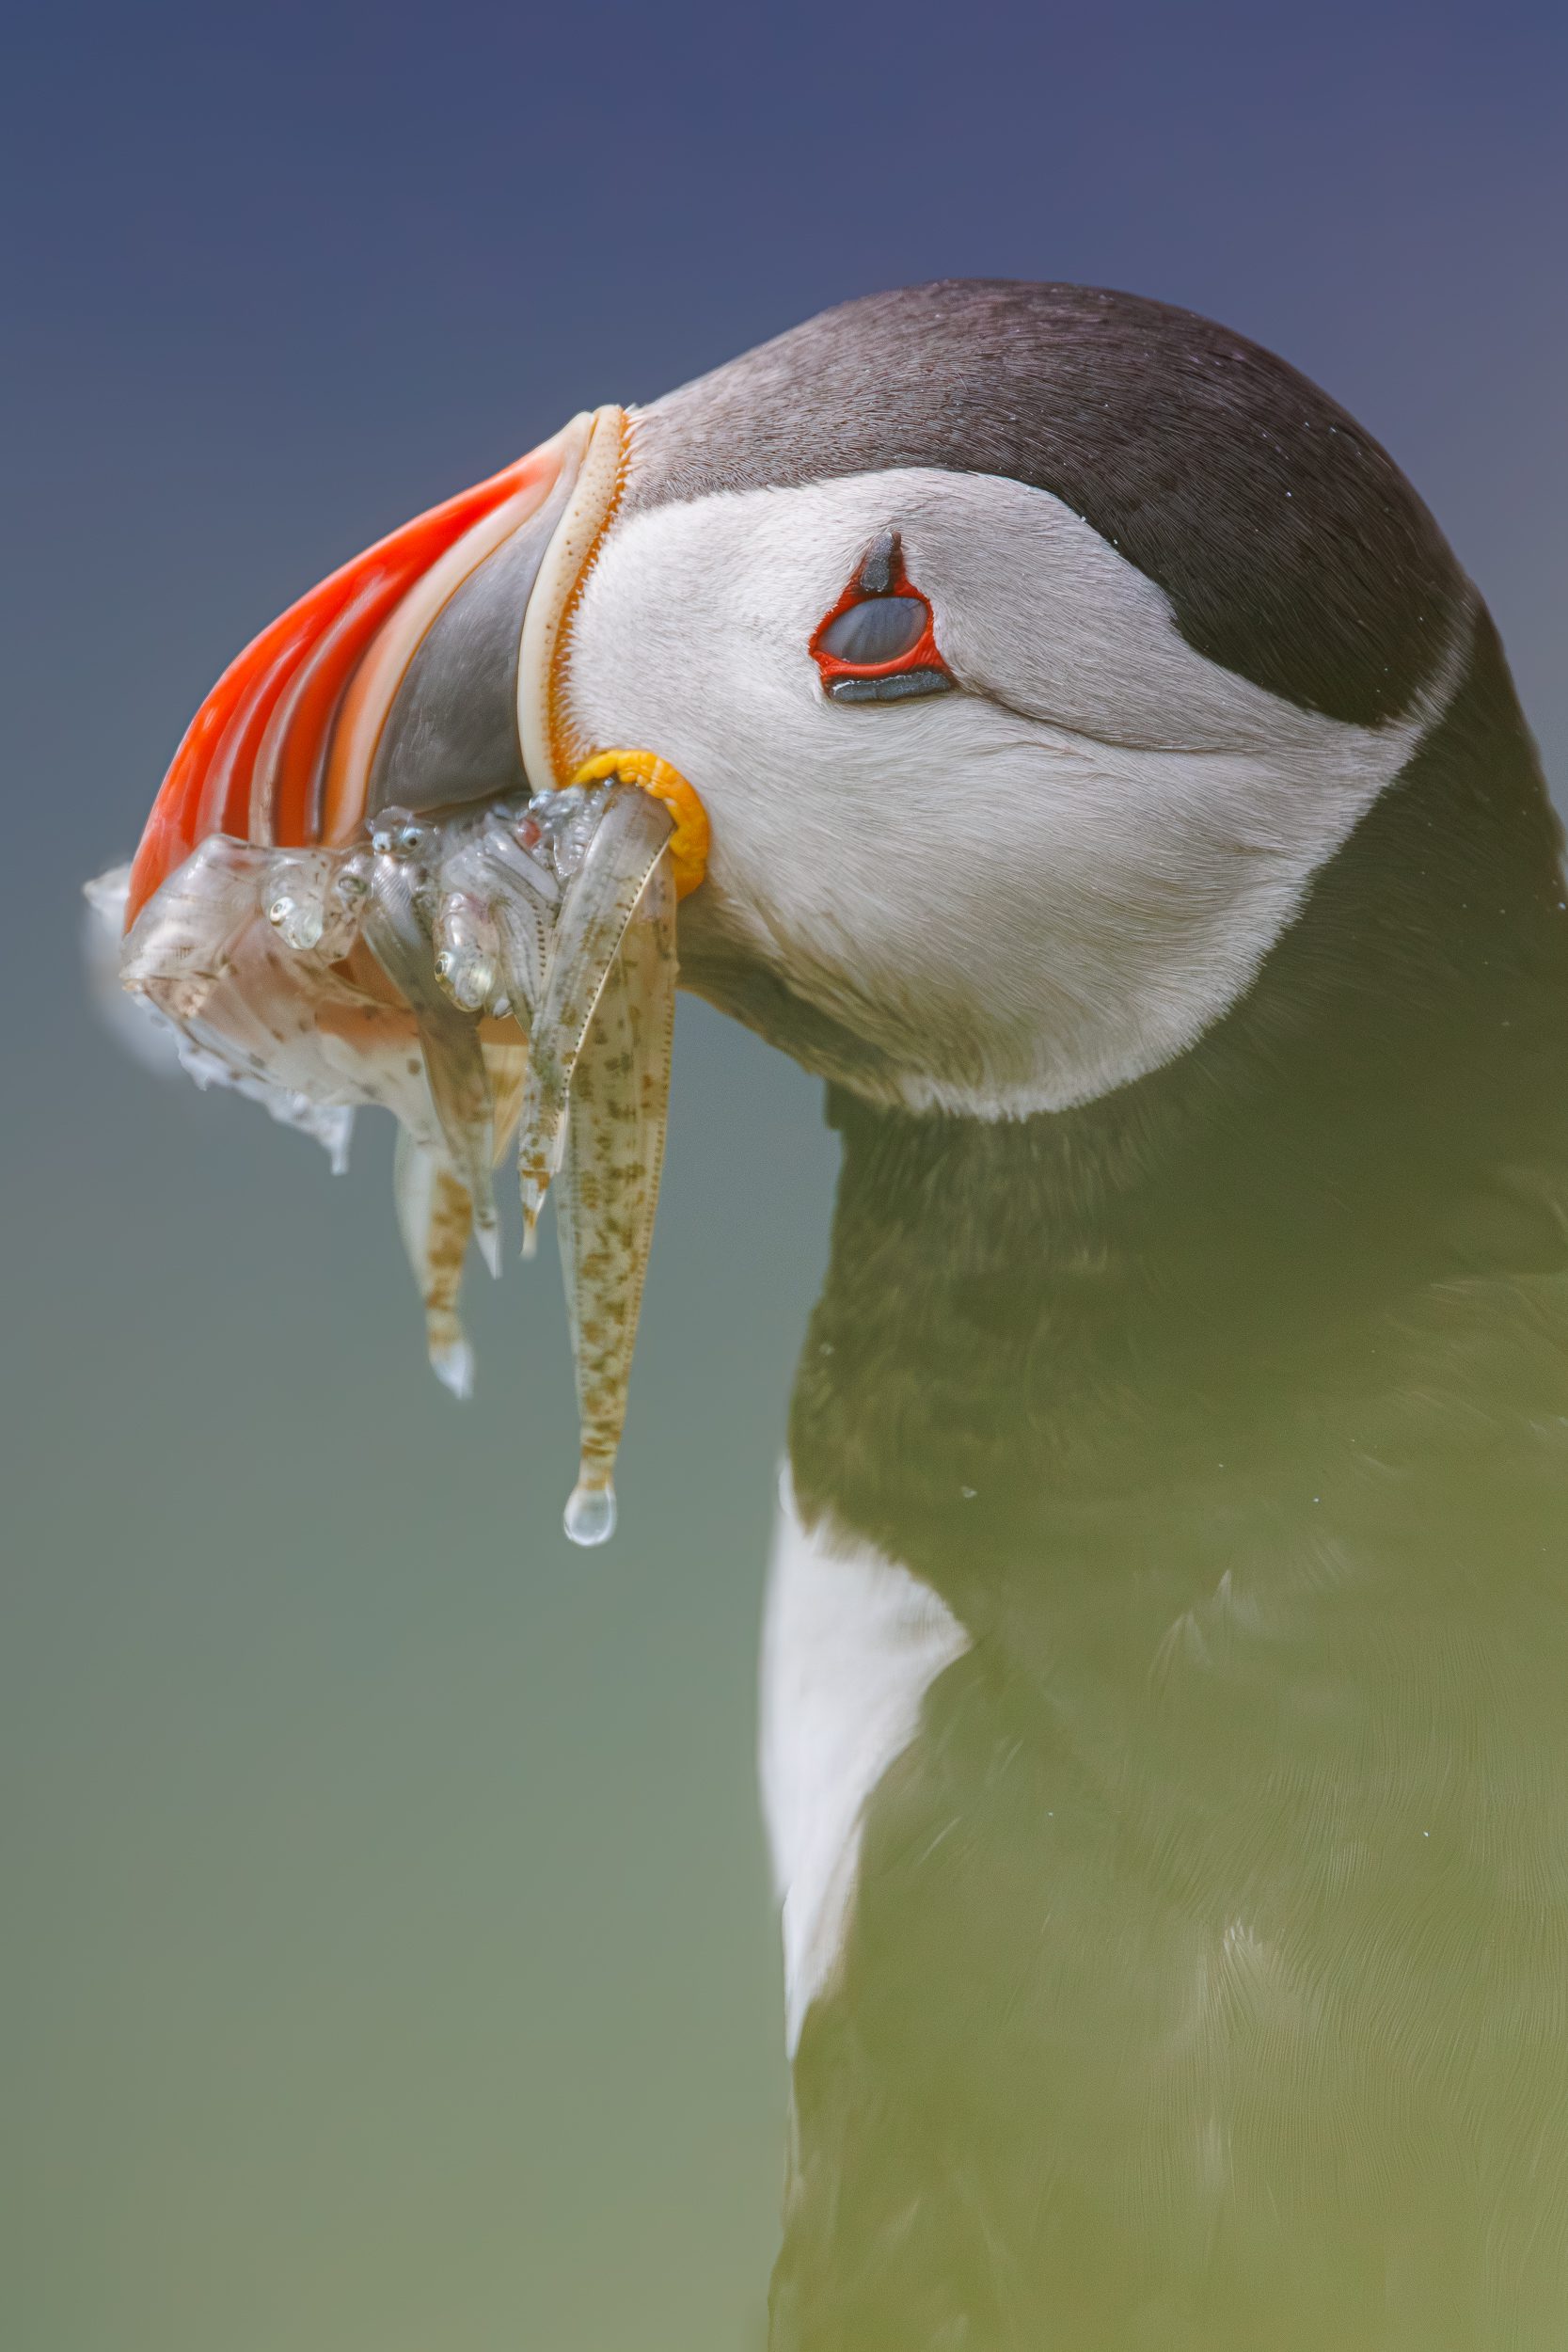
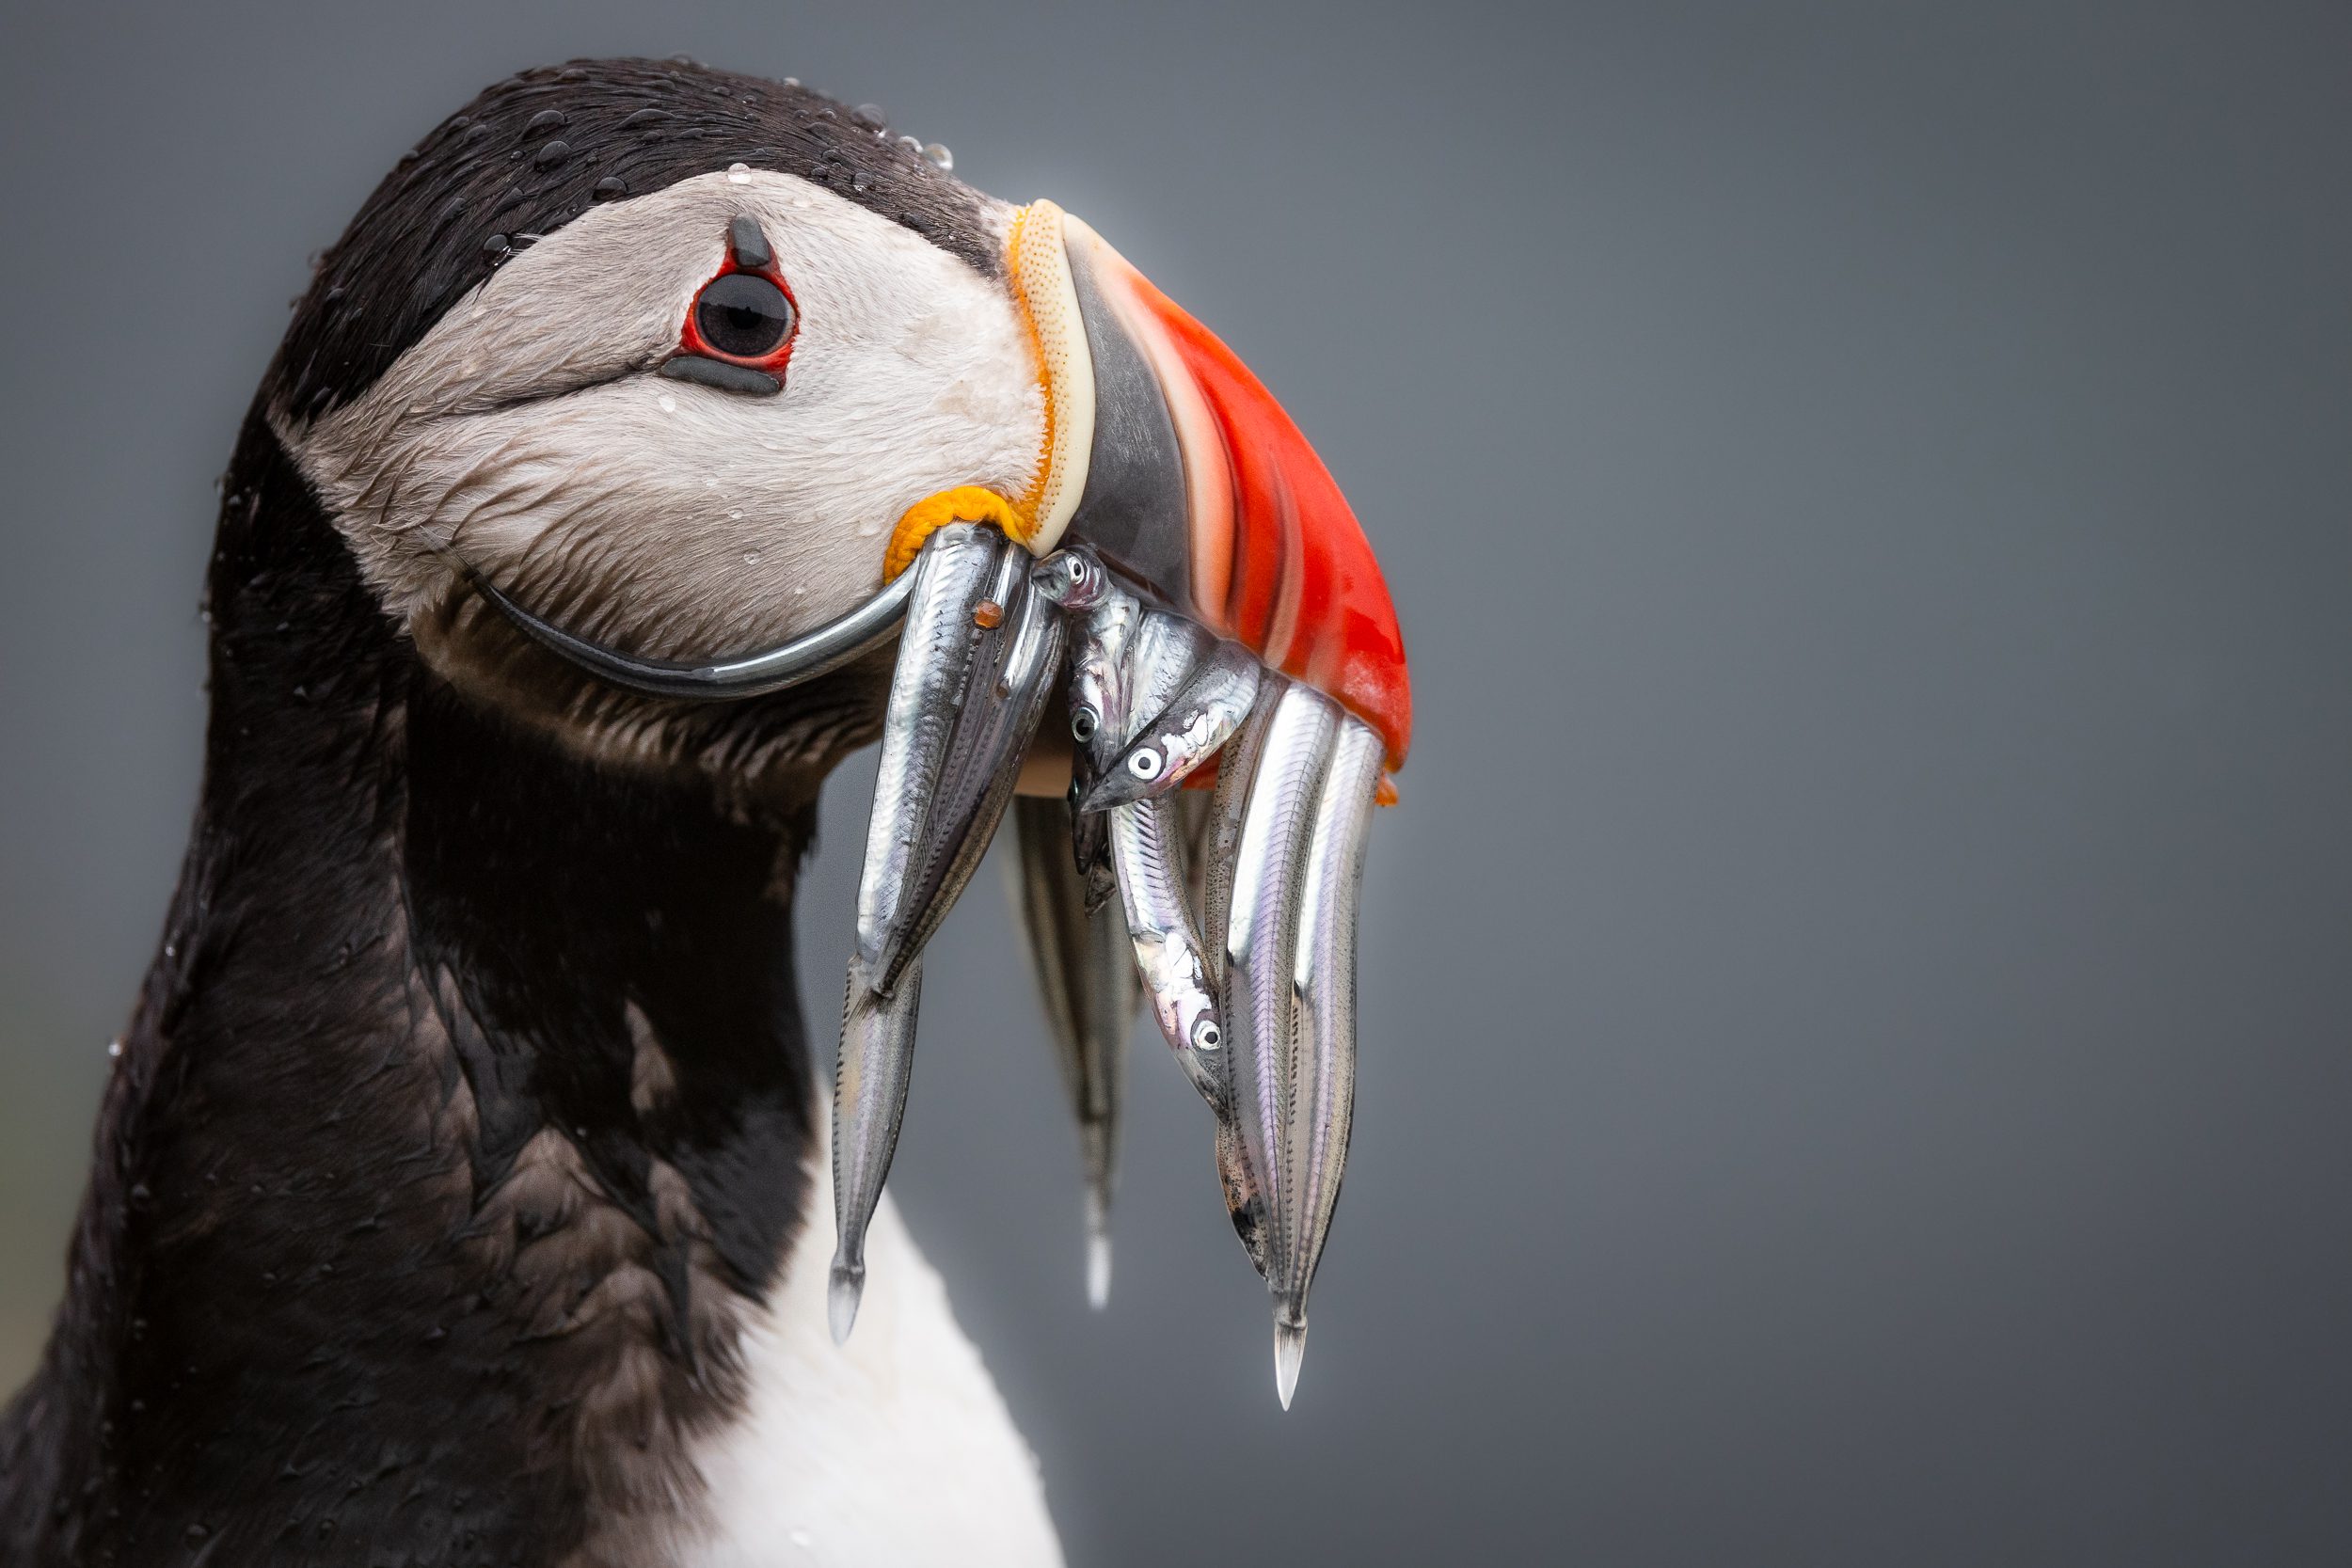
- One of the most iconic photographs you can take of a puffin is when it has a bill full of fish. Generally, you will see them with fish in their bills when the chicks have hatched as they are fishing to feed them. The size of the fish also varies throughout the season. Usually you will see them with bigger fish later in the season. Many people dream of photographing a puffin holding fish in its bill.
- Over the years, I have observed them “yawning” in the evening. I don’t know why they do this or if they are actually yawning, but in the evenings I have observed them with their bills open more frequently. This means you will also get a chance to photograph them with their unique tongues out. When you see this, it makes for fun puffin photographs
- Puffins always return to the same burrows. Odds are that when you return to the same spot year after year, you will see the same bird each time. This also means that if you see a puffin with fish in its bill, and it leaves, it will return again in the same spot later. They sometimes leave again when disturbed by other puffins, or maybe even by you. It’s important to know that if a puffin comes back again and again without entering a burrow, you are likely the issue which means it’s better to leave your position. Knowing when to back off is the heart of ethical puffin photography.
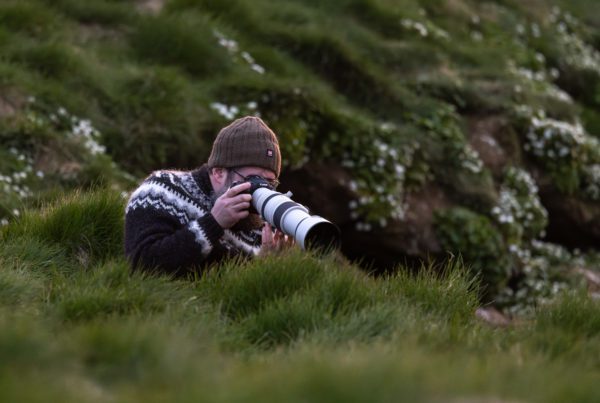
Together with understanding, I would say that observing is equally important. I usually hide in the grassy cliffside and observe the birds near me before I begin shooting. I check whether they are disturbed by my presence (which can be easily seen from a puffin) and I see whether or not there is potential for a compelling image. Are there birds interacting with each other? Is there a puffin with fish in its bill? Do I have a good fore- and background? All of these things matter.
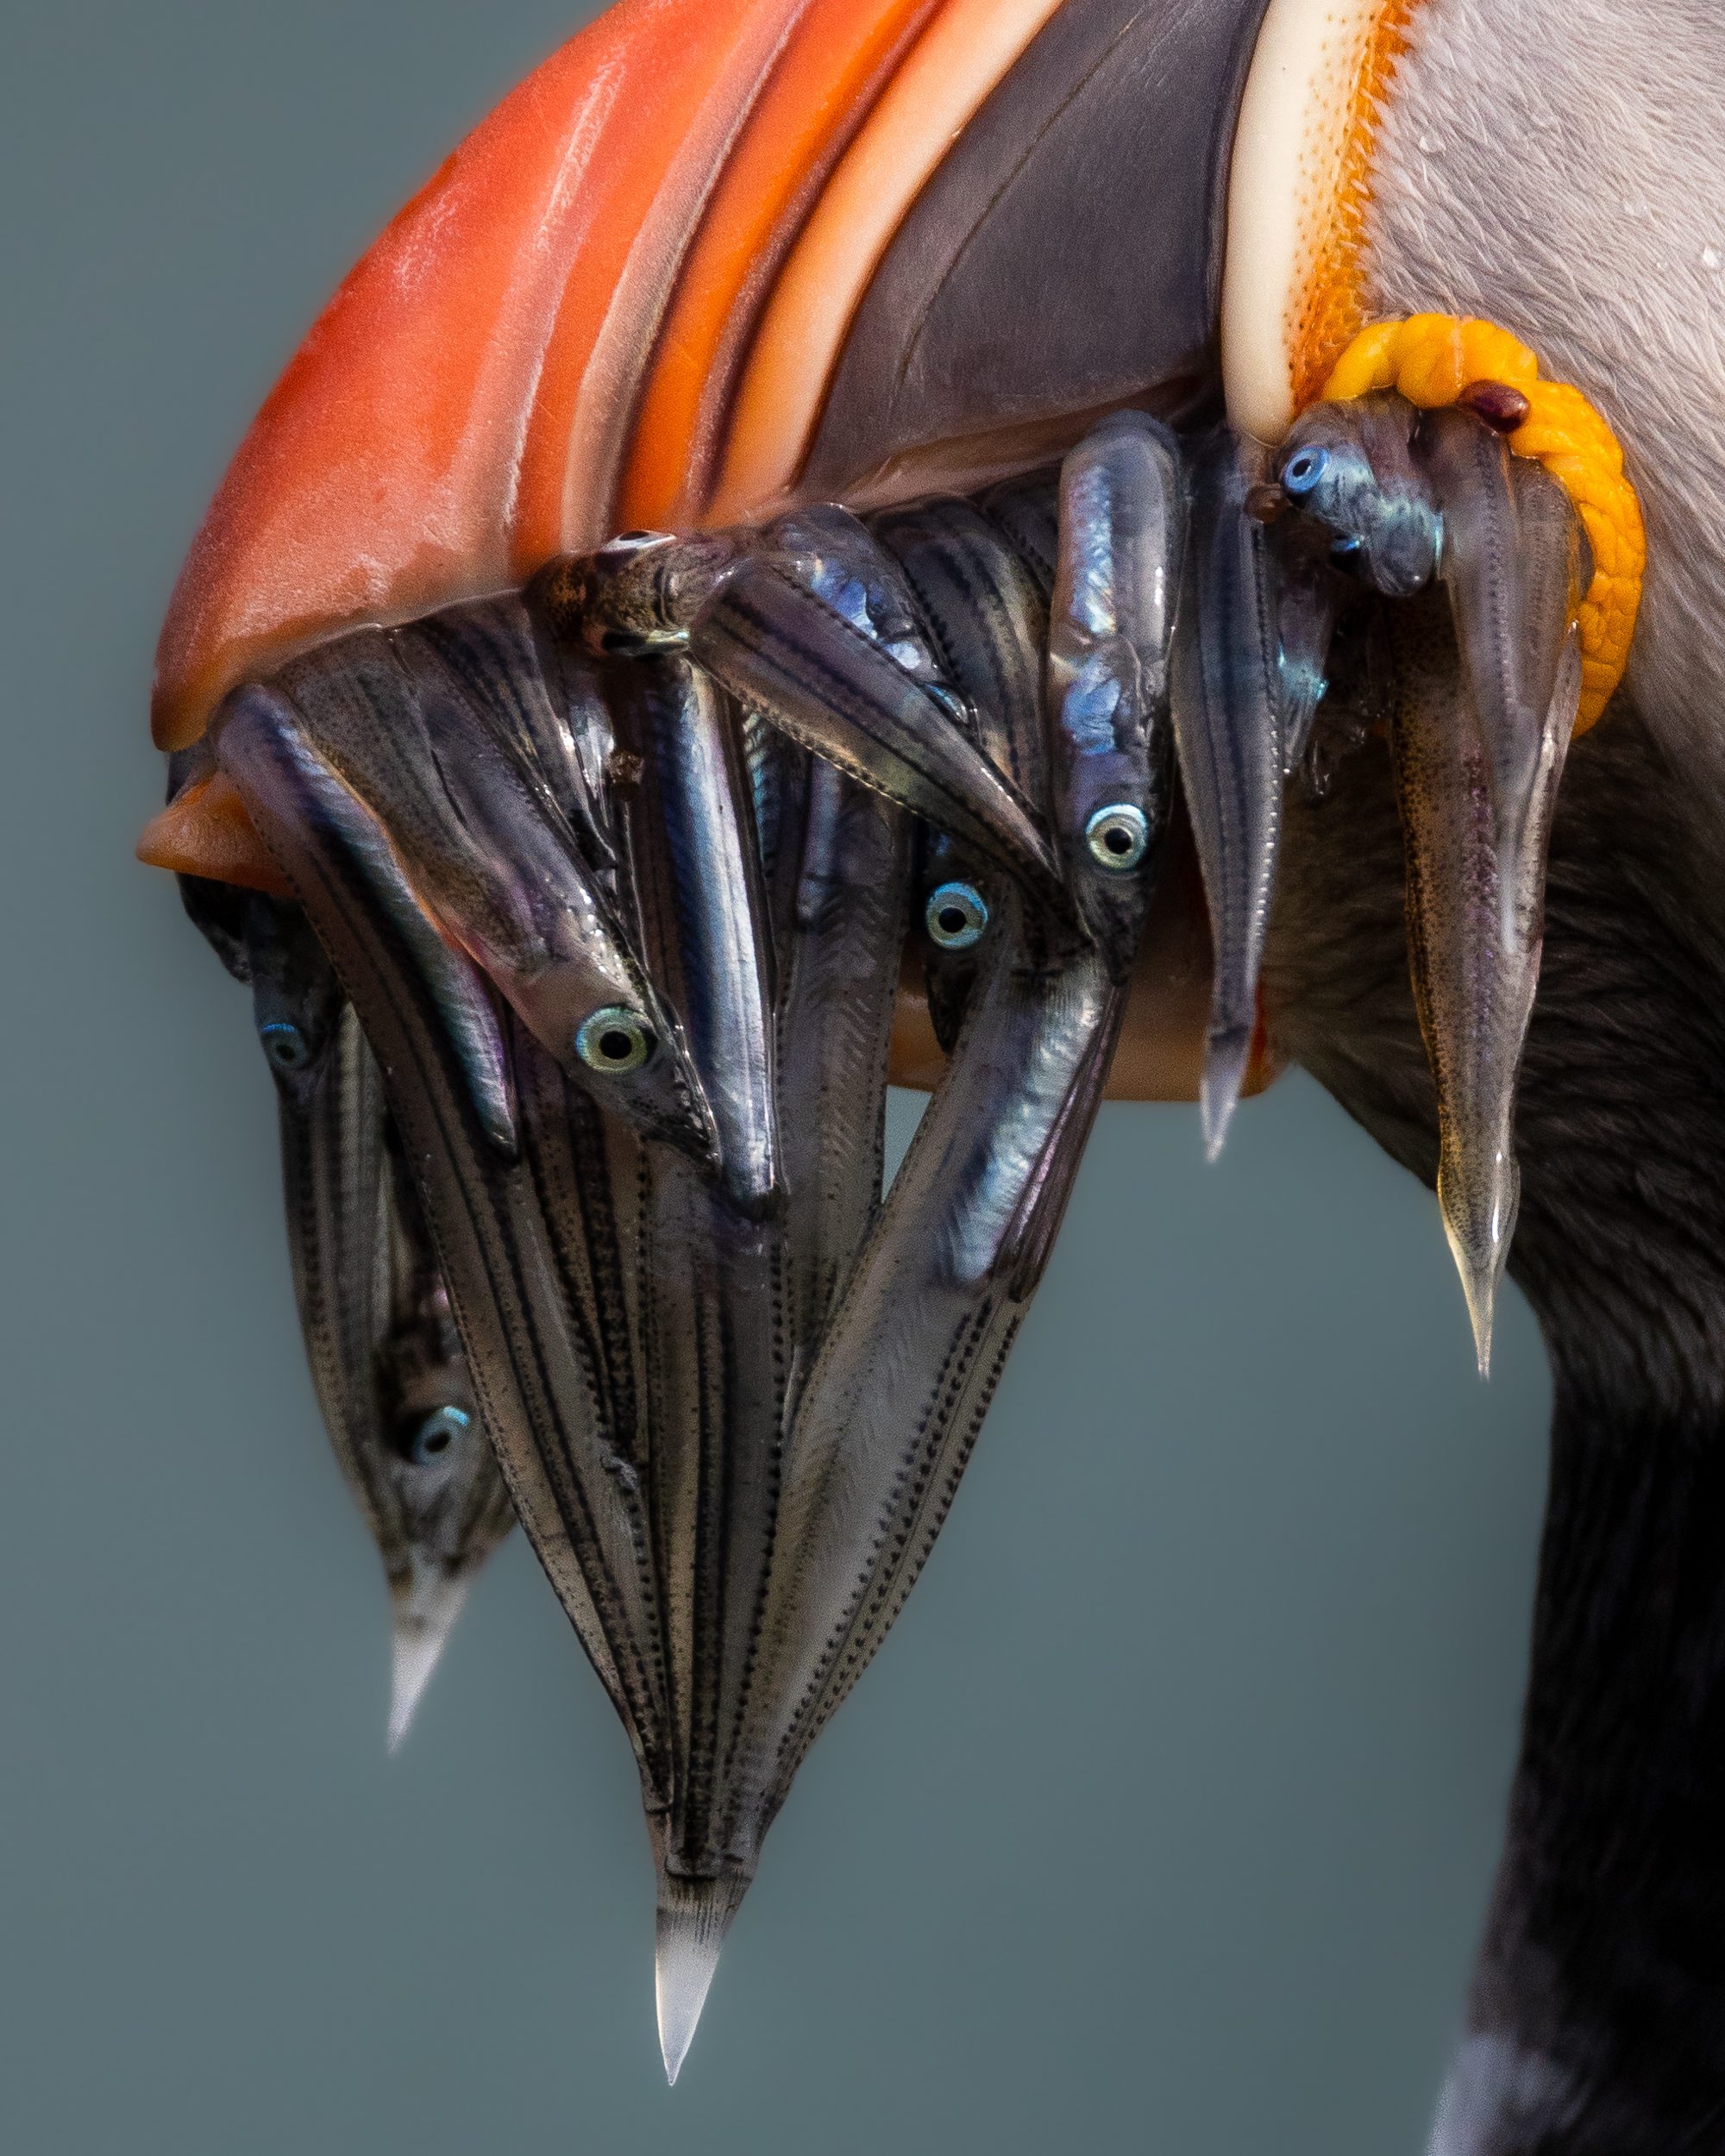
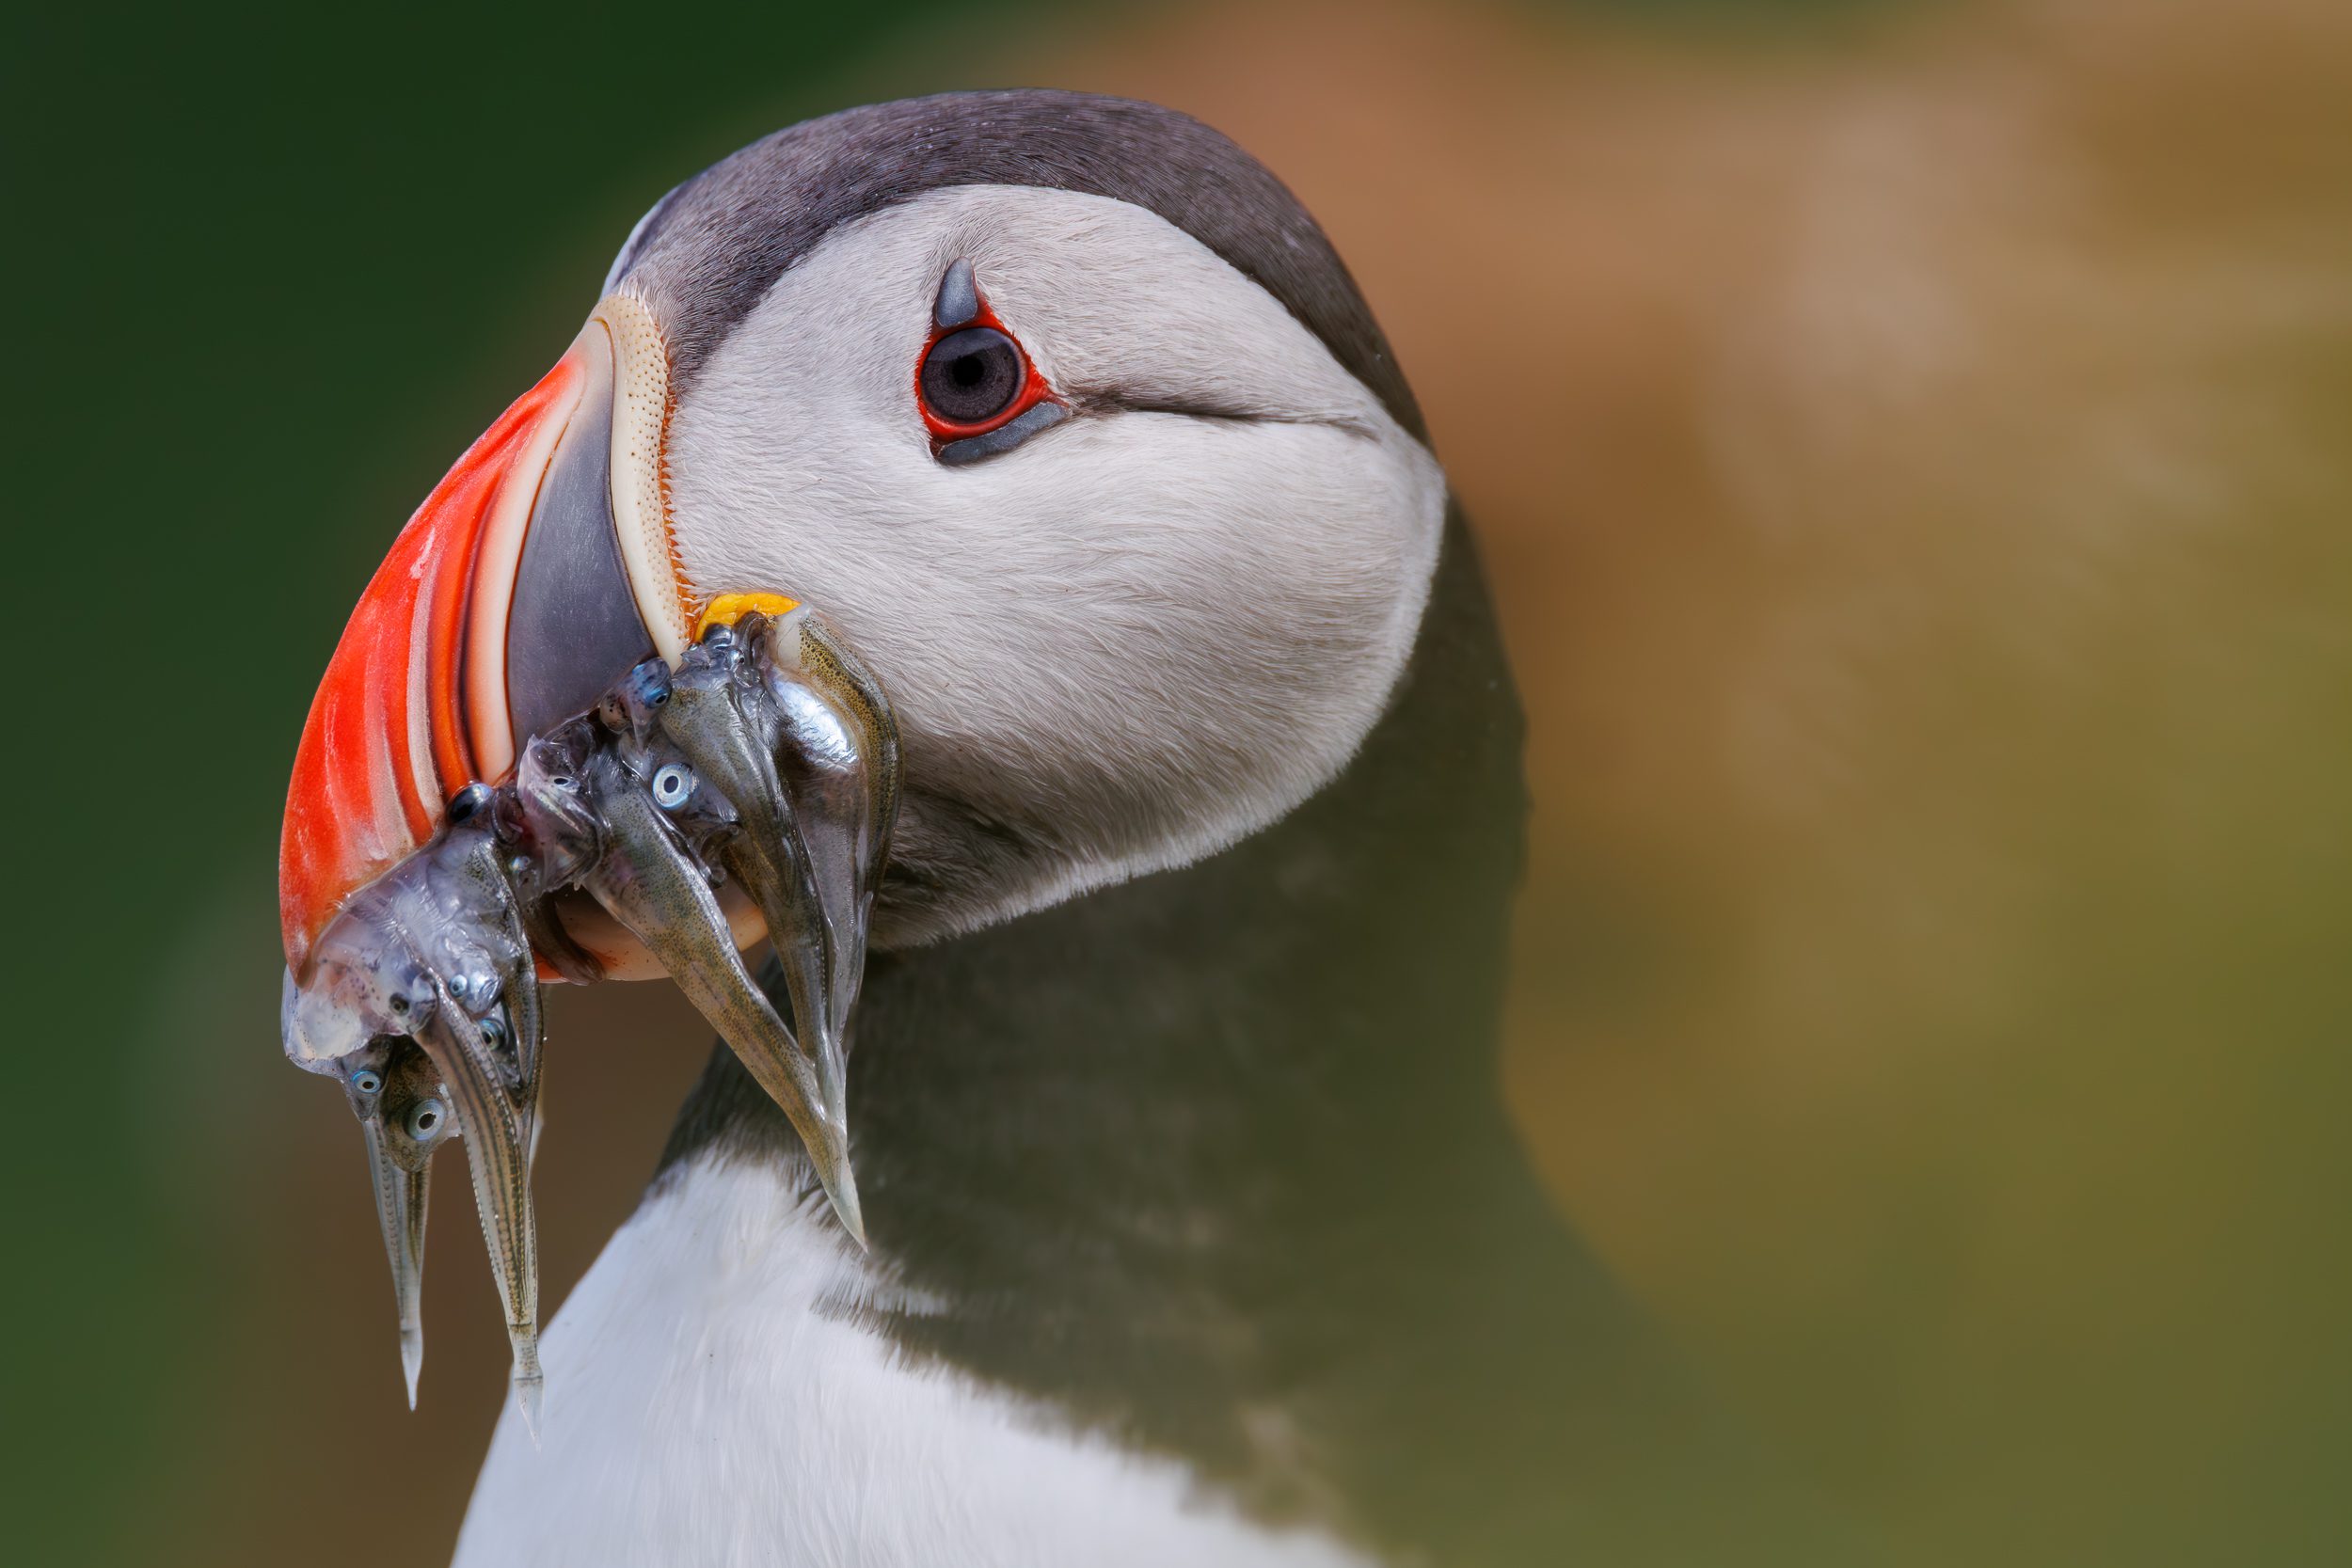
A bucket list shot for many is to capture a shot of a puffin keeping his bill full of fish.
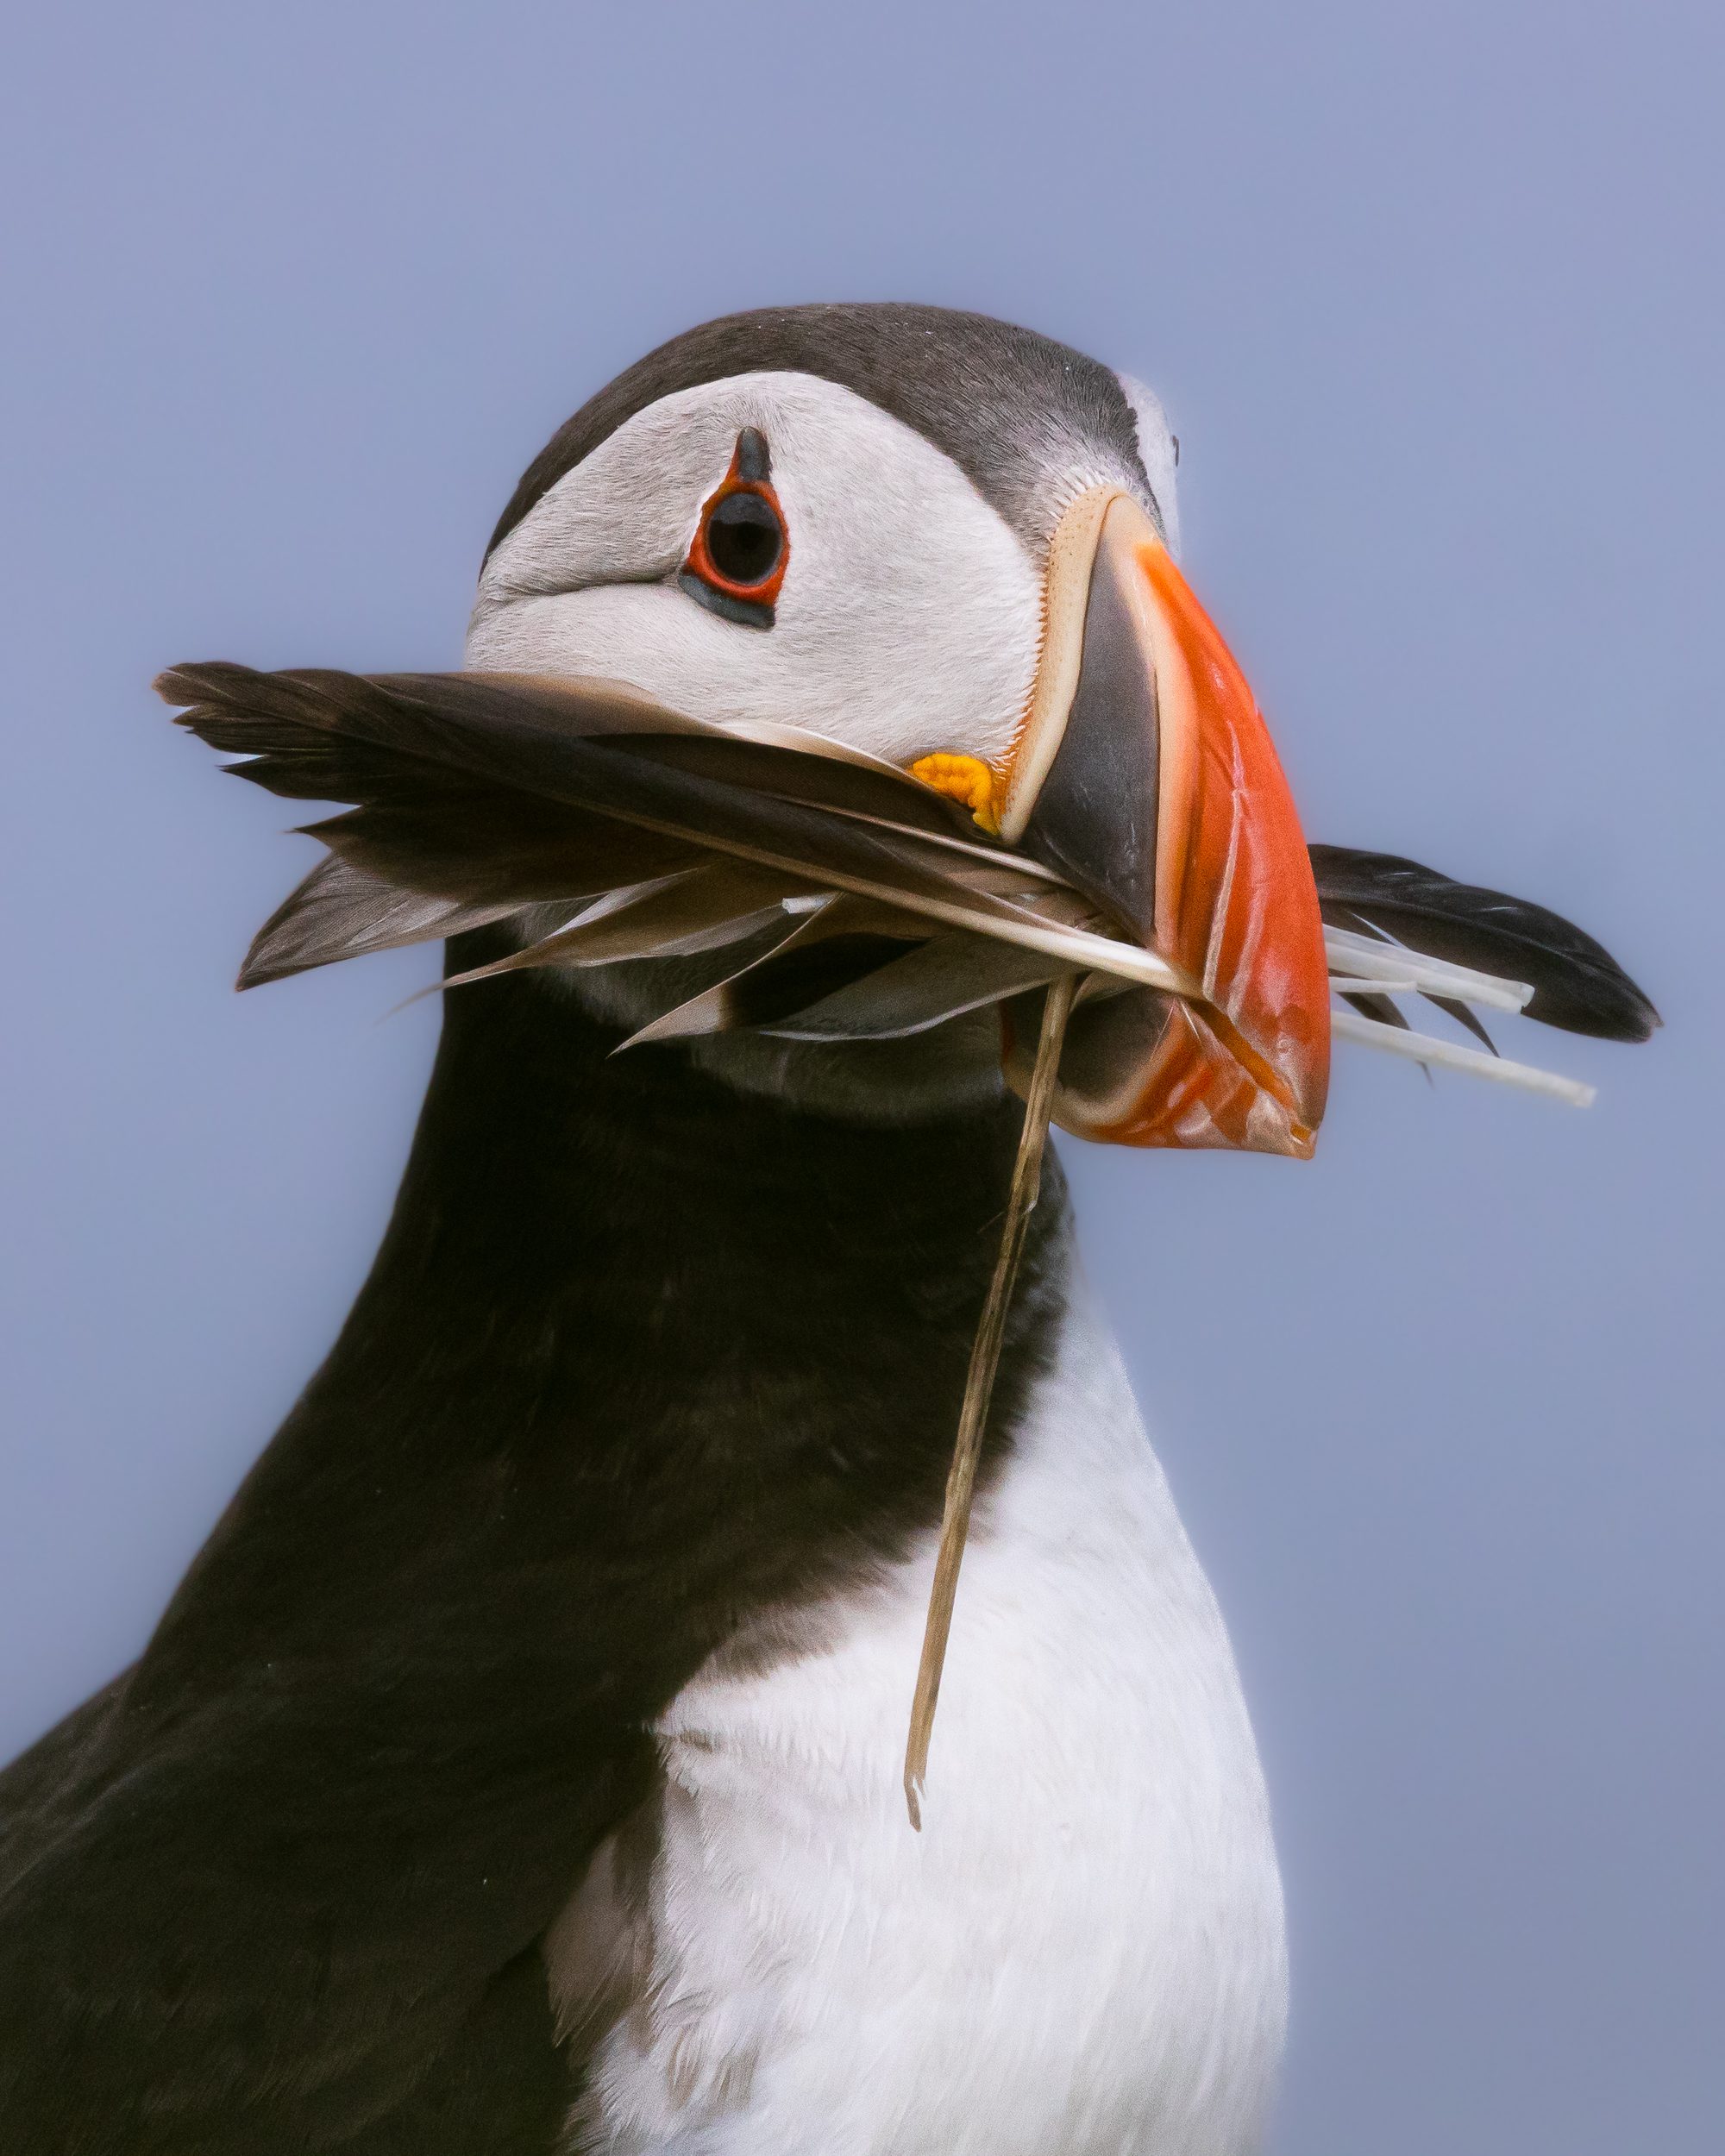
Early in the season, you might see puffins gather all sorts of things to keep its chicks warm inside the burrow.
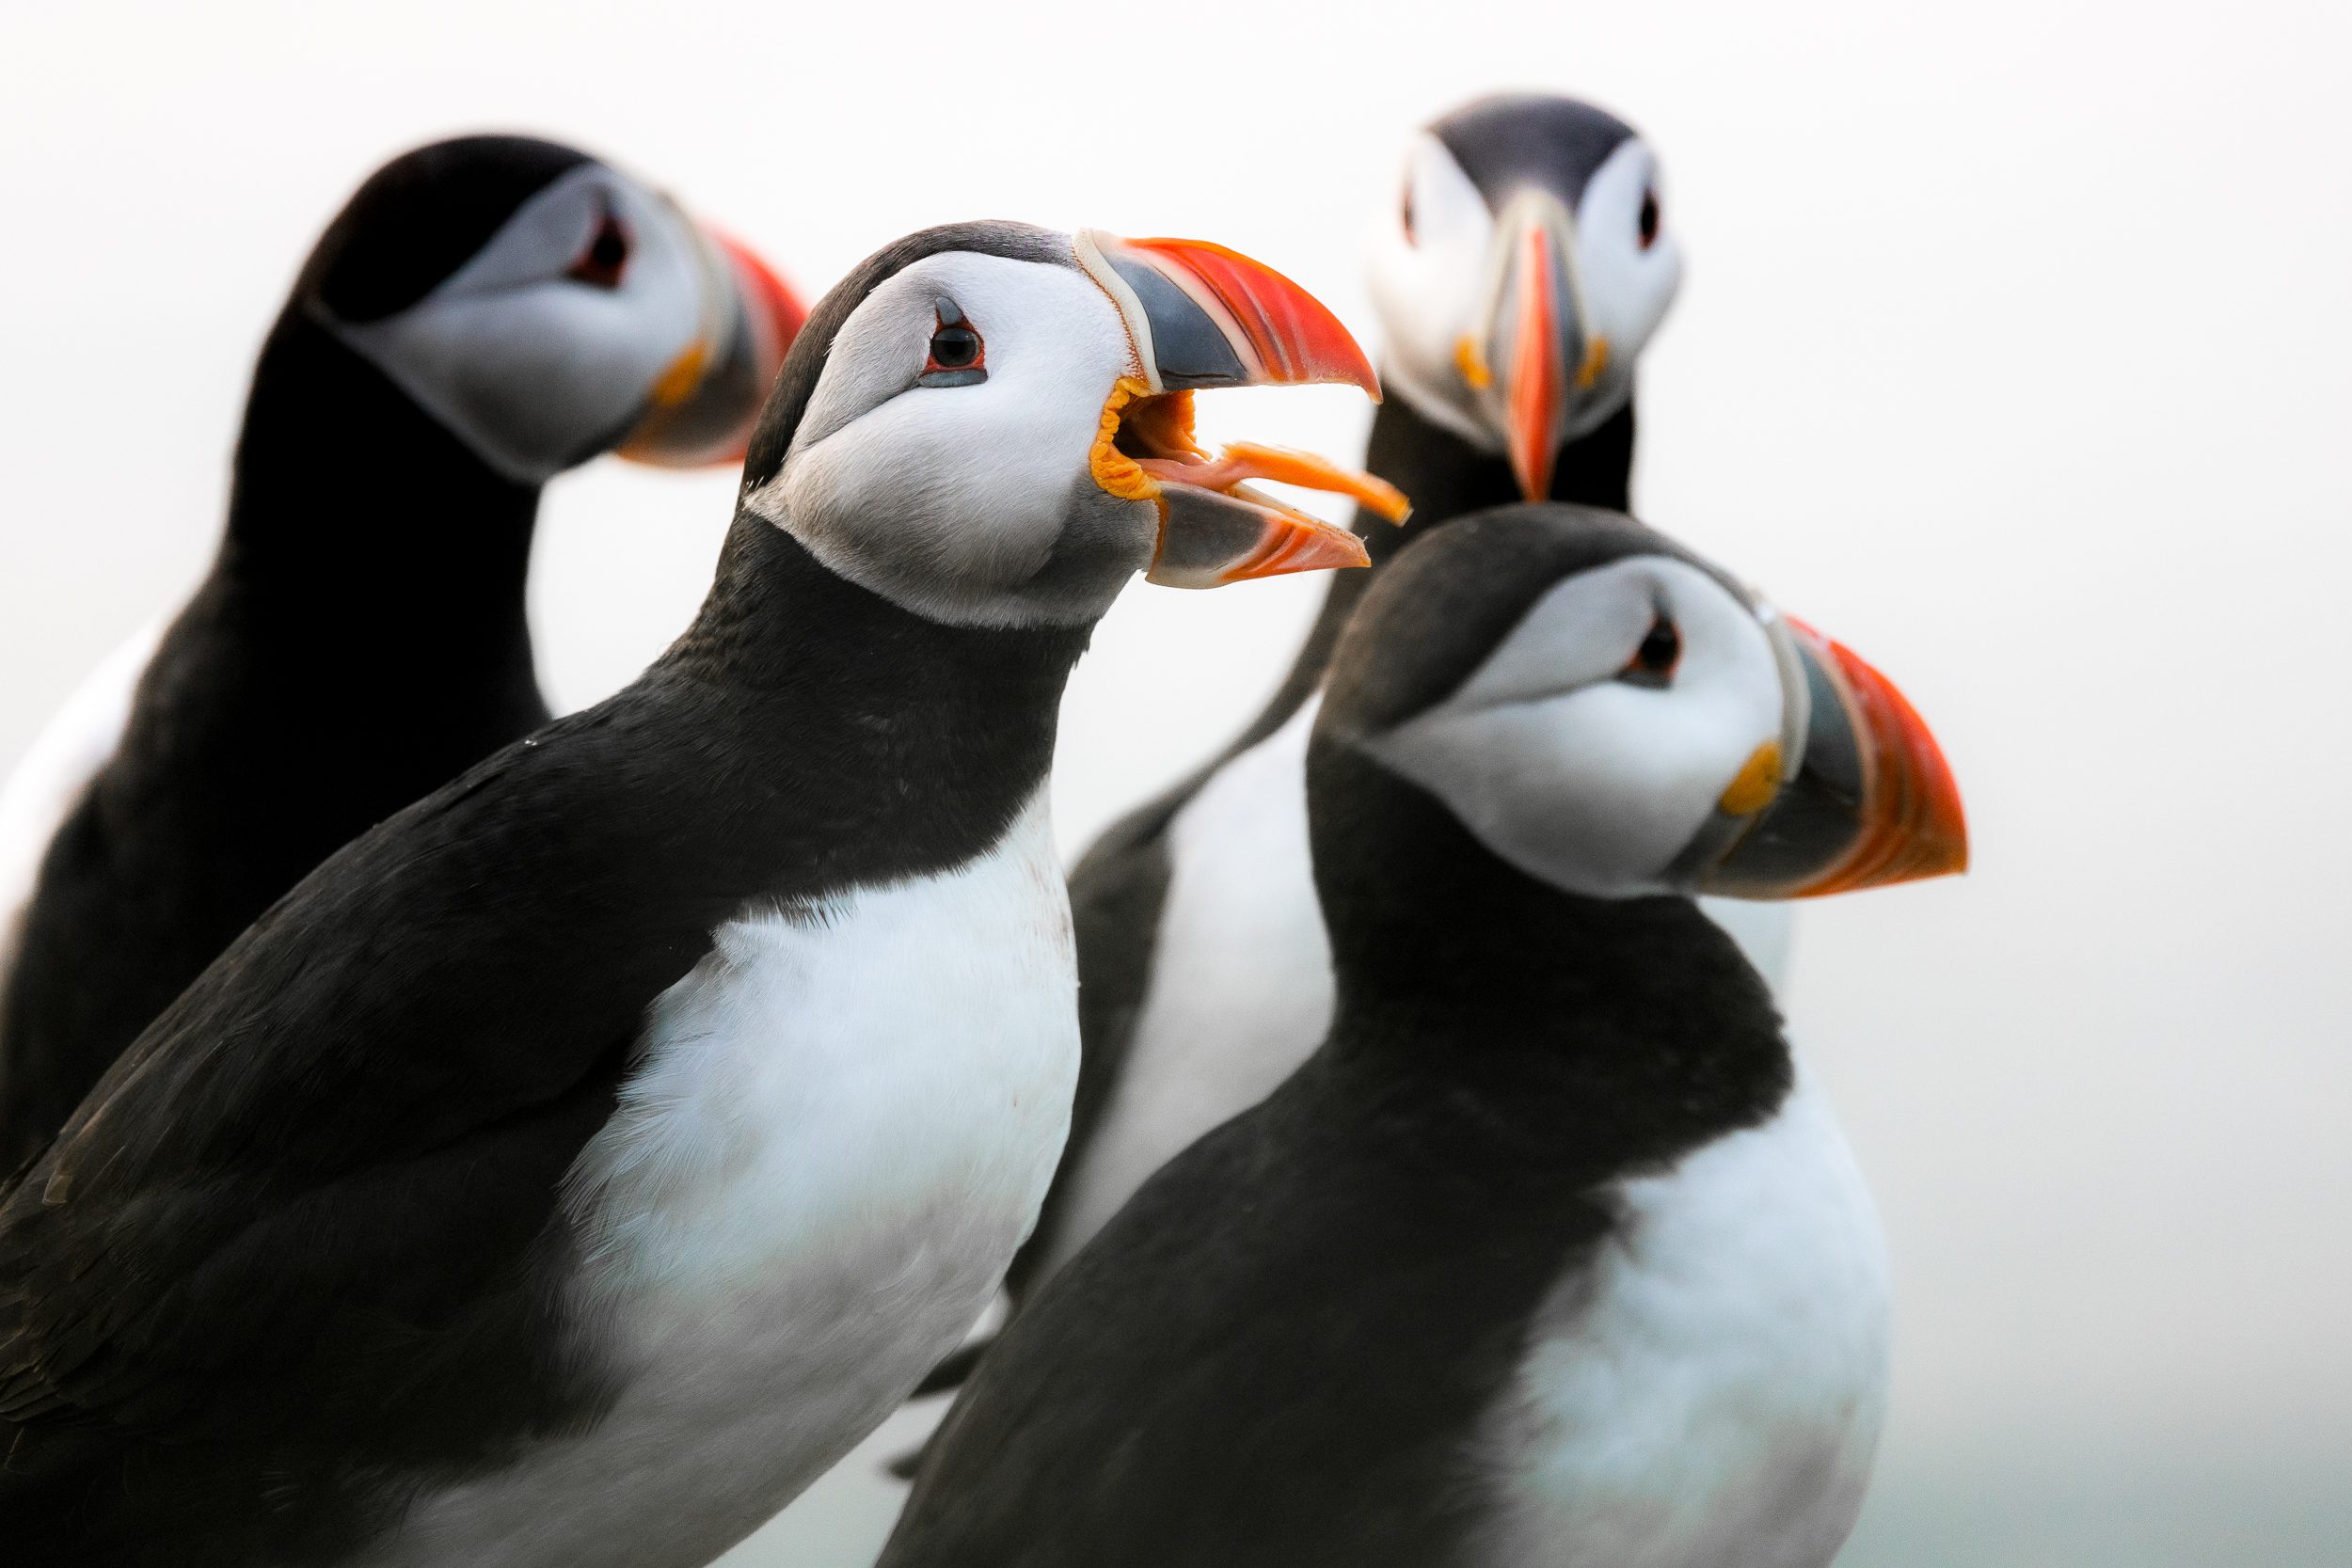
I’ve noticed that I much more frequently see puffins open their bills and stick out their tongues in the evenings, as if they are yawning.
Tip 6 – Prioritise Shutter Speed To Get Sharp Puffin Photographs!
When configuring your settings on your camera, you should do everything you can to prioritise shutter speed in order to get the best result when photographing puffins. You can do so by following this simple advice:
- Set your ISO to Auto. Setting your ISO to be dealt with automatically, means you don’t have to adjust it as light conditions change. On most cameras you can also set a maximum ISO when the ISO is set to Auto. However, I find myself shooting more frequently at extreme ISO’s as fixing noise in post-processing has become increasingly easy with tools such as Adobe AI Denoise and Topaz.
- Make sure your aperture is the largest it can possibly be. Allowing the maximum amount of light to enter the camera means that your ISO will be as low as possible considering the shutter speed. To clarify: a large aperture means a low aperture number! Having a large aperture also means you will have more shallow depth of field which results in more separation between the puffin and its surroundings.
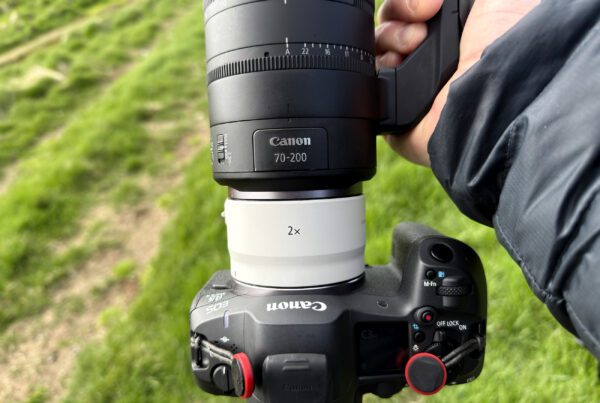
- Configure your shutter speed to at least 1/1000 and even higher if the puffin is moving fast. Almost all of my puffin photographs are shot at 1/1000. The only exception to this is when it gets too dark or, for example, when I am using a 2x extender which puts my aperture at F14.
When you configure your camera like this, the only thing you need to keep an eye on is whether the camera is exposing correctly. You can see that on the EV, the exposure value, as it will be fully centred (or zero).


This photograph was taken at ISO12800 and has been “cleaned up” using Adobe AI Denoise in Adobe Lightroom. Having this technology available today means that you can shoot at much higher ISO without having to worry about the outcome – providing the image is well exposed!
Let Me Know!
Did these puffin photography tips help you, did you know them already or do you have advice of your own to share on photographing puffins? Let me know in the comments!
Discover Jeroen’s Photo Workshops in Iceland, Greenland & Beyond
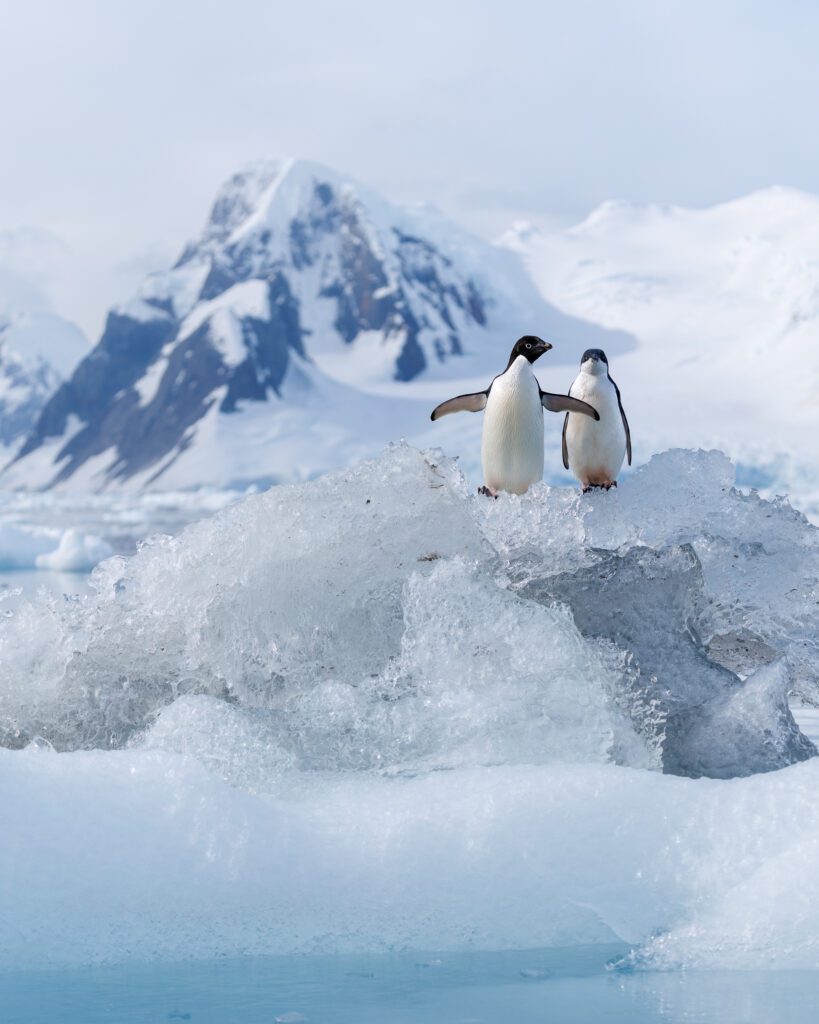
Ready to take your photography to the next level? Join me, Jeroen Van Nieuwenhove, on unforgettable photo workshops in Iceland, Greenland, Antarctica and other exciting destinations. Whether your passion is wildlife photography, bird photography, landscape adventures, or mastering drone photography, each workshop is designed to give you hands-on guidance in some of the world’s most spectacular locations.
From puffins in the midnight sun to Arctic foxes in the wild, from glaciers and volcanoes to dramatic coastlines seen by drone – these journeys are more than workshops; they’re once-in-a-lifetime experiences. Group sizes are kept small, ensuring personal mentoring and plenty of shooting opportunities.
Looking for something specific? Check out Jeroen’s…
- Wildlife & Bird Photography Workshops (Puffins, Arctic Foxes)
- Drone Photography Workshops
- Photo Workshops in Iceland
- Photo Workshops in Greenland
- Photo Workshops in Antarctica
Spots are limited – secure your place today!
Are You Looking For A Specific Photo Workshop?
All Upcoming Photography Workshops With Jeroen
Explore all upcoming photography workshops with Jeroen and take your skills to the next level in some of the world’s most extraordinary locations. From the volcanic landscapes of Iceland to the ice-filled fjords of Greenland and the wildlife-rich polar regions such as Antarctica, each workshop is designed to help you grow creatively while experiencing unforgettable moments in the field. Browse all upcoming departures below and find your next adventure!
LAST SPOT

OPEN FOR BOOKINGS
LAST SPOTS
OPEN FOR BOOKINGS
WAITLIST
WAITLIST
WAITLIST
WAITLIST

WAITLIST

WAITLIST
WAITLIST
Choosing the right photography workshop is about more than just visiting iconic locations. It’s about experience, safety, timing, and personal guidance. Below you’ll find honest reviews from photographers who have joined me on landscape, wildlife & drone photo workshops in Iceland, Greenland and other locations. These testimonials reflect real experiences in small groups, hands-on instruction in challenging conditions, and the level of care Jeroen aims to bring to every workshop.
These reviews are verifiable on Jeroen’s public Google Business profile.


")


")


Support Jeroen’s Work
As an independent photographer, Jeroen partially relies on your support to keep producing worthwhile content such as blogs, photographs, books and much more. If you want to support his work, it is possible to do so by buying his e-books & books or prints.
You can also sign up to the newsletter to stay up to date on new blog posts, projects, workshops and other interesting information.
Thank you for considering!


Very helpful tips & reminders, Jeroen. Thank you. I’m going to Skomer next June so I will re-read them before the trip:-)
Thanks! Enjoy Skomer! I hear it’s an amazing place 🙂