
I have to admit that I am a bit of a gadget nerd. I’m always on the lookout for new gadgets and tools that could simplify my photography life. One thing that I have always struggled with are L brackets. While they are a reliable tool, there are some shortcomings to them. For example, they limit the motion range of the fully articulating screen and also prevent access to the ports on the side of your camera. That’s why I was extremely intrigued when I discovered the ATOLL tripod collar – especially after reading it received a Red Dot design award. This new solution promises to replace your L bracket by solving those issues.
Can this be a good replacement for your L bracket? Let’s find out!
Full disclosure: Silence Corner provided me with an ATOLL to review. However, this is not a sponsored review. I am not being paid to write this review nor did Silence Corner get any input or preview. All opinions are my own.
A traditional L bracket does not always work well with a fully articulating screen. Additionally, access to the ports on the side tends to be more difficult.
The ATOLL has a unique design that solves a few of the downsides that a L bracket has by not obstructing the bottom and sides of the camera body.
What Is ATOLL?
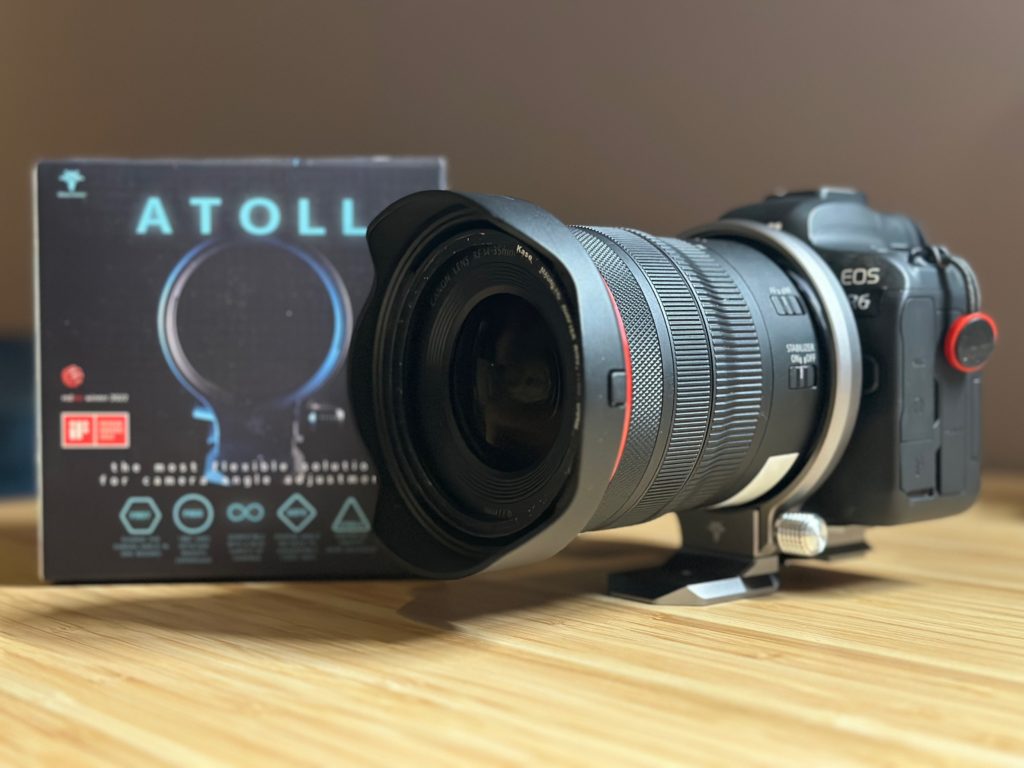
ATOLL is a type of tripod collar which is attached to your camera via a tripod plate. Attached to this tripod plate is a rotatable ring which sits in front of the lens mount and around the lens. This allows you to rotate the camera between landscape & portrait orientation without it ever detaching from your tripod.
There are different models to choose from, all of which have the same functionality. The difference lies in which camera brand they are compatible with. ATOLL Model S is compatible with Sony cameras, while ATOLL Model C is intended for Canon and ATOLL Model D is for other brands. You can find a full list of compatible cameras on Silence Corner’s website. It’s really important to check this list before buying so you don’t end up with an item that does not fit your camera.
For this review I used the ATOLL Model C as I use two Canon R6 camera bodies.
This animation, which can be found on Silence Corner’s website, shows really well how the ATOLL works.
How Does It Work?
The process to attach ATOLL to your camera is pretty straight forward:
- Detach your lens.
- Attach the ATOLL by the tripod plate to your camera using the included hex key.
- Use the included hex key to adjust the ring so it sits centred around the lens mount.
- Attach your lens again and it’s ready to use!
To use the ATOLL, you simply attach it to your tripod. Once attached, you can unlock the ring to rotate the camera between portrait and landscape orientation.
If you’re interested in a more complete installation guide, there is one available on Silence Corner’s website.
This video shows you how to install the ATOLL on your camera.
This video demonstrates some of the advantages of ATOLL against an L bracket.
Can It Replace My L Bracket?
For the ATOLL to replace my trusty L bracket, it has to improve on it without adding new limitations. Is that the case and will I use the ATOLL in favour of my L bracket?
Let’s break down what I like and don’t like about the ATOLL.
What I Like
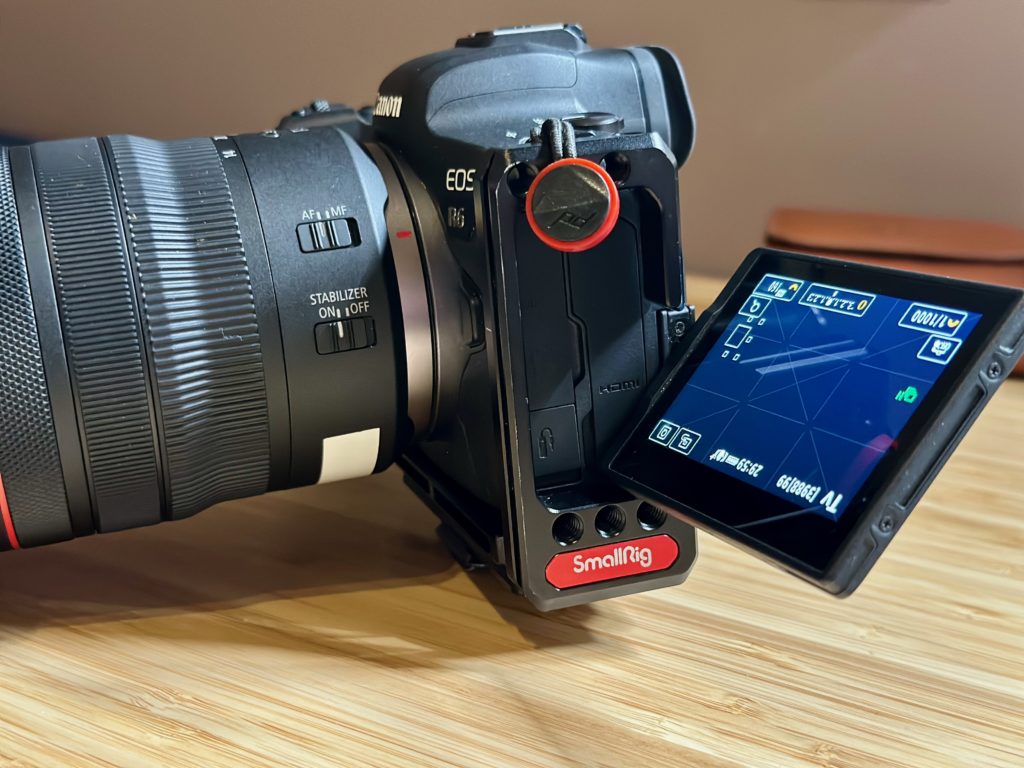
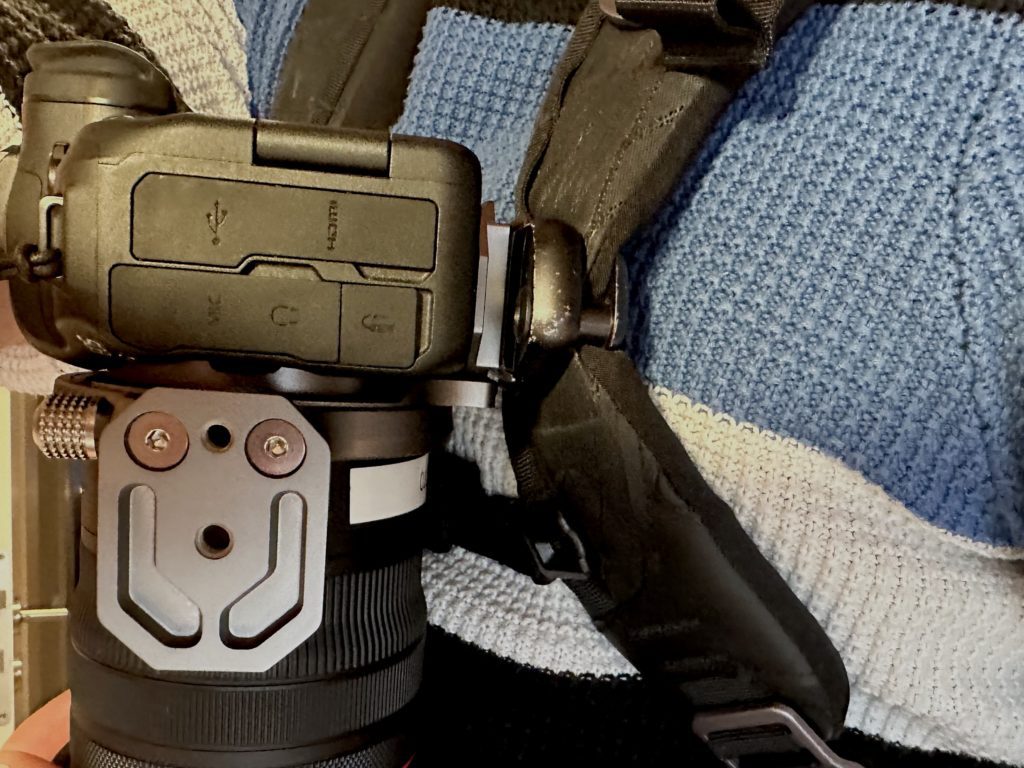
First off, you can use the fully articulating screen on your camera without any limitations as there is nothing stuck to the body aside from the tripod plate. Also, the battery door and ports on the side of your camera are fully accessible. These are the primary issues this tripod collar is designed to solve.
Secondly, it’s easy to change between a landscape & portrait orientation without losing your composition. This is because you turn the camera around the centre of your lens. You simply unlock the knob holding the ring in place and turn the camera. Additionally, there is a clicking mechanism which clicks at every 90 degree angle. If your tripod is levelled, it means you can very easily know that your camera is level after switching between portrait and landscape orientation. As you might have guessed, this also means you do not have to detach the camera from your tripod when changing orientation.
The tripod collar is very lightweight (108g) and weighs less than my current L bracket (a Smallrig). While the weight difference is minimal, it is noticeable when handling the camera.
Another advantage is for those who often use an inverted center column. With an L bracket, it’s only possible to keep the camera upside down on the tripod. However, with the ATOLL you can keep the camera in its normal orientation because you can rotate the camera 360 degrees within the ring.
Finally, the tripod plate of the ATOLL is fully compatible with the Peak Design Capture Clip. This is not the case with my L bracket where I am forced to attach a Peak Design Tripod Plate to the bottom, which means I can’t use the L bracket in a landscape orientation. I use the Capture Clip extensively while outdoors so it’s definitely an advantage of the ATOLL.
The ATOLL allows you to easily access the ports on the side, as well as use the flippy screen if you have one.
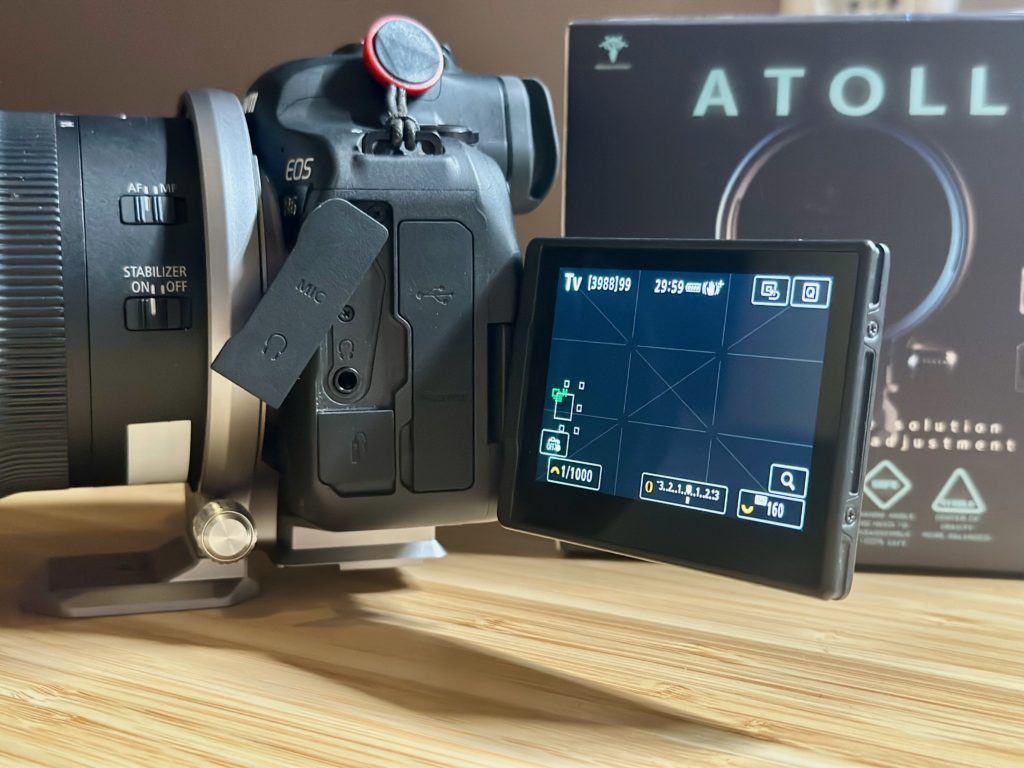
The ATOLL is fully compatible with the Peak Design Capture Clip.
What I don’t like
As this is a first generation product, there are bound to be some issues that need solving. While testing the ATOLL I encountered a few gripes that I need to point out.
Firstly, it’s very difficult to fully tighten the knob of the adjustment ring. While the knob is designed to provide extra grip, I find it’s too small and has to be tightened too far to fully lock the ring so there can not be any movement of the camera. On one occasion I even encountered additional stiffness when temperatures were below zero. Even though not leaving the adjustment ring fully locked doesn’t pose any issues if you clicked into a 90 degree angle, it does make it possible to accidentally change the ring so the camera is no longer level. Additionally, using the knob with gloves on has proven challenging – even with gloves that have removable fingertips (such as my Vallerret Hatchet photography gloves). I believe this could be improved by using a clamping lever to lock the ring rather than a knob to twist.
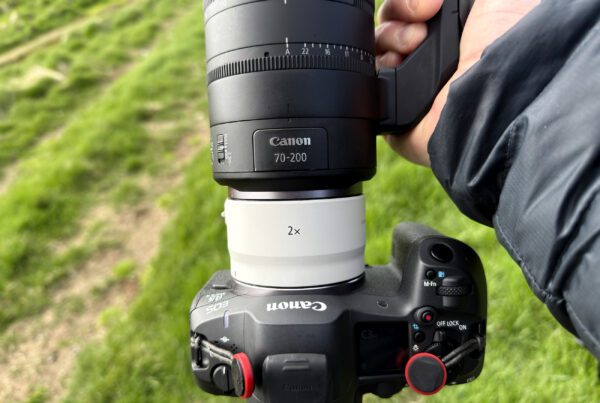
Another issue I encountered is that the adjustment ring makes it almost impossible to use the camera grip on my EOS R6. The ring sits too close to the grip so I can’t use all of my fingers to hold the camera. Again, this becomes even more challenging while wearing gloves. However, it’s worth nothing that this might not be an issue to you. For example: if you don’t really use your camera for handheld shots but mostly on a tripod or if you rarely wear thicker gloves.
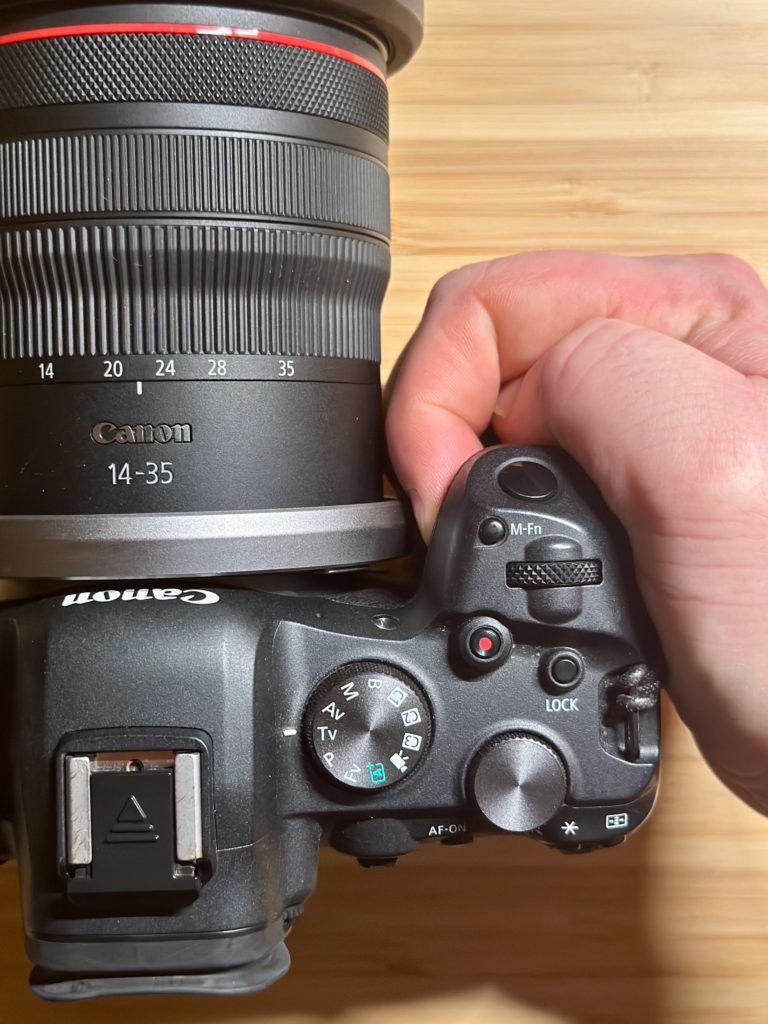
Holding the camera by the grip is more difficult because the ring sits very close to it and is quite wide.
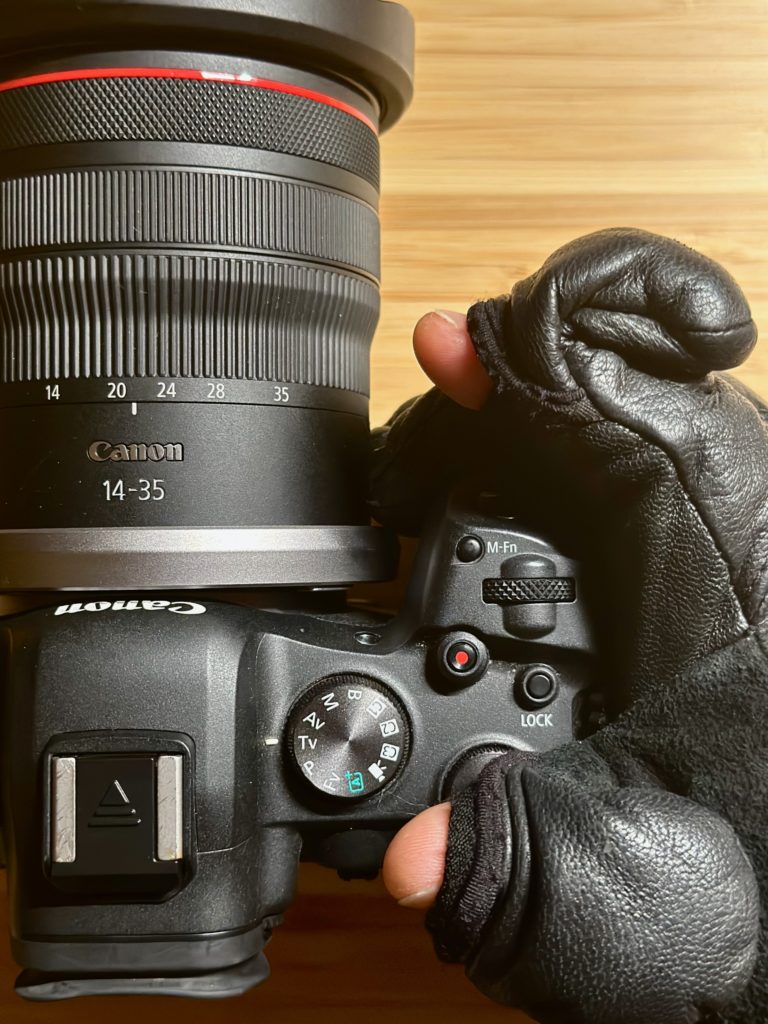
Using the camera grip with gloves on is pretty much out of the question. I can barely hold on to the grip because of the decreased space.
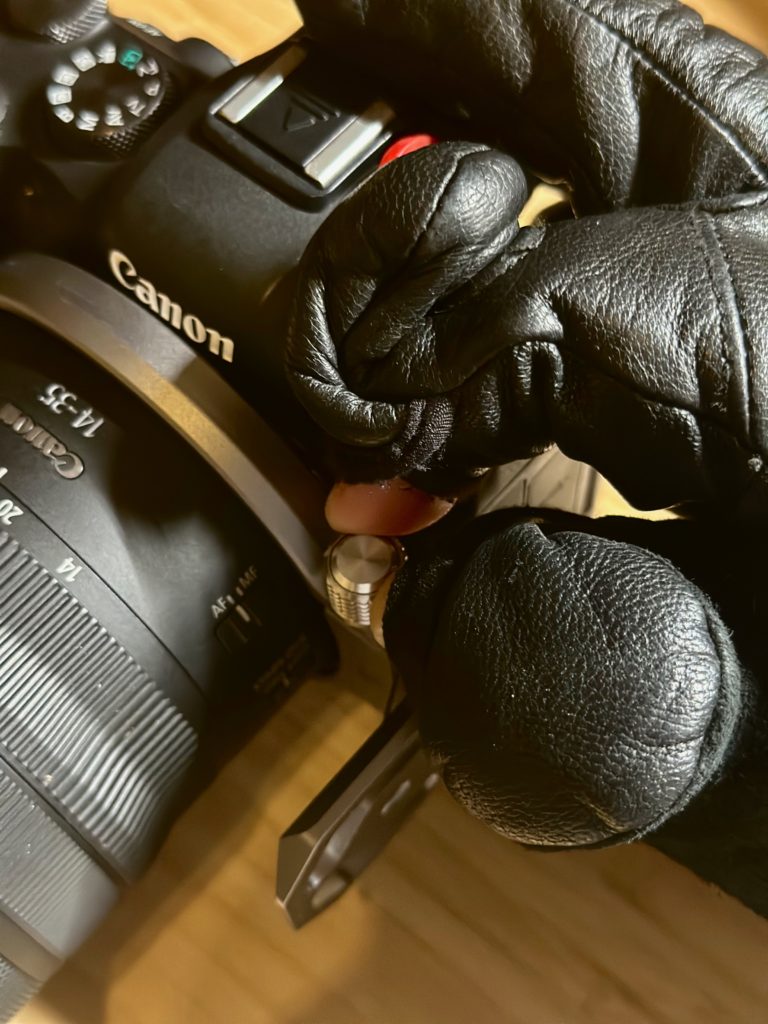
Turning the knob with gloves on is very difficult, especially because it needs to be tightened quite far. I would consider a clamp to lock and unlock the ring in a future model.
Because the adjustment’s ring size is limited by how close it sits against the camera grip, it could mean that lenses with a very large diameter might not fit inside the ring. There is a full compatibility list on Silence Corner’s website. Heavier lenses, such as a 100-500mm RF lens, should however always be used with their own tripod collars.
In some cases, the ring might also sit in front of the AF and IS buttons on your lens although you can adjust how close the ring sits to your camera body. On my camera body, the lens release button is partially covered but it can still be easily pressed when changing lenses. On crop sensor Canon R bodies, such as the R10 & R7, the ring might also sit in front of the focus switch in the front of the camera body.
If you’re the type of person who uses different camera brands, this might also not be the best solution for you as each model is specifically designed for specific camera bodies. Again, it’s highly advisable to read through the list of compatible gear.
Finally, the unique design of ATOLL means your camera body is much less protected than with an L bracket which reinforces your camera body. Again, this might not matter to you if you’re not the type of person who puts their gear through a lot of hardship.
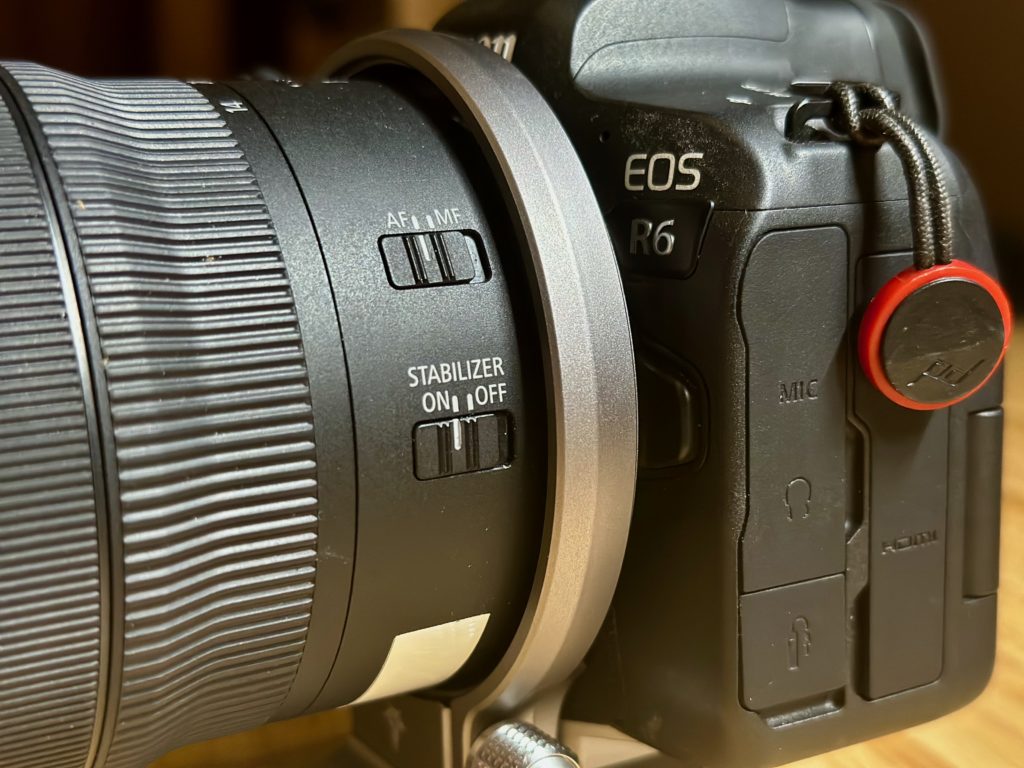
On this Canon 14-35mm I could position the ring so it does not sit in front of the buttons but that could be different for other lenses and bodies.
Conclusion
Will I be using the ATOLL with my own photography setup? The short answer is ‘no’. Living in Iceland means I am wearing gloves often when outdoors. The fact I can not easily use the adjustment knob or carry my camera by holding the camera grip while wearing gloves is a big turnoff for me. As a nature photographer I never want gear to sit in the way of usability and unfortunately I feel that is the case with ATOLL.
However, these issues might not be a problem to you if you rarely wear gloves or never photograph handheld (or have a camera with a larger grip).
I do look forward to seeing if there will be a version two of the ATOLL. The design concept is intriguing and I feel it could make a good product into a great product if the usability issues I encountered, such as replacing the knob with something more user-friendly, are addressed.
Pro’s
- Easy to switch between landscape & portrait orientation with nice clicking mechanism
- Easy access to ports & battery
- Works with the Peak Design Capture clip
- Very lightweight
- No need to detach the camera from the tripod
- Shooting with an inverted column is easier
Con’s
- Difficult to tighten the adjustment ring (especially with gloves)
- Difficult to hold the grip of the camera
- Doesn’t work with all lenses
- The ring might cover some buttons on your lens or body
- The camera is less protected than with an L bracket
Support Jeroen’s Work
As an independent photographer, Jeroen partially relies on your support to keep producing worthwhile content such as blogs, photographs, books and much more. If you want to support his work, it is possible to do so by buying his e-books & books or prints.
You can also sign up to the newsletter to stay up to date on new blog posts, projects, workshops and other interesting information.
Thank you for considering!


Great review! I was about to buy one, but the limitations you mentioned are huge for me since I use gloves often. I guess I’ll stick with my SmallRig cage…
Thanks David. I am currently testing a newer version, the ATOLL X which solves some of those issues. I will be publishing my review this month.
Thank you Jeroen for this review. Most of the drawbacks you mention are less of an issue with larger bodies such as the eos 5d.
Hi Marc, thanks for your reply! I appreciate it is less of an issue on larger bodies. However, with more and more people using smaller bodies I felt it was important to point out the difficulties I had. I believe if it would be possible to make the ring thinner without it losing strength, it would already solve some issues I had.