

Since DJI Mavic 4 Pro’s release day, about three months ago, I have almost non-stop tested this new flagship model in DJI’s Mavic line of drones. During my initial preview, I promised I would write a proper review on this new flagship prosumer drone and since then, I have flown the DJI Mavic 4 Pro over 2000 kilometers whilst taking almost 40.000 images with it on personal trips and photo workshops I hosted. That means I finally feel confident enough to share my unbiased opinion in this photography-focused review of the DJI Mavic 4 Pro. Grab a cup of coffee (or tea) and enjoy!
Disclaimer: This article is not sponsored in any way. However, when you make a purchase using the link in this article, I may earn a small commission.
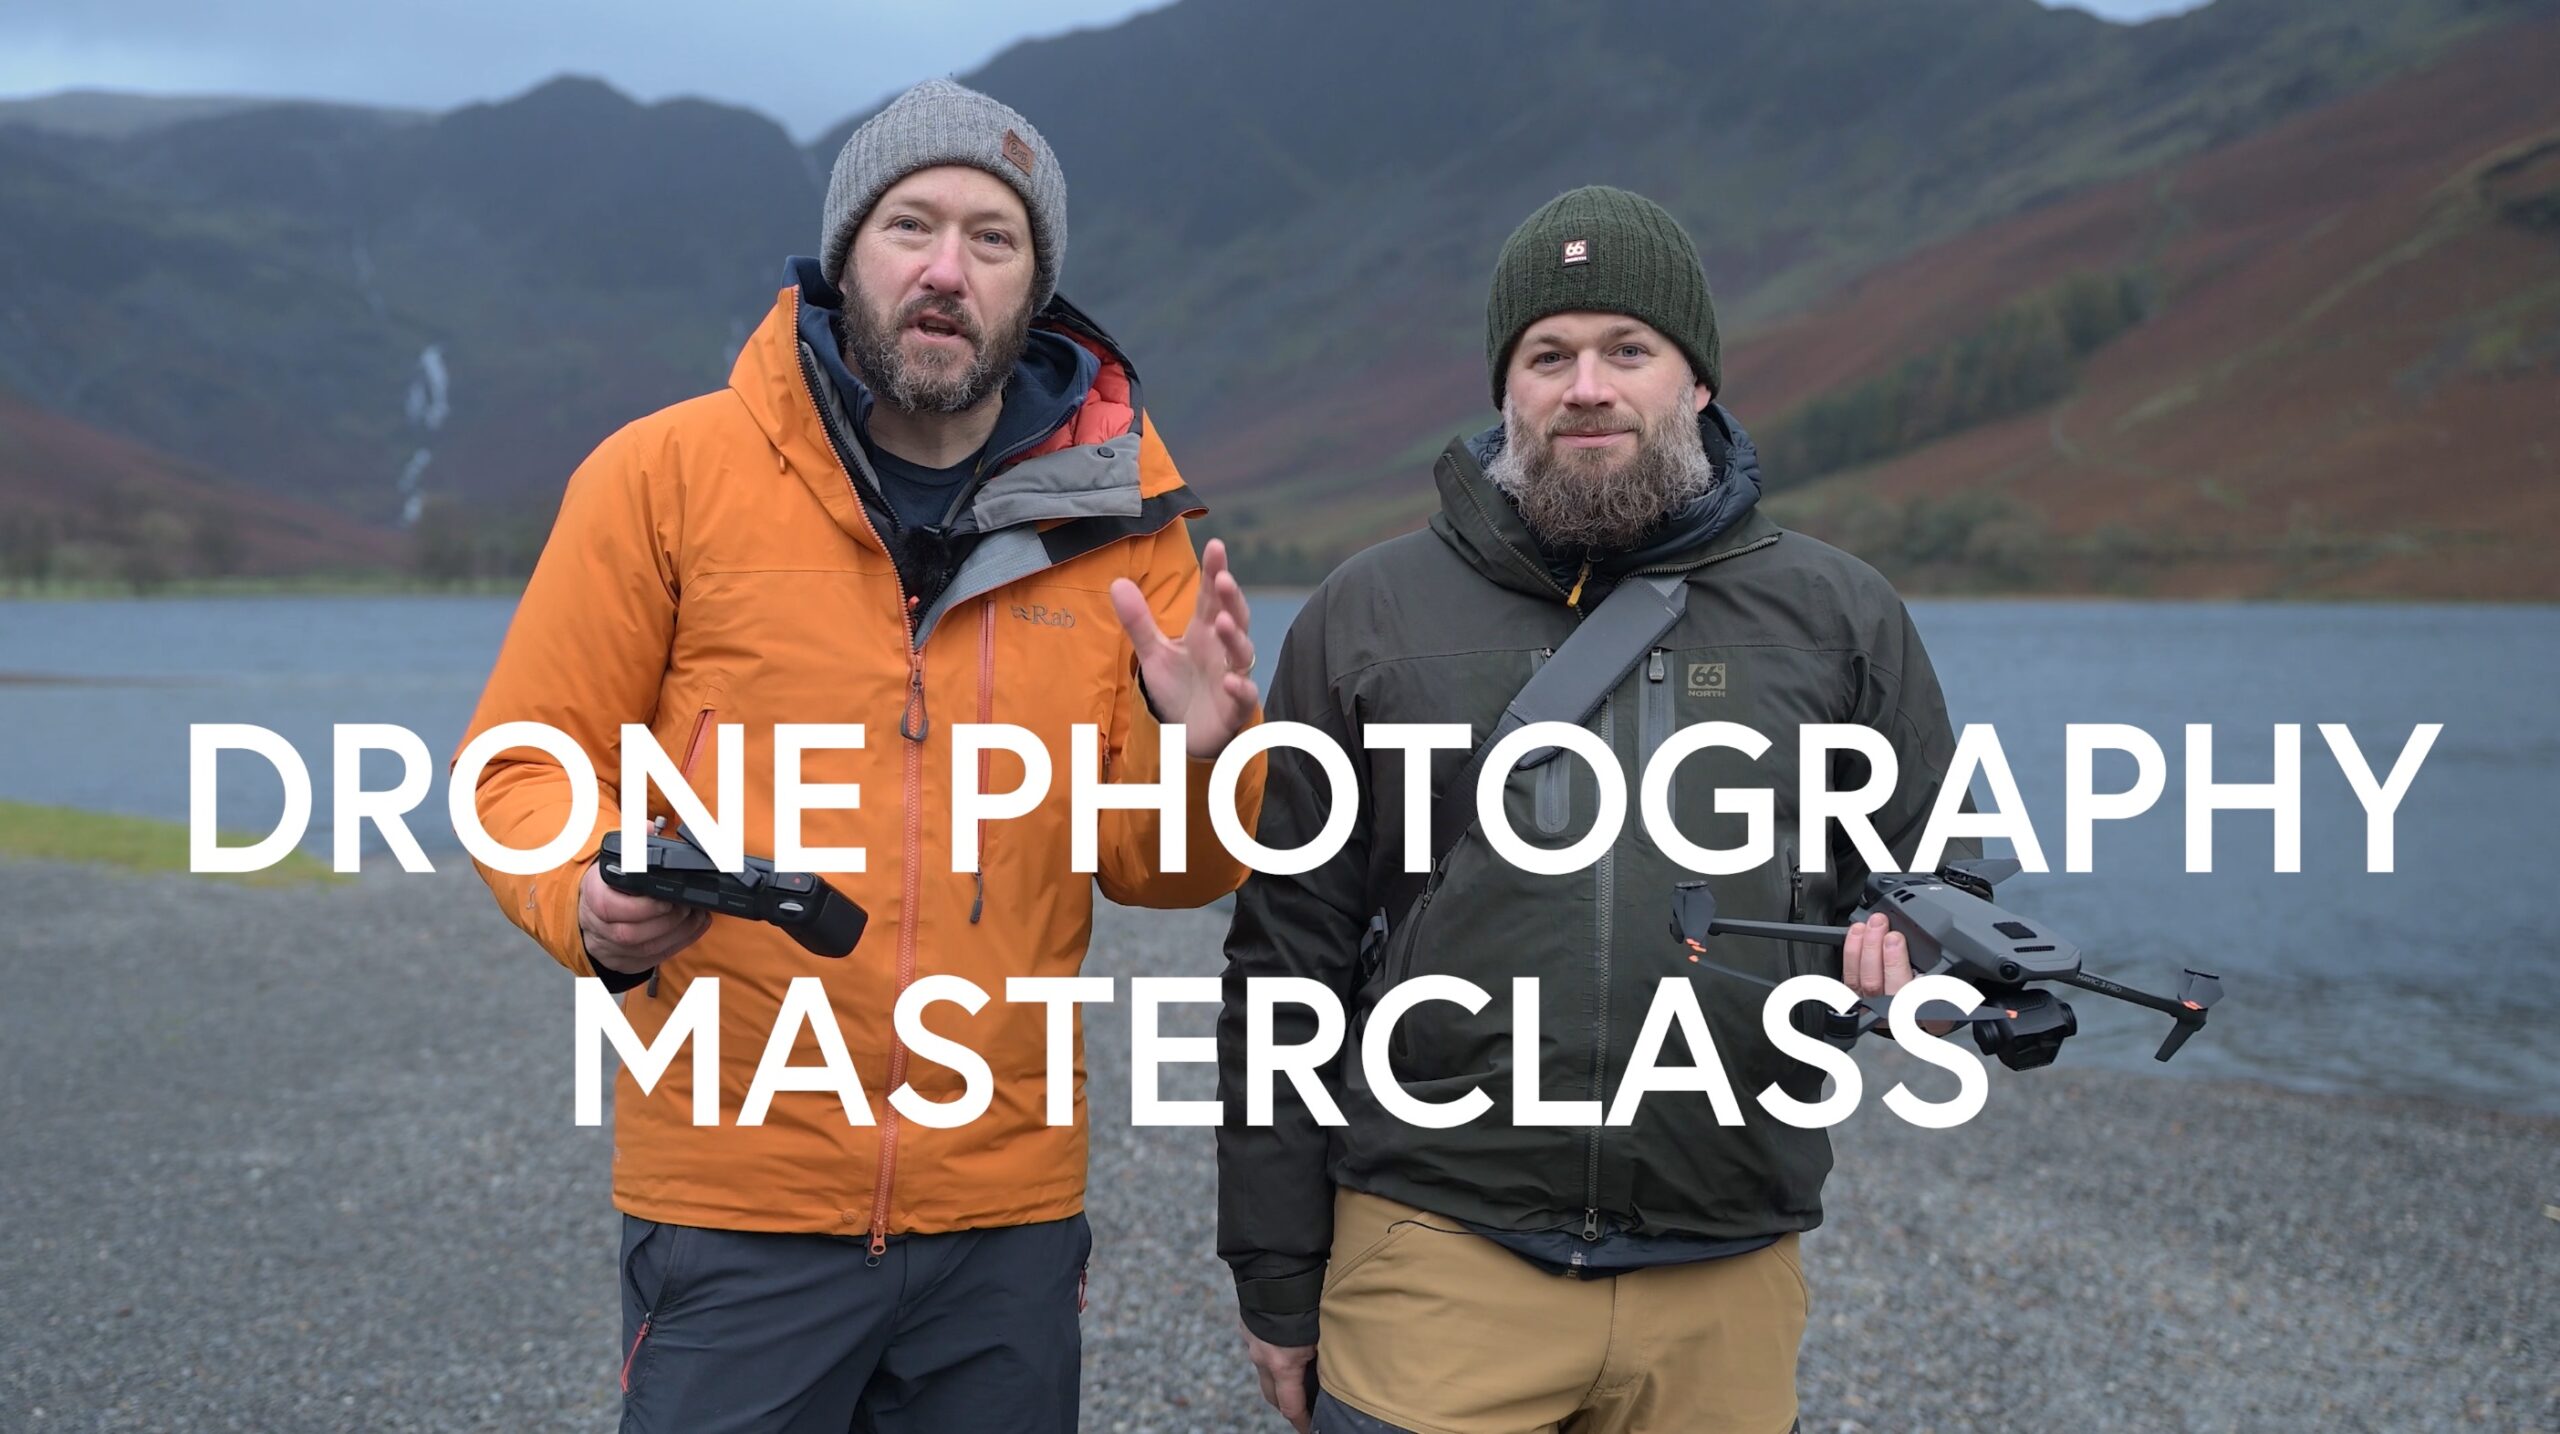
You can now get 30% off the Drone Photography Masterclass. Scroll down below to enjoy the offer!

I have put the Mavic 4 Pro through its paces during the last three months, taking it from one extreme to another. As a professional drone photographer, I push the limits of what I can do with the technology to produce great photographs.
How DJI Mavic 4 Pro Improves On Its Predecessor
Before I dive into the juicy details of my review, I want to get one thing out of the way first: the initial hate the Mavic 4 Pro received upon release has been wildly undeserving and unjustified. Many claimed the improvements were greatly exaggerated and that the overly positive views on Mavic 4 Pro were undeserving. I don’t agree with that vision at all. The DJI Mavic 4 Pro is, undoubtedly, the best drone on the market for photography. Is it perfect? No, it is not. But let’s be fair: what tool is perfect? To me, the better question to ask is: is it the best available tool on the market today for photographers? And in that case, the answer is undeniably “yes”. Mavic 4 Pro has brought many incremental upgrades to the table over its predecessor, almost all of which are welcomed to someone who is a professional drone photographer.
Mavic 4 Pro’s Stellar Image Quality
Let’s start off with the most obvious improvement on Mavic 4 Pro: the image quality. Given that the camera module houses 3 different cameras, it’s important to look at each one separately and how they improve (or don’t) over the DJI Mavic 3 Pro.
If you want to look at comparable RAW files between Mavic 4 Pro and Mavic 3 Pro, it is possible to do so in a separate blog which I published before.

DJI Mavic 4 Pro comes with another 3-camera powerhouse. While it looks similar, the sensors and image quality have largely changed for the better.
My Photography Workhorse: The 1x Wide-Angle Camera
The Mavic 4 Pro‘s 1x main camera, which I use to capture 95% of my photographs, has a massive improvement over the Mavic 3 Pro’s 1x camera. The 25 megapixel micro four thirds sensor, which now has an aspect ratio of 3:2, captures 14 bit RAW files as opposed to 12 bit RAW. This results in richer colors, which is something I immediately noticed when I began using the Mavic 4 Pro. To my eyes the files are so clean and crisp that for the first time I find that single images have become usable on their own for demanding photographers.
A big change has been the change to a tighter focal length on the Mavic 4 Pro’s main camera. The main camera now has a 28mm equivalent lens as opposed to the 24mm equivalent lens on Mavic 3 Pro. Some people have found that to be a very negative development but for a photographer like myself I have welcomed this change. Creating drone panoramas using this focal length has become considerably easier as there is less distortion at the edges of the frame.
Mavic 4 Pro’s extra 5 megapixels are not the only resolution upgrade as the sensor now has a quad-bayer layout which allows you to capture 100 megapixel images when desired – at the expense of dynamic range. When comparing an upscaled version of the 25 megapixel image with the 100 megapixel one, I don’t notice any visible difference but your mileage may vary of course.
Finally, one of the most obvious improvements with this new sensor is the improvements at higher ISO ranges. Especially from ISO 800 and upwards, there is a massive noticeable difference between the Mavic 4 Pro’s main camera and its predecessor. The improvement has made me dream of night time photography with a drone, which I feel says a lot.
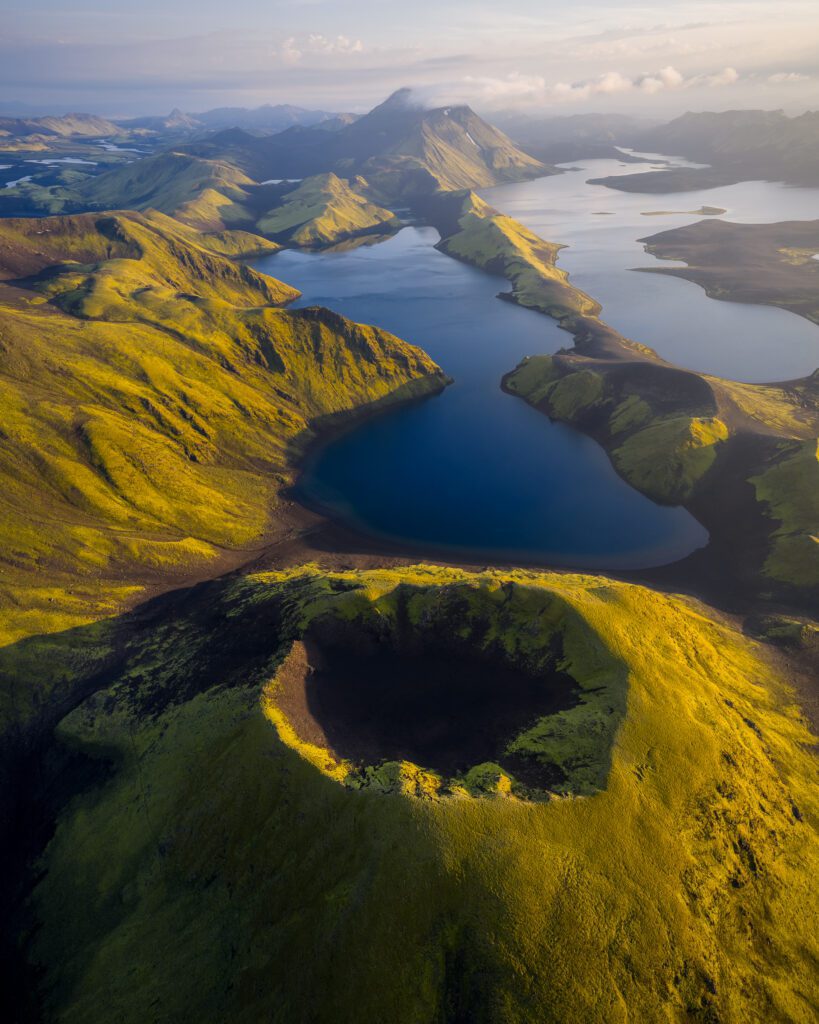
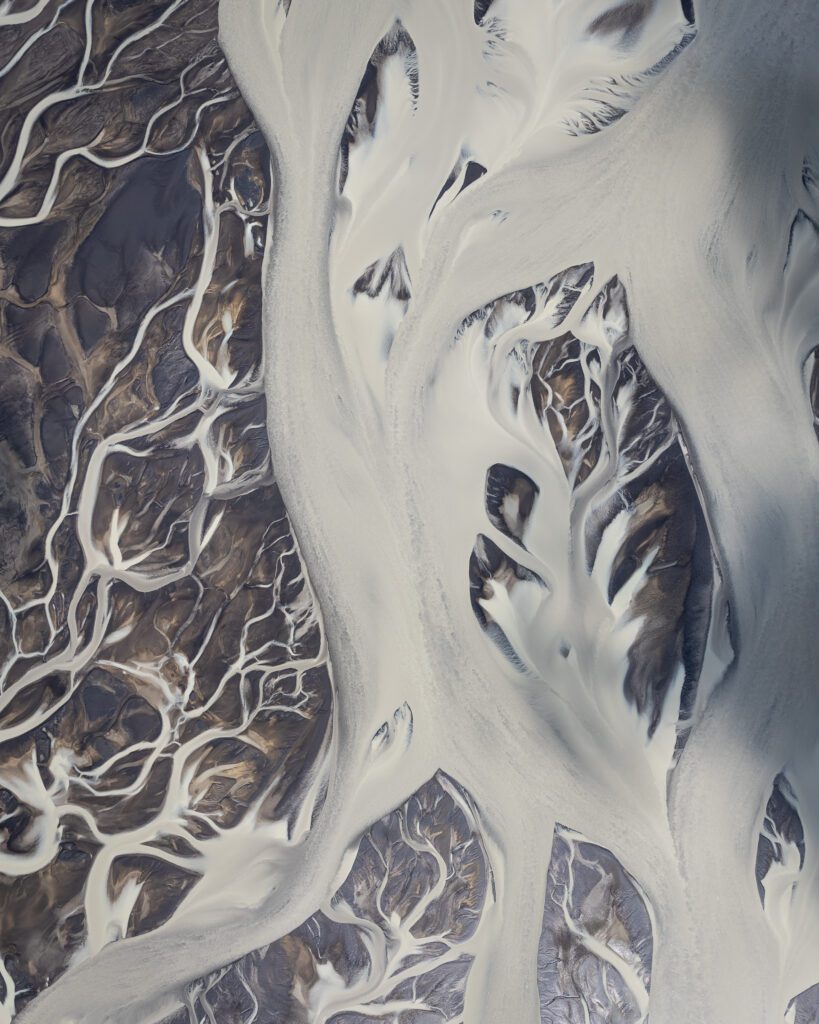
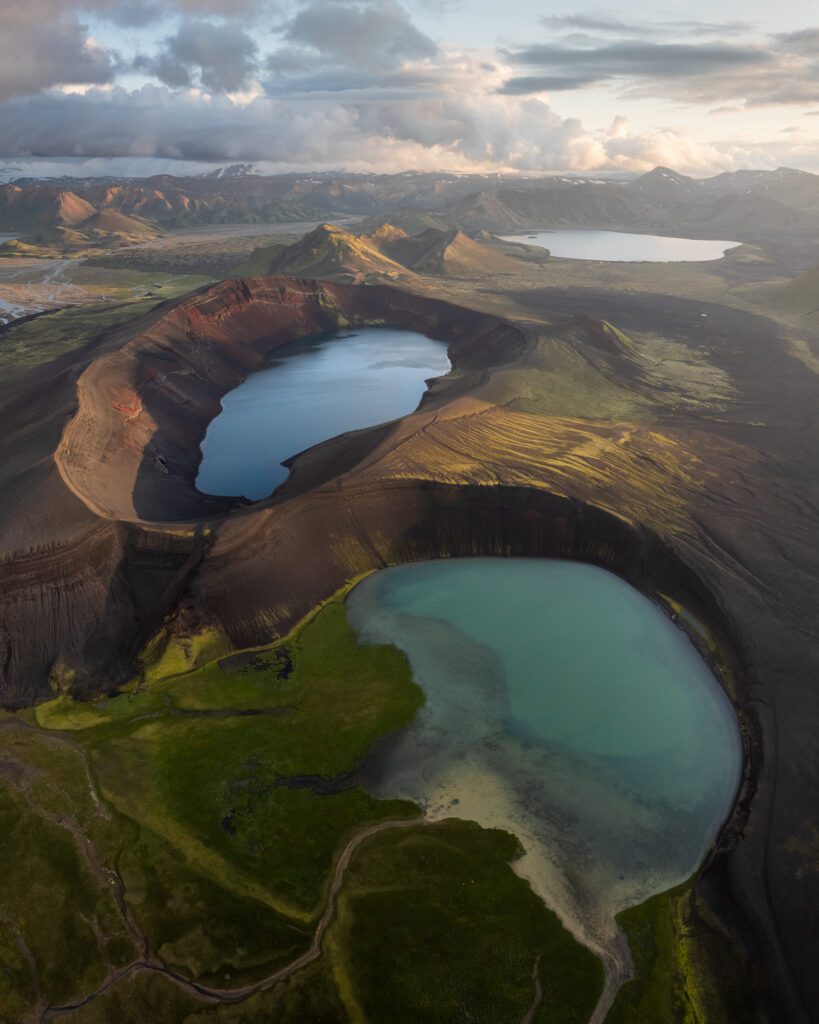
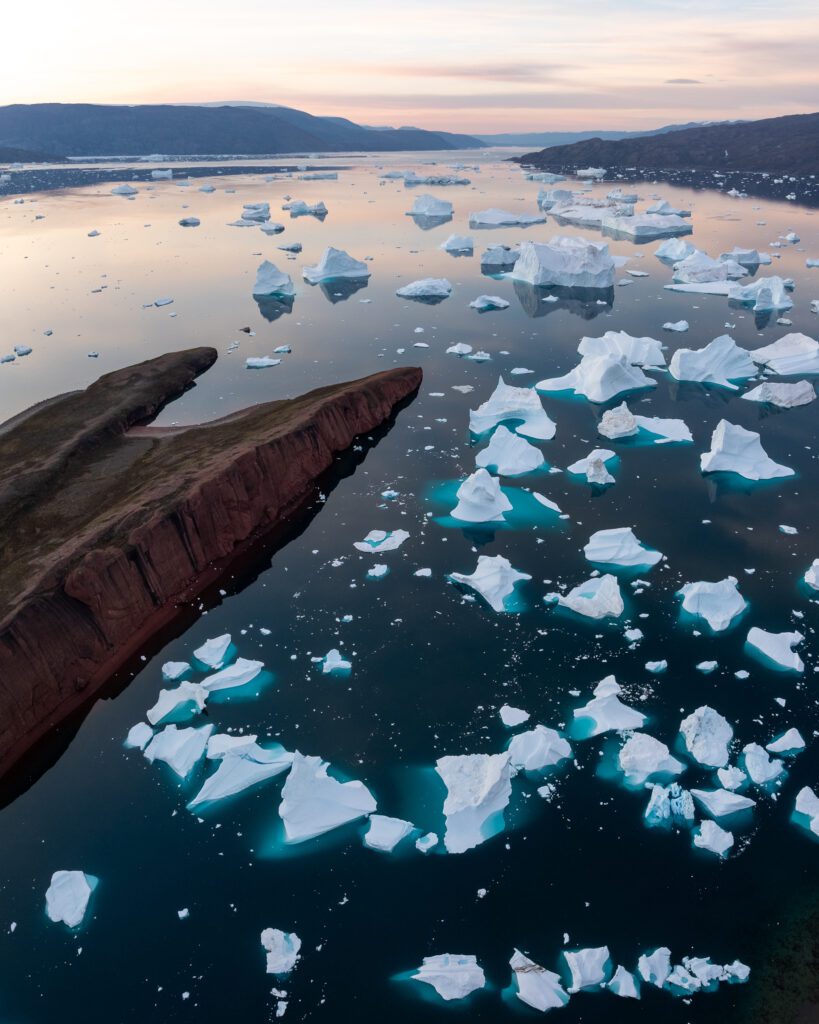
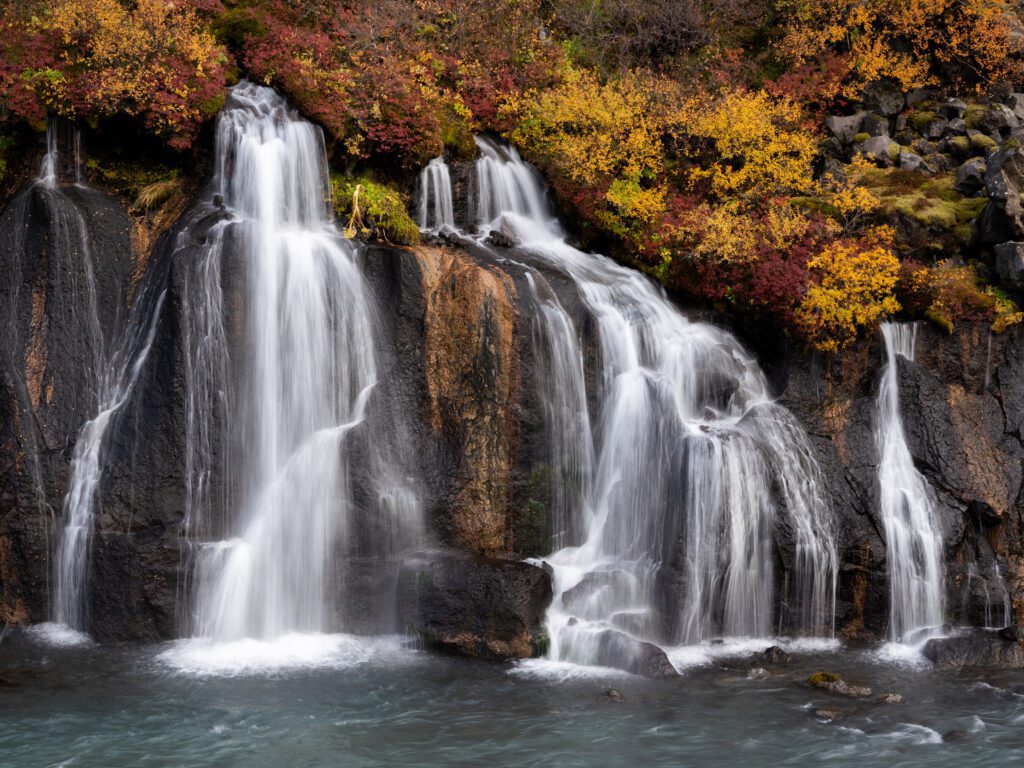
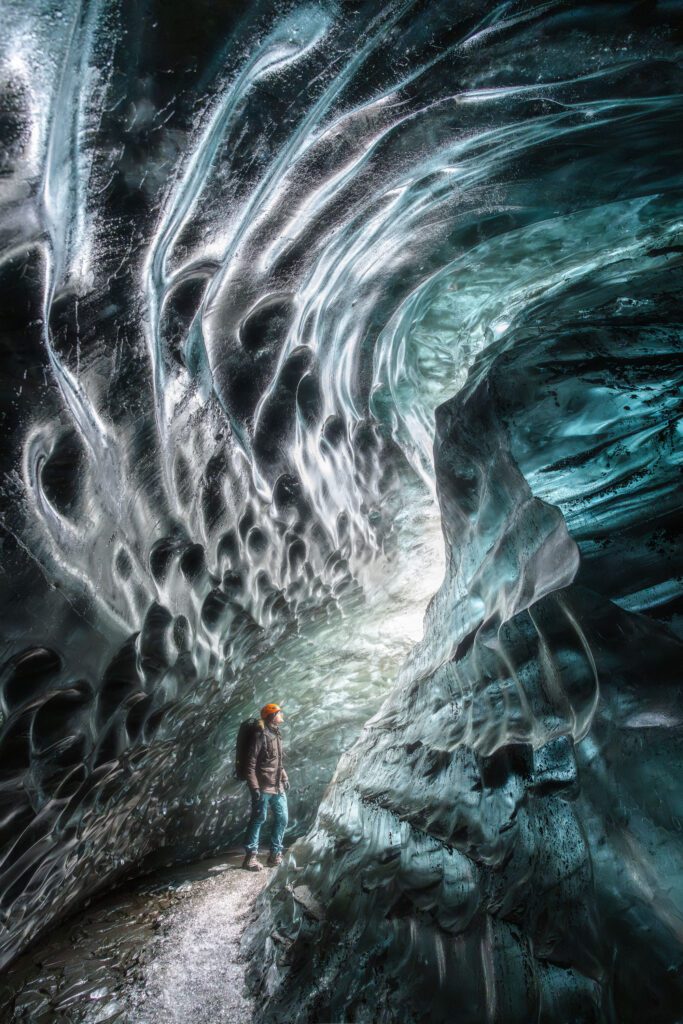
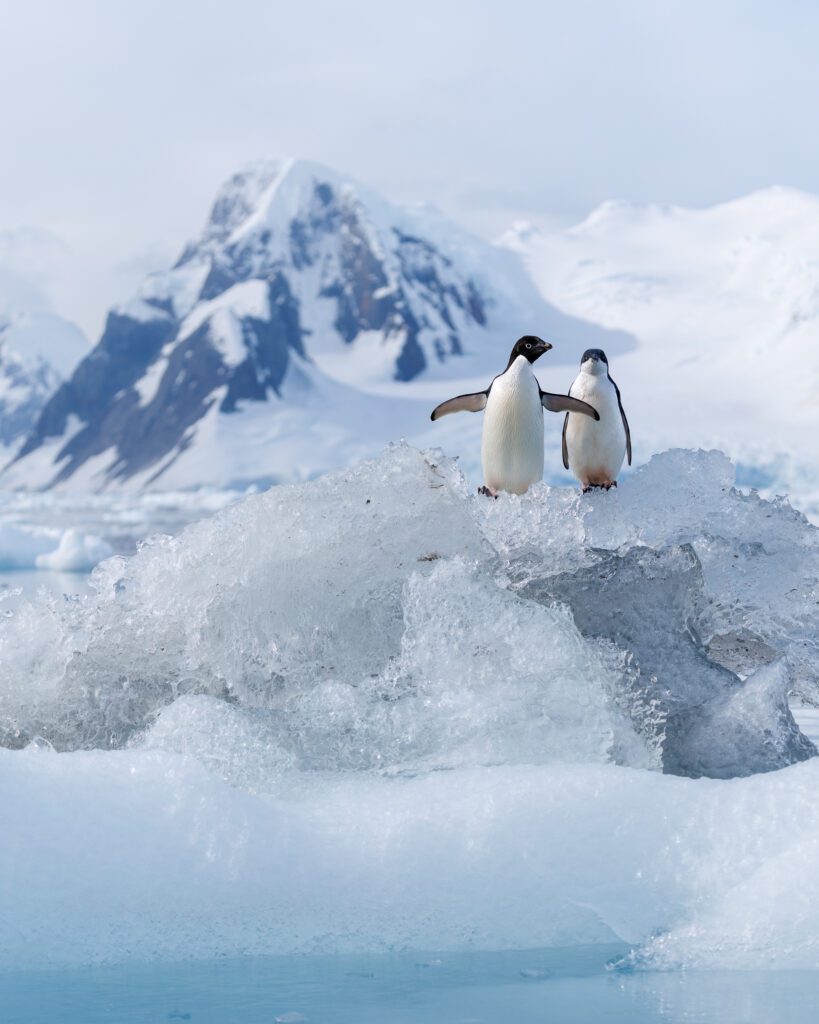
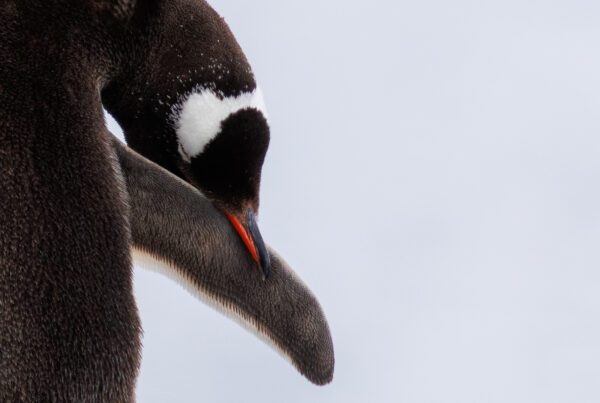
But, as always, I love to let my images speak for themselves. I have been able to produce images that I have been super excited about using the Mavic 4 Pro‘s wide-angle camera. I know us photographers love to get into the nitty gritty of the technology but, ultimately, it is about the final result first and foremost. Below are some of my images taken in the last few months with Mavic 4 Pro.


An Unchanged 2,5x Mid-Range Camera
The Mavic 4 Pro comes with a mid-range camera which is now a 2,5x zoom, as opposed to 3x, due to the change in focal length on Mavic 4 Pro’s main camera. The focal length is essentially the same (a 70mm equivalent) as before but that’s not the only thing that has remained the same. To me, there is no visible change in this camera whilst using it, which is further affirmed when looking at my RAW file comparison. The camera still produces a sharp 12 megapixel image, which can be increased to 48 megapixel when switching on the quad-bayer mode.
However, one improvement I did notice is that the focusing issues I experienced at the volcanic eruptions in Iceland, a big issue with the Mavic 3 Pro, are a thing of the past. While Mavic 4 Pro will still lose focus on occasion, it is possible to easily regain focus. With Mavic 3 Pro, you would not be able to regain focus at all until the drone had been switched off and on again. This seemed to be occur only with top down shots and near the volcanic eruptions I have been documenting. I know this is an incredibly niche issue but because it is not-so-niche to me, it is an improvement I welcome.

The image quality of Mavic 4 Pro‘s 2,5x camera remains unchanged, which isn’t necessarily a bad thing.
An Improved 6,5x Telephoto Camera
The Mavic 4 Pro’s telephoto camera is now a 6,5x lens, as opposed to 7x, and has the same focal length as before (168mm equivalent). However, it has seen some big improvements. While there is a very slight increase to 12,5 megapixels (50 megapixels in quad-bayer mode), the biggest improvement can be seen in the sharpness of the images produced. When I compared the 6,5x images on Mavic 4 Pro to its predecessor, the sharpness difference is night & day. However, I don’t tend to use this lens very much for photography as atmospheric haze becomes quite a big issue at this focal length but it works great for recording videos of erupting volcanoes or wildlife (to not disturb them).

Mavic 4 Pro‘s telephoto lens is excellent for photographing wildlife undisturbed. It allows you to keep plenty of distance and using the high resolution mode, you can crop in even more to give you that extra range.
It is also possible to use Mavic 4 Pro‘s telephoto lens to compress landscape elements and create compelling, unseen before, angles to familiar landscapes.
A Plethora Of Quality-of-Life Improvements On Mavic 4 Pro
While image quality is of course one of the most important aspects to photography gear, Mavic 4 Pro has many other smaller improvements that can help you achieve the best photography results. Below I outline some of the most noteworthy improvements that may look small on paper but have proven to actually be big upgrades in my view.
- The battery life combined with the increased flight speed is a gamechanger. The battery life is rated to be 51 minutes on Mavic 4 Pro and there is definitely a noticeable, yet small, difference. However, when you add that to the upgrades in flight speed, this actually turns into a massive advantage. In Normal mode, the Mavic 4 Pro is now able to fly at 18m/s and even 27m/s in Sport mode. This means that not only do you get more battery life, but you also get much more time at a shooting location because you are able to get there & back faster. I was flying together with people using fairly new Mavic 3 Pro’s this summer in numerous instances and this is a difference that really stood out. I was able to fly longer but also get to locations quicker with my Mavic 4 Pro. This in turn meant I had more time to figure out compositions and find new interesting angles.
- The Mavic 4 Pro’s transmission rate has also been upgraded to the new OcuSync 4+ which provides a more stable and smoother transmission. It also increases the range but I didn’t notice that much at all due to CE regulations limiting the transmission power. However, what I did notice, is that my transmission has been much more stable when flying with other drone pilots at the same time.
- A big improvement with Mavic 4 Pro is the DJI RC Pro 2, the brand new controller. Yes, it looks bulky but it is so much better than any other remote I have used that it easily justifies the higher price point of buying the Creator Edition. The new controller has a much brighter screen (up to 2000 nits) which makes the regular controller’s screen look as if it is broken. The screen is also bigger and sits closer to your face thanks to the unique folding design. Another big benefit is the new custom wheel button. By pressing the center button, you can cycle through which camera setting you want to adjust (aperture, shutter speed or ISO). Using the wheel around it, you can quickly change each setting. There are a lot of other, smaller, improvements too such as faster charging capabilities, quicker boot up time, a low power sleep mode and it can automatically fold down the control sticks. Overall, it is hard to go back to another controller after you have used the DJI RC Pro 2.

My favourite addition to the new DJI RC Pro 2 is the new wheel button that allows you to control all the manual camera settings without needing to touch the screen. It is most welcome to someone who mostly wears gloves when shooting outdoors.

The control sticks now also fold away when you fold down the screen so there is no need to remove them at all.
- The Mavic 4 Pro’s batteries now come in a battery dock as is the case with the Mini and Air series drones. However, the new dock has a big advantage which is that it can charge 3 batteries simultaneously using the proprietary 240W charging brick. Whilst I am not 100% sure how it exactly works, it seems like there is some “intelligent charging” going on where the battery dock aims to get batteries topped up to the same level before charging them all together. Charging 3 batteries at the same time is faster than charging one at a time using USB-C but not by a big margin. I do wish the USB-C port would just support 240W charging instead of 100W so I wouldn’t have to carry the heavy proprietary charging brick all the time.
- Finally, it is now possible to access the internal SSD and SD card without switching on the drone at all. You can just plug in a USB-C cable and access both storage devices easily from a computer or tablet. It’s a minor improvement but one that makes my life much easier when downloading files off my drone.
Where DJI Mavic 4 Could Be Improved
The Mavic 4 Pro is a great photography workhorse but, as I have mentioned before, no tool is perfect and the DJI Mavic 4 Pro is no exception to that. However, I do feel some of the shortcomings I have encountered also have to be put in perspective as some criticism has made them look much worse than they actually are.
The Mavic 4 Pro’s Infinity Gimbal Shortcomings
With Mavic 4 Pro, a new style of gimbal has been introduced which allows the gimbal to rotate 360 degrees around its axis horizontally. From a photography point of view, the ability to spin 360 degrees horizontally is useless but it can be fun for creating different styles of videos.
The biggest advantage of this new Infinity gimbal design is that the camera module can now rotate vertically, a feature that was previously only available on the Mini series and, if you go back several years, on the original Mavic and Mavic 2 Zoom. I welcome that we can shoot vertical now but it comes with a limitation which does not exist on the DJI Mini series.
Because of the Mavic 4 Pro‘s Infinity gimbal design, the tilt angle in vertical mode is extremely limited. Most often, the tilt range will be limited to about 20-30 degrees and is depending on the angle of the drone. That means that on windy days, you can have access to a different range of tilt than on still days due to the tilt of the drone itself. In some instances, I have been able to work around this limitation by flying backwards into the wind while keeping the gimbal tilt wheel down. As soon as you make the drone stop, it will briefly tilt forward to brake, which allows you to shoot further down. The limited vertical tilt range is not always a problem but for my style of photography, it is not ideal as I tend to accentuate foregrounds a lot more than I am able to with Mavic 4 Pro’s vertical mode.
Another problem I have noticed is that if the Mavic 4 Pro takes off in windy conditions, the gimbal seems to not always be able to keep the horizon straight. This doesn’t always happen and I have not been able to find a way to solidly reproduce this issue. However, one way to fix that is by rotating gimbal using the horizontal rotation slider (360 degree gimbal feature) and then reseting it to zero degrees again. This issue may be something that is software related but at the time of writing, no fix has been presented.
Finally, a problem that was also present on Mavic 3 Pro is that the gimbal sometimes gets knocked upwards in windy situation. However, this only occurs when looking straight down and then moving forward or backward. It does feel like the gimbal motors are not strong enough to handle all kinds of windy situations but this is speculation on my part.
Overall, the Mavic 4 Pro‘s new gimbal design is an improvement over Mavic 3 Pro but for photography, it isn’t that ideal and I wonder how much longer the 360 spinning videos will remain relevant compared to vertically-oriented photography.

The Mavic 4 Pro‘s gimbal can now turn vertically so it is possible to take true vertical images. However, there are several limitations that are less than ideal for photographers who capture a lot of vertical shots.

Even though the vertical tilt angle is limited, it has been super welcome to have a screen that also turns vertically. I have used it on many occasions to explain workshop participants what kind of drone panorama I am trying to capture as it is perfect to visualize the end result.
A Few Other Things To Consider
There are a few other things to consider, which may or may not be downsides to you. For me, most of these are not downsides but rather things you should be aware of when considering buying a Mavic 4 Pro.
- Mavic 4 Pro is considerably heavier and weighs 1063 grams, which is almost 200 grams heavier than its predecessor. The batteries however are very similar in weight. This means Mavic 4 Pro is a C2 drone which may require you to have more licensing to fly it in all conditions. The Mavic 4 Pro is also considerably chunkier than Mavic 3 Pro which means you may need more space in your bag to carry it around.
- Mavic 4 Pro is DJI’s most expensive prosumer drone available today. At roughly 3400 USD for a Fly More combo, it isn’t cheap. However, considering the market it is aimed at, it isn’t too expensive either.
- I often take off by hand and one of the things I have noticed is that the back motors of the drone tend to lift off sooner than the front ones by about a second. While this is only a problem in specific situations, I feel it is important to point out. On one occasion, the drone began lifting but then almost tipped forward due to a sudden wind gust. This may, again, be just a quirk in the software that needs ironing out.
- Hand takeoff with the DJI RC Pro 2 has become a bit more difficult because of the screen being away from the actual controls. I sort of circumvent this by holding on the screen during takeoff and then quickly changing over to the controls when it begins to hover but it is less than ideal. However, I do feel some software tweaks could make this easier by, for example, allowing a button to initiate takeoff. That way you can keep your hand on/near the control sticks.
- When shooting directly into the sun, ugly lens flares & discoloration still remain a problem. This is an issue that has always been there on any small camera system and I am unsure whether this can actually be fixed. I tend to keep the sun out of my frames, or compose my image in such a way that sun flares are not a problem.
- While the Ciné version of Mavic 3 Pro had a 1TB SSD built-in, the Mavic 4 Pro’s Creator version only has a 512GB SSD built-in. After some testing, it also seems like the Mavic 4 Pro has a slower SSD. The Creator version also does not have ProRes video support, which is good to know but irrelevant for photography.

The new DJI RC Pro 2 is considerably thicker and bulkier than its predecessor. However, this is such a minor downside compared to all the improvements it brings.

Despite the downsides, I have been able to capture superb images with my Mavic 4 Pro under all kinds of conditions, which is ultimately what matters most to me.
Software Improvements To Turn Mavic 4 Pro Into A Photography Powerhouse
Before I wrap up this Mavic 4 Pro review, I want to share a few suggestions for software changes I think could really level up and improve the photography side of drones. I am sure it is a long-shot that someone in the product team of DJI would read this, but I will share them anyway.
- Now that all of the cameras on Mavic 4 Pro support high resolution modes, it would be great to have a quick toggle, or visible indicator, on the screen when flying to show which resolution you are shooting in. More than once I have captured images at 100 megapixel unintentionally because I forgot to switch it off beforehand. The only way to switch between moves is by going into the camera menu. A quick toggle or indicator would be a massive quality-of-life improvement.
- As mentioned before, it would be super helpful to have a way to initiate the takeoff procedure from the controller one-handed so it is easier to hand launch with the new DJI RC Pro 2.
- Mavic 4 Pro’s that have an internal SSD and an SD card should be able to mirror images to both storage media. This could be a great way to make sure you have a backup on your drone of all your SD card footage or vice versa. It would even be great if the RAW files could be transmitted whilst flying and stored on the controller’s micro SD card. If videos can be cached wirelessly, why can’t photos?
- While Mavic 4 Pro now supports 7-shot brackets in AEB mode, it would be a big improvement if we could select how wide the bracket should be or even how many stops in-between there should be. Right now, the drone captures images with .7 EV increments which cannot be changed.
- Capturing brackets using AEB mode tends to be slow and I wonder if that is because it is merging the brackets together as previews in the software. It would be a game-changer if you could capture the brackets and disable any kind of processing it does afterwards. All us photographers need are the RAW files.
These are just a few suggestions that came to mind when using the Mavic 4 Pro intensely over the last 3 months. They seem like quick wins that bring a lot of quality-of-life improvement.

This summer I have been able to visit some bucket list locations and I was very happy to have such a powerhouse at my disposal to capture them.

Mavic 4 Pro has proven itself in even the faintest of light and I can’t wait to use it when the darkness of winter is finally upon us again here in Iceland.
Mavic 4 Pro Is A Photography Beast
As you can probably tell, I am a very happy photographer with my Mavic 4 Pro. It isn’t the best camera I own but it can do something that all my other cameras can’t: fly & shoot from any angle I can think of. That makes it the best camera I own for its purpose. Even though there are a few shortcomings, there is currently no better prosumer drone on the market for photographers.
Compare The RAW Files Of Mavic 3 Pro With Mavic 4 Pro
I have now also published a new blog containing my findings when comparing the RAW files of Mavic 4 Pro & Mavic 3 Pro. You can download the files yourself and check them out!
DJI Mavic 4 Pro: The Important Specifications
Technical Specifications
- Battery life: rated up to 51 minutes
- EU Drone Class: C2
- Weight: 1063 gram
- Transmission technology: OcuSync 4+
- Maximum video transmission range: 30 km (FCC) – 15 km (CE/SRRC/MIC)
- Obstacle avoidance: Omni-directional obstacle avoidance with front-facing LiDAR (works in 0.1 lux darkness)
- Maximum altitude at takeoff: 6000 meter
- Maximum wind resistance speed: 12 m/s
- Maximum horizontal speed (at sea level): 25 m/s (Sport mode) & 18 m/s (Normal mode)
The Main Wide-Angle Camera (1x)
- A new Micro Four Thirds CMOS sensor that has 25 megapixels (100 megapixels with quad-bayer technology)
- A 28mm-equivalent on full frame (less wide than on the DJI Mavic 3 Pro)
- A variable aperture of F2.0 up to F11
- Video capabilities up to 6K resolution at 60fps in HDR – with great dynamic range
- Slow-motion video capabilities up to 4K at 120fps
- The same color profiles as in the past: D-LOG, D-LOG M & HLG
The Mid-Range Telephoto Camera (2.5x)
- A new 1/1.3″ CMOS sensor with a 12 megapixels resolution (48 megapixels with quad-bayer technology)
- A 70mm-equivalent on full frame (roughly the same as the DJI Mavic 3 Pro)
- A fixed aperture of F2.8
- Video capabilities up to 4K at 60fps in HDR – with great dynamic range
- Slow-motion video capabilities up to 4K at 120fps
- The same color profiles as in the past: D-LOG, D-LOG M & HLG
The Long-Range Telephoto Camera (6x)
- A new 1/1.5″ CMOS sensor with a 12.5 megapixels resolution (50 megapixels with quad-bayer technology)
- A 168mm-equivalent on full frame (roughly the same as the DJI Mavic 3 Pro)
- A fixed aperture of F2.8
- Video capabilities up to 4K at 60fps in HDR – with great dynamic range
- Slow-motion video capabilities up to 4K at 100fps
- The same color profiles as in the past: D-LOG, D-LOG M & HLG
A full list of all the specifications can be found on DJI’s website.
Affordable Alternatives
If you are looking at alternatives to the DJI Mavic 4 Pro, I can point you into the direction of my updated drone buyer’s guide. If you are considering upgrading from an older model, you may also be able to get some great deals on second-hand Mavic 3 series drones or others.
GET 30% DISCOUNT NOW!
The Drone Photography Masterclass
Nigel Danson & Jeroen Van Nieuwenhove‘s complete drone masterclass will explore everything you need to know to start creating the best aerial photographs using any type of drone in 50+ detailed videos. Whether you are a complete beginner or an advanced drone pilot, this video course contains a vast amount of information to level up your drone photography skills.
Learn Drone Photography
Want to learn how to get the best results with your newly purchased drone? I wrote the most comprehensive guide available on drone photography which teaches you a technique to get the DSLR-like results out of even the cheapest drones.
In 125 detailed pages I explore everything you need to know to start creating the best photographs using any type of drone. Whether you are a complete beginner or an advanced drone pilot, this e-book contains a vast amount of information to level up your drone photography skills.
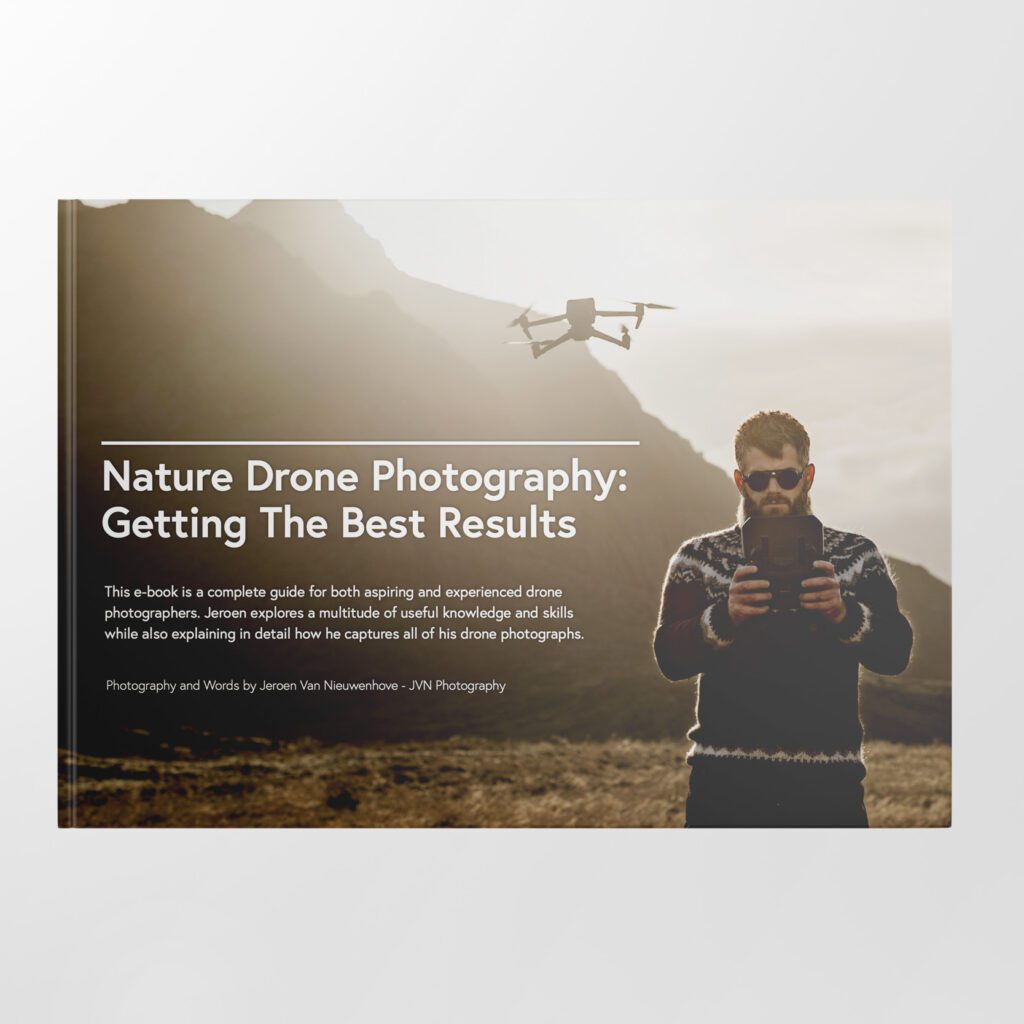
What to Expect?
- A 125-page educational PDF about nature drone photography with very detailed explanations
- Which drone to get for photography and why
- Important settings and configuration options
- A list of useful skills & tips
- A list of useful accessories and what not to buy at all
- How to research locations for drone photography
- How to compose with a drone and insight into Jeroen’s thought process with plenty of examples
- Thoughtfully planning ahead for your drone shoot
- The how and why of creating bracketed images
- The how and why of shooting HDR panoramas
- What challenges you might face and how to deal with them
- Common mistakes & how to deal with them
- How to stitch your panoramas together
Use EBOOK20 to get 20% off your Nature Drone Photography (E-Book) purchase!


Discover Jeroen’s Photo Workshops in Iceland, Greenland & Beyond
Ready to take your photography to the next level? Join me, Jeroen Van Nieuwenhove, on unforgettable photo workshops in Iceland, Greenland, Antarctica and other exciting destinations. Whether your passion is wildlife photography, bird photography, landscape adventures, or mastering drone photography, each workshop is designed to give you hands-on guidance in some of the world’s most spectacular locations.
From puffins in the midnight sun to Arctic foxes in the wild, from glaciers and volcanoes to dramatic coastlines seen by drone – these journeys are more than workshops; they’re once-in-a-lifetime experiences. Group sizes are kept small, ensuring personal mentoring and plenty of shooting opportunities.
Looking for something specific? Check out Jeroen’s…
- Wildlife & Bird Photography Workshops (Puffins, Arctic Foxes)
- Drone Photography Workshops
- Photo Workshops in Iceland
- Photo Workshops in Greenland
- Photo Workshops in Antarctica
Spots are limited – secure your place today!
Are You Looking For A Specific Photo Workshop?
All Upcoming Photography Workshops With Jeroen
Explore all upcoming photography workshops with Jeroen and take your skills to the next level in some of the world’s most extraordinary locations. From the volcanic landscapes of Iceland to the ice-filled fjords of Greenland and the wildlife-rich polar regions such as Antarctica, each workshop is designed to help you grow creatively while experiencing unforgettable moments in the field. Browse all upcoming departures below and find your next adventure!

Puffins in the Midnight Sun 2026 Photo Workshop
LAST SPOT

West Greenland 2026 Photo Workshop
SOLD OUT

Aerials of the Icelandic Highlands 2026 (08-15 July)
SOLD OUT
Aerials of the Icelandic Highlands 2026 (01-08 August)
SOLD OUT
Aerials of the Icelandic Highlands 2026 (13-20 August)
SOLD OUT
Aerials of the Icelandic Highlands 2026 (22-29 August)
SOLD OUT
East Greenland Photo Expedition 2026
LAST SPOT

East Greenland With James Popsys 2026
SOLD OUT
Autumn in West/North Iceland 2026 (with Mads)
SOLD OUT
Iceland in Winter 2026 Photo Workshop (with Mads Peter Iversen)
SOLD OUT
Antarctica & South Georgia Photo Expedition 2028
OPEN FOR BOOKINGS
What Previous Participants Shared About Their Experience
Choosing the right photography workshop is about more than just visiting iconic locations. It’s about experience, safety, timing, and personal guidance. Below you’ll find honest reviews from photographers who have joined me on landscape, wildlife & drone photo workshops in Iceland, Greenland and other locations. These testimonials reflect real experiences in small groups, hands-on instruction in challenging conditions, and the level of care Jeroen aims to bring to every workshop.
These reviews are verifiable on Jeroen’s public Google Business profile.


")

")


Support Jeroen’s Work
As an independent photographer, Jeroen partially relies on your support to keep producing worthwhile content such as blogs, photographs, books and much more. If you want to support his work, it is possible to do so by buying his e-books & books or prints.
You can also sign up to the newsletter to stay up to date on new blog posts, projects, workshops and other interesting information.
Thank you for considering!


DJI still has not released Mavic 4 pro profiles. Curious if the images above have been edited using Cobalt’s Mavic 4 pro profiles as mentioned above? I tried editing from scratch and it was not great. Not sure when Adobe will release their profiles, so wondering if it is worth purchasing Cobalt’s profile.
All of my images have been edited using the default profile in Lightroom and I have never encountered any problems using it. I have never seen Adobe release profiles dedicated to DJI drones so I don’t believe they will ever release them given they haven’t in the past. I have not used the Cobalt profiles but I hear they are working well for those who are using them.
The biggest issue I have with my Mavic 4 Pro is the lack of Lightroom RAW profiles. It renders colors horribly, especially at sunset. Adobe still hasn’t offered profiles for Mavic 4 Pro, this really limits professional use. I wonder how you didn’t experience this issue, probably you just didn’t notice.
I haven’t experienced any issues with this but there are third parties who do offer what you are looking for. This one for example: https://www.cobalt-image.com/product/adobe-base-pack/?v=a2a551a6458a I am not affiliated with them but I have their Mavic 4 Pro profiles.