

Ever since the DJI Mavic 4 Pro launched, a lot of doubt has seemingly been cast over whether or not it is actually a significant upgrade from its predecessor. Because I like to follow my own thoughts and observations, I decided to just test it myself by flying the Mavic 4 Pro and Mavic 3 Pro side-by-side, taking the same images in the same conditions.
Let’s get one thing out of the way first: I am not a pixel-peeper. I generally don’t go and zoom in on an image at 400% to see whether or not something is every so slightly sharper. I don’t think it matters all that much. And you know why? It’s because a new drone, or a new camera, is not solely defined by whether or not it produces significantly better images. There are so many factors to take into consideration whether something is a significant step up such as battery life, transmission technology, controllers, easy-of-use, …
So what did I find by putting the DJI Mavic 3 Pro and DJI Mavic 4 Pro next to each other? Let’s find out!
Disclaimer: This is an opinion article based on all the available information of the DJI Mavic 4 Pro at the time of writing. This article is not sponsored in any way. However, when you make a purchase using the link in this article, I may earn a small commission.
To celebrate the launch of the DJI Mavic 4 Pro, you can now get 30% off the Drone Photography Masterclass. Scroll down below to enjoy the offer!

I flew both the DJI Mavic 4 Pro and the DJI Mavic 3 Pro side-by-side, in the same conditions, to compare their RAW files.
Things You Should Know About The Mavic 3 Pro/Mavic 4 Pro RAW Files
Since the release of DJI Mavic 4 Pro, I have been getting a lot of requests for files so I decided to do it properly and make a full set of files of both the Mavic 3 Pro and Mavic 4 Pro. Today, I went out, flew both drones next to each other at about 14 meter altitude and then took all of the images according to a list I made. Some of the differences are considerable and I am sure you will be curious about them too.
If you sign up below, you will get a link sent to download the files. However, there are a few things I want to point out first…
Good To Know
During the creation of all these images, and comparing both drones, I have noticed a few things that really stood out to me. It’s impossible to do a 1:1 comparison, with the same composition/view, between the Mavic 3 Pro and Mavic 4 Pro for a variety of reasons:
- The camera module on both drones has a dramatically different design. How the three different lenses are positioned is different, with the most obvious change being that the 1x lens is at the bottom on the DJI Mavic 3 Pro and at the top on the Mavic 4 Pro). The gimbal itself is also vastly larger on the Mavic 4 Proo, which means that they are not sitting at the same height.
- The main camera (1x) does not have the same focal length, with the Mavic 4 Pro being a bit tighter. On top of that, the resolution is not the same as the Mavic 4 Pro has 25 megapixels, up from 20 megapixels on the Mavic 3 Pro. The sensor itself also has a different aspect ratio. Mavic 4 Pro has a 3:2 sensor, while Mavic 3 Pro has a 3:4 sensor.
- The 6x and 7x have the same focal length but have a slightly differing resolution.

Because the camera modules are dramatically different, it is almost impossible to do a true 1-to-1 comparison of both camera systems.
- The Mavic 4 Pro has many more ISO steps to choose from. For example, you jump from ISO100 straight into ISO200 on Mavic 3 Pro, while Mavic 4 Pro has ISO125 & ISO160 in between. To keep the download size smaller, I removed these in between ISO steps from the RAW files.
- The 1x lens on the Mavic 4 Pro has an aperture that can open up considerably wider than the Mavic 3 Pro’s 1x lens.
- Mavic 4 Pro is also capable of shooting at much faster shutter speeds (up to 1/16000s) which you will notice when comparing the highest ISO’s. Some images on the Mavic 3 Pro are overexposed as a result of the slower maximum shutter speed.
- After inspecting the RAW files, I can conclude that the Mavic 4 Pro RAW files have a higher effective color depth than Mavic 3 Pro.
- Mavic 4 Pro has dual-native ISO on all three cameras for photography with a native ISO at 100 & 400. This is different in video, and depending on the color profile, where it will be ISO 400 & ISO 1600 instead.
- Even though the white balance is the same on all images, the colors on Mavic 3 Pro are much cooler in comparison.
- The minimal focusing distance is different with the Mavic 3 Pro focusing from one meter, as opposed to two meters on the Mavic 4 Pro.
- For some of these images, for example when changing the ISO, I had to leave the settings on Auto for aperture and shutter speed so the exposures wouldn’t be wildly different. This is when I noticed that the metering on both of these camera systems is seemingly very different. You will notice that the choices for aperture and shutter speed on both drones, in the same situation, are completely different. By default, the Mavic 3 Pro seems a lot darker in choosing its exposures.
What Can You Find In The Downloadable Files?
Here is a list of all the RAW files I have made available in the download:
- DJI Mavic 4 Pro:
- 1x Camera: all ISO’s that are also available on Mavic 3 Pro
- 1x Camera: all apertures
- 1x Camera: a 100 megapixel quad-bayer image
- 2,5x Camera: all ISO’s that are also available on Mavic 3 Pro
- 2,5x Camera: a 48 megapixel quad-bayer image
- 6x Camera: all ISO’s that are also available on Mavic 3 Pro
- 6x Camera: a 50 megapixel quad-bayer image
- DJI Mavic 3 Pro:
- 1x Camera: all ISO’s
- 1x Camera: all apertures
- 3x Camera: all ISO’s
- 7x Camera: all ISO’s

Everything is divided up neatly into folders so you can do your own investigating and research.
Get Access To The RAW Files
Sign up below to get a download link to access the RAW files.
Please note that signing up for the download link will also sign you up to my newsletter mailing list.
A Few Comparisons I Wanted To Highlight
While I do not want to draw conclusions just yet, because I want to use my drone more thoroughly before I write a thorough review, there are a few comparisons I want to show you in the imaging department. As mentioned, these are comparisons under certain conditions between DJI Mavic 3 Pro and Mavic 4 Pro. Without hyping it too much, there is definitely a very visible difference between both of them.
Disclaimer: it is by far the best to download the files yourself and have a look. The images you see here are also in some way compressed because you are viewing them on my website.
200% Crop Between Mavic 3 Pro (1x) and Mavic 4 Pro (1x)
This is a 200% crop of two RAW files at ISO100 towards the center of the frame. There is a very clear difference in sharpness.

DJI Mavic 3 Pro

DJI Mavic 4 Pro
200% Crop Of The Left Bottom Corner On Mavic 3 Pro (1x) and Mavic 4 Pro (1x)
This is a 200% crop of the left bottom corner of both RAW files at ISO100. Mavic 3 Pro was never great at corner sharpness and it does not look like Mavic 4 Pro has any significant improvement there.

DJI Mavic 3 Pro

DJI Mavic 4 Pro
ISO6400 On Mavic 3 Pro (1x) and Mavic 4 Pro (1x)
This is a crop of two unedited RAW files. I tried to crop them to resemble the view somewhat. The difference between both sensors at ISO6400 is revolutionary in my eyes.

DJI Mavic 3 Pro

DJI Mavic 4 Pro
200% Crop Of Mavic 3 Pro (7x) and Mavic 4 Pro (6x)
These two RAW images show a significant improvement on the longest lens of the two drones. The sharpness improvement is very obvious.

DJI Mavic 3 Pro

DJI Mavic 4 Pro
Affordable Alternatives
If you are looking at alternatives to the DJI Mavic 4 Pro, I can point you into the direction of my updated drone buyer’s guide. If you are considering upgrading from an older model, you may also be able to get some great deals on second-hand Mavic 3 series drones or others.
DISCOUNT
The Drone Photography Masterclass – Video Course
Nigel Danson & Jeroen Van Nieuwenhove‘s complete drone photography video masterclass will explore everything you need to know to start creating the best aerial photographs using any type of drone in 50+ detailed videos. Whether you are a complete beginner or an advanced drone pilot, this video course contains a vast amount of information to level up your drone photography skills.
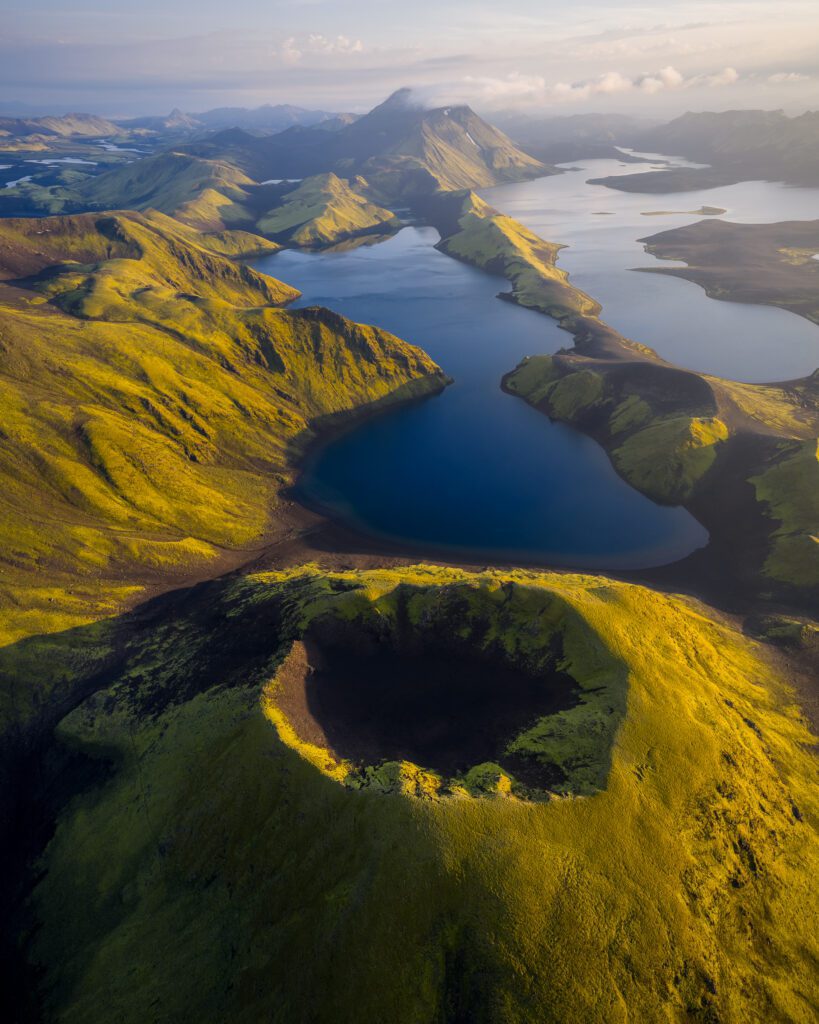
Discover Jeroen’s Photo Workshops in Iceland, Greenland & Beyond
Ready to take your photography to the next level? Join me, Jeroen Van Nieuwenhove, on unforgettable photo workshops in Iceland, Greenland, Antarctica and other exciting destinations. Whether your passion is wildlife photography, bird photography, landscape adventures, or mastering drone photography, each workshop is designed to give you hands-on guidance in some of the world’s most spectacular locations.
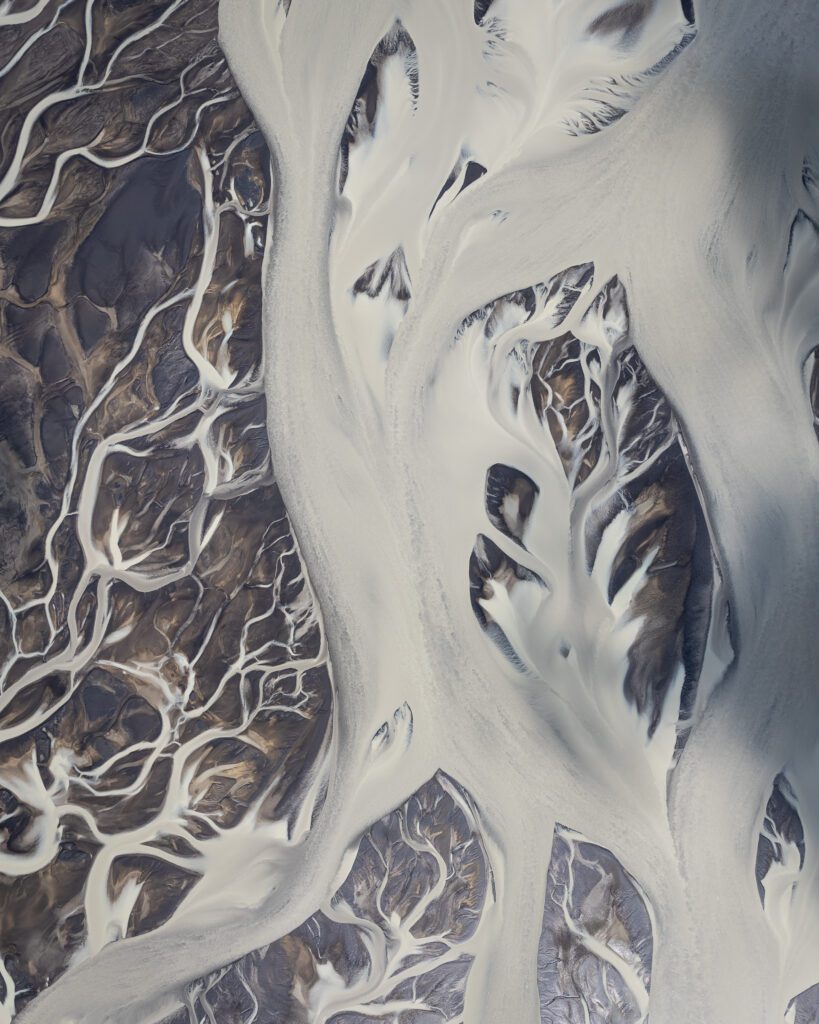
From puffins in the midnight sun to Arctic foxes in the wild, from glaciers and volcanoes to dramatic coastlines seen by drone – these journeys are more than workshops; they’re once-in-a-lifetime experiences. Group sizes are kept small, ensuring personal mentoring and plenty of shooting opportunities.
Looking for something specific? Check out Jeroen’s…
- Wildlife & Bird Photography Workshops (Puffins, Arctic Foxes)
- Drone Photography Workshops
- Photo Workshops in Iceland
- Photo Workshops in Greenland
- Photo Workshops in Antarctica
Spots are limited – secure your place today!
Are You Looking For A Specific Photo Workshop?
All Upcoming Photography Workshops With Jeroen
Explore all upcoming photography workshops with Jeroen and take your skills to the next level in some of the world’s most extraordinary locations. From the volcanic landscapes of Iceland to the ice-filled fjords of Greenland and the wildlife-rich polar regions such as Antarctica, each workshop is designed to help you grow creatively while experiencing unforgettable moments in the field. Browse all upcoming departures below and find your next adventure!

Puffins in the Midnight Sun 2026 Photo Workshop
LAST SPOT

West Greenland 2026 Photo Workshop
SOLD OUT

Aerials of the Icelandic Highlands 2026 (08-15 July)
SOLD OUT
Aerials of the Icelandic Highlands 2026 (01-08 August)
SOLD OUT
Aerials of the Icelandic Highlands 2026 (13-20 August)
SOLD OUT
Aerials of the Icelandic Highlands 2026 (22-29 August)
SOLD OUT
East Greenland Photo Expedition 2026
LAST SPOT

East Greenland With James Popsys 2026
SOLD OUT
Autumn in West/North Iceland 2026 (with Mads)
SOLD OUT
Iceland in Winter 2026 Photo Workshop (with Mads Peter Iversen)
SOLD OUT
Antarctica & South Georgia Photo Expedition 2028
OPEN FOR BOOKINGS
Choosing the right photography workshop is about more than just visiting iconic locations. It’s about experience, safety, timing, and personal guidance. Below you’ll find honest reviews from photographers who have joined me on landscape, wildlife & drone photo workshops in Iceland, Greenland and other locations. These testimonials reflect real experiences in small groups, hands-on instruction in challenging conditions, and the level of care Jeroen aims to bring to every workshop.
These reviews are verifiable on Jeroen’s public Google Business profile.


")

")


Support Jeroen’s Work
As an independent photographer, Jeroen partially relies on your support to keep producing worthwhile content such as blogs, photographs, books and much more. If you want to support his work, it is possible to do so by buying his e-books & books or prints.
You can also sign up to the newsletter to stay up to date on new blog posts, projects, workshops and other interesting information.
Thank you for considering!


Thank you for your review, Jeroen. I am currently deciding whether to replace my broken Mavic 2 Pro with a used one or upgrade to the Mavic 4 Pro. The major issue for me: still image quality. Mavic 2 Pro was sort of okayish but not great. What I did not like: softness of the corners, easily blown out highlights (in particular in the yellows). And I had to try several samples to find one where the lens was decently centered and did not show worse softness in one or two of the corners. – You mentioned that corner softness is still present in the Mavic 4 Pro (which diminishes the value of an upgrade for me). If you have used a Mavic 2 Pro earlier, do you have an opinion how the image quality compares with regard to sharpness over the frame? And is highlight blowout still an issue?
Thanks a lot
Frank Sauer
Hi Frank, the Mavic 4 Pro is a dramatic upgrade in still image quality over Mavic 2 Pro. No doubt in my mind it would be a great upgrade: it is currently the best prosumer drone on the market for photographers. If you have the financial means to get a Mavic 4 Pro, I wouldn’t try and find another Mavic 2 Pro today.
Thank you very much! I am using Mavic 3 pro and
your explanations and comparative data are very useful 🙂
Thank You for the impressive comparison.
I guess I will go for Mavic 3. I have been using a lot Mavic 2 Pro, but now it is time to upgrde.
We have been coming a long way from my very first drone around 2014, with soft corners and fringes..
Cheers,
Petteri
My pleasure! I am happy to read you found it useful!
Hi Jeroen,. what software did you use to process the raw files?
The RAW files are not processed. All I did was open them in Lightroom to make the comparisons. No edits were made. The RAW files that you can download are not processed either.
Hi Jeroen,
Thank you for your excellent posts on the new Mavic 4 Pro, which I recently bought.
I’m a professional aerial photographer (www.davidabram.co.uk & Instagram @davidrabram). Most of my work is destined for print (in both books and large-scale prints for exhibition), so I was really looking forward to this new drone.
However, and in contrast to nearly every review I’ve read to date, I am a little disappointed with the quality of stills images in the main camera. It looks to me as if the Quad Bayer Coding is adding artefacts to my shots. I always use HDR natural image fusion to compensate for the small dynamic range of the sensor on the M2Pro, with great results up til now. But it looks as if I’m going to have to work out a whole new workflow to get really good stills off the latest Mavic.
I write this because it would be great to read your thoughts in your detailed review later in the year. I’m holding off judgement at present as most of the test shots I’ve done have been in windy conditions, but I can say with certainty that the results I’ve had so far are not better than what I get out of my Mavic 2 Pro (with a bit of help from Photomatix Pro/PTGui etc).
This does not apply to video, which is a huge step up. And of course, the ‘quality of life’ improvements DJI have made to the craft and RC are wonderful – in many respects this is the drone I’ve wanted for 12 years or more. I just suspect in their desperation to have a headline 100 megapixel spec for the marketing push may prove a shot in the foot in the long run.
Keep up the good work,
David Abram, UK
I think the problem you may be facing is that when the drone can’t stay perfectly still, the quad-bayer technology will struggle. Even though it happens quite fast, there is always going to be some delay as it is trying to create the higher resolution image. It’s one of the reasons I never use it because I almost always shoot in windy conditions or because I am photographing moving subjects.